SC-200 Study Guide

Manage a security operations environment (25–30%)
Configure settings in Microsoft Defender XDR
Configure a Connection from Defender XDR to a Sentinel Workspace
To establish a connection from Defender XDR (Extended Detection and Response) to a Microsoft Sentinel workspace, follow these steps:
Access Microsoft Sentinel: Sign in to the Microsoft Azure portal and navigate to Microsoft Sentinel. Select the appropriate Sentinel workspace or create a new one if necessary.
Connect Security Solutions: Within the Microsoft Sentinel dashboard, locate the ‘Data connectors’ section. Here, you can find various Microsoft security solutions that can be connected to Microsoft Sentinel, including different Defender products that are part of the Defender XDR suite.
Configure Automatic Incident Creation: For each Defender product you wish to connect, configure the settings to automatically create incidents in Microsoft Sentinel from the alerts generated in the connected service. This ensures that any alerts raised by Defender XDR components are automatically escalated to incidents within Sentinel for further investigation and response https://learn.microsoft.com/en-us/training/modules/analyze-data-in-sentinel/4-analytics-rules .
Filter Alerts: You have the option to filter these alerts by severity or by specific text contained in the alert name. This helps in managing the volume of incidents and focusing on the most critical ones https://learn.microsoft.com/en-us/training/modules/analyze-data-in-sentinel/4-analytics-rules .
Verify Connection: After configuring the connection and setting up the automatic incident creation, verify that the alerts from Defender XDR are successfully being sent to the Microsoft Sentinel workspace. This can be done by checking for new incidents in the Sentinel dashboard that correspond to the alerts from Defender XDR.
Customize and Enhance: Once the connection is established, you can further customize and enhance the integration by creating custom analytics rules, workbooks, and playbooks in Microsoft Sentinel to analyze and respond to the data provided by Defender XDR.
For additional information on configuring Microsoft Sentinel and connecting it to various security solutions, you can refer to the following resources:
- Microsoft Sentinel documentation: Microsoft Sentinel Documentation
- Connect data sources: Connect Data Sources to Azure Sentinel
- Microsoft Defender for Cloud Apps: Microsoft Defender for Cloud Apps
- Microsoft Defender for Endpoint: Microsoft Defender for Endpoint
- Microsoft Defender for Identity: Microsoft Defender for Identity
By following these steps and utilizing the provided resources, you can effectively configure a connection from Defender XDR to a Microsoft Sentinel workspace, enabling a comprehensive security management and response system.
Manage a security operations environment (25–30%)
Configure settings in Microsoft Defender XDR
Configure Alert and Vulnerability Notification Rules
When configuring alert and vulnerability notification rules, it is essential to understand the mechanisms and settings that allow for effective monitoring and response to potential security threats. Here’s a detailed explanation of how to configure these rules:
Alert Notification Rules
Email Notifications: Set up email notifications to inform specified recipients about new alerts. This ensures that individuals responsible for security can act promptly based on the severity of the alerts https://learn.microsoft.com/en-us/training/modules/configure-settings-for-alerts-detections-microsoft-defender-for-endpoint/3-configure-alert-notifications .
Permissions: Only users with ‘Manage security settings’ permissions can configure email notifications. In basic permissions management, Security Administrator or Global Administrator roles are required https://learn.microsoft.com/en-us/training/modules/configure-settings-for-alerts-detections-microsoft-defender-for-endpoint/3-configure-alert-notifications .
Severity Levels: Configure the system to trigger notifications based on different alert severity levels. This helps in prioritizing the response actions https://learn.microsoft.com/en-us/training/modules/configure-settings-for-alerts-detections-microsoft-defender-for-endpoint/3-configure-alert-notifications .
Recipient Management: Add or remove recipients for the email notifications. New recipients will receive alerts that occur after they have been added https://learn.microsoft.com/en-us/training/modules/configure-settings-for-alerts-detections-microsoft-defender-for-endpoint/3-configure-alert-notifications .
Role-Based Access Control (RBAC): If RBAC is used, recipients will only get notifications for device groups they manage. Global administrators can manage notification rules for all device groups https://learn.microsoft.com/en-us/training/modules/configure-settings-for-alerts-detections-microsoft-defender-for-endpoint/3-configure-alert-notifications .
Alert Suppression Rules: Create rules to suppress alerts that are known to be innocuous, which helps in reducing noise and focusing on genuine security threats https://learn.microsoft.com/en-us/training/modules/mitigate-incidents-microsoft-365-defender/5-manage-investigate-alerts .
Creation from Existing Alerts: Suppression rules can be created from an existing alert and can be disabled or re-enabled as needed https://learn.microsoft.com/en-us/training/modules/mitigate-incidents-microsoft-365-defender/5-manage-investigate-alerts .
Effectiveness: A suppression rule takes effect from the time it is created and does not affect alerts already in the queue https://learn.microsoft.com/en-us/training/modules/mitigate-incidents-microsoft-365-defender/5-manage-investigate-alerts .
Contexts: Choose from two contexts for suppression rules: ‘Suppress alert on this device’ or ‘Suppress alert in my organization’, to tailor the visibility of alerts in the portal https://learn.microsoft.com/en-us/training/modules/mitigate-incidents-microsoft-365-defender/5-manage-investigate-alerts .
Vulnerability Notification Rules
Threat and Vulnerability Management: Manage security settings to receive notifications about vulnerabilities and required remediations https://learn.microsoft.com/en-us/training/modules/deploy-microsoft-defender-for-endpoints-environment/6-create-manage-roles-for-role-based-access-control .
Active Remediation Actions: Take response actions, manage exceptions, and submit remediation requests. This includes blocking vulnerable applications and managing security baselines https://learn.microsoft.com/en-us/training/modules/deploy-microsoft-defender-for-endpoints-environment/6-create-manage-roles-for-role-based-access-control .
Alerts Investigation: Manage alerts, start automated investigations, and run scans. This also involves managing device tags and downloading investigation packages https://learn.microsoft.com/en-us/training/modules/deploy-microsoft-defender-for-endpoints-environment/6-create-manage-roles-for-role-based-access-control .
Data Retention and Advanced Features: Manage data retention policies and configure advanced features to maintain an optimal balance between historical data and system performance https://learn.microsoft.com/en-us/credentials/certifications/resources/study-guides/sc-200 .
Attack Surface Reduction (ASR) Recommendations: Recommend ASR rules for devices to minimize the risk of exploitation by reducing the attackable surface area https://learn.microsoft.com/en-us/credentials/certifications/resources/study-guides/sc-200 .
Device Group Management: Configure and manage device groups to apply specific policies and rules to different sets of devices within the organization https://learn.microsoft.com/en-us/credentials/certifications/resources/study-guides/sc-200 .
Microsoft Defender Vulnerability Management: Use the Microsoft Defender Vulnerability Management to identify devices at risk and manage endpoint threat indicators effectively https://learn.microsoft.com/en-us/credentials/certifications/resources/study-guides/sc-200 .
Device Discovery: Identify unmanaged devices within the network to ensure that all potential endpoints are monitored and protected https://learn.microsoft.com/en-us/credentials/certifications/resources/study-guides/sc-200 .
For additional information on configuring alert and vulnerability notification rules, you can refer to the following resources:
- Manage alert policies in Microsoft Defender for Cloud
- Set up alert suppression rules in Microsoft Defender for Endpoint
Please note that the URLs provided are for reference and additional information. They should be accessed to gain a deeper understanding of the configuration process and best practices.
Manage a security operations environment (25–30%)
Configure settings in Microsoft Defender XDR
Configure Microsoft Defender for Endpoint Advanced Features
Microsoft Defender for Endpoint offers a suite of advanced features that enhance the security posture of an organization’s devices. Configuring these features is crucial for ensuring robust protection against threats and efficient incident response. Below is a detailed explanation of how to configure the advanced features of Microsoft Defender for Endpoint:
- Manage Data Retention and Alert Notification
- Data retention policies can be set to determine how long data should be kept before it is automatically deleted.
- Alert notification settings allow you to configure how and when you are notified about potential security incidents.
- Recommend Attack Surface Reduction (ASR) Rules
- ASR rules help reduce the attack surface of your devices by blocking behaviors that are typically used by malware and attack campaigns.
- You can configure ASR rules to automatically apply to device groups based on their risk profile.
- Respond to Incidents and Alerts
- Set up automated investigation and remediation to respond to alerts efficiently.
- Configure the automation level to control how Microsoft Defender for Endpoint responds to different types of alerts on devices.
- Configure and Manage Device Groups
- Device groups can be created and managed to apply specific security policies and configurations to a set of devices with similar characteristics or roles.
- Identify Devices at Risk with Microsoft Defender
Vulnerability Management
- Use the vulnerability management features to identify and prioritize devices at risk due to unpatched vulnerabilities or misconfigurations.
- Manage Endpoint Threat Indicators
- Configure custom threat indicators to detect activities related to known threats or suspicious behaviors on endpoints.
- Identify Unmanaged Devices with Device Discovery
- Use device discovery features to find and bring unmanaged devices under the protection of Microsoft Defender for Endpoint.
- Configure Advanced Features in Microsoft Defender for
Endpoint
- Navigate to the Advanced Features area in the General Settings to toggle on or off various features.
- Some of the key features include Automated Investigation, EDR in block mode, and the ability to automatically resolve alerts or allow/block files https://learn.microsoft.com/en-us/training/modules/configure-manage-automation-microsoft-defender-for-endpoint/2-configure-advanced-features .
- Manage Automation Settings
- Control how automated investigation and remediation are applied to devices by managing the automation configuration options https://learn.microsoft.com/en-us/training/modules/configure-manage-automation-microsoft-defender-for-endpoint/7-summary-resources .
- Advanced Hunting
- Utilize the advanced hunting tool to proactively search for threat indicators and entities within your network.
- This tool allows you to inspect events and build custom detection rules that automatically respond to breach activity https://learn.microsoft.com/en-us/training/modules/mitigate-incidents-microsoft-365-defender/8-explore-advanced-hunting .
- Integration with Other Microsoft Security Products
- Depending on the other Microsoft security products in use, additional advanced features might be available for integration with Defender for Endpoint https://learn.microsoft.com/en-us/training/modules/deploy-microsoft-defender-for-endpoints-environment/8-configure-environment-advanced-features .
For additional information on configuring these features, you can refer to the official Microsoft documentation:
- Manage data retention and alert notification
- Attack surface reduction rules
- Automated investigations
- Advanced hunting
By configuring these advanced features, organizations can significantly enhance their security capabilities and ensure that their endpoints are well-protected against a wide range of threats.
Manage a security operations environment (25–30%)
Configure settings in Microsoft Defender XDR
Configure Endpoint Rules Settings, Including Indicators and Web Content Filtering
When configuring endpoint rules settings, it is essential to understand the various components involved, such as indicators and web content filtering. These settings are crucial for maintaining the security posture of an organization’s network and endpoints.
Managing Indicators
Indicators in Microsoft Defender for Endpoint are used to define specific attributes or patterns, such as URLs, IPs, and file hashes, that represent known threats. By configuring indicators, you can control how the system responds when it detects these attributes in your environment.
To manage indicators, follow these steps:
- Navigate to the Microsoft Defender Security Center.
- Go to the ‘Settings’ section and select ‘Indicators’.
- Here, you can add new indicators by specifying the type (IP addresses, URLs/domains, or file hashes) and the action to take when detected (Alert, Alert and Block, or Allow).
- Configure the indicator’s expiration date, severity, and category according to your organization’s policies https://learn.microsoft.com/en-us/training/modules/configure-settings-for-alerts-detections-microsoft-defender-for-endpoint/8-summary-resources .
For more information on managing indicators, refer to the official documentation: Manage indicators in Microsoft Defender for Endpoint.
Web Content Filtering
Web content filtering is a feature that allows you to control web access based on categories. This helps prevent users from accessing websites that may pose a security risk or are not compliant with company policies.
To configure web content filtering, follow these steps:
- In the Microsoft Defender Security Center, go to ‘Settings’ and select ‘Web content filtering’.
- Choose the categories you wish to block or allow. Categories can include adult content, high bandwidth sites, legal liability, and more.
- Apply these settings to device groups as needed.
- Review and enforce the policies to ensure they are active and functioning as intended.
For additional guidance on web content filtering, visit: Web content filtering in Microsoft Defender for Endpoint.
Additional Considerations
- Data Retention: Be aware of how long your indicators and web content filtering logs are retained for auditing and investigation purposes https://learn.microsoft.com/en-us/credentials/certifications/resources/study-guides/sc-200 .
- Advanced Features: Explore advanced features such as automated investigations and response actions to enhance your endpoint security https://learn.microsoft.com/en-us/credentials/certifications/resources/study-guides/sc-200 .
- Device Groups: Properly configure and manage device groups to apply different settings based on the group’s risk profile or function within the organization https://learn.microsoft.com/en-us/credentials/certifications/resources/study-guides/sc-200 .
By carefully configuring endpoint rules settings, including indicators and web content filtering, you can significantly enhance your organization’s defense against cyber threats and ensure compliance with internal policies.
Manage a security operations environment (25–30%)
Configure settings in Microsoft Defender XDR
Manage Automated Investigation and Response Capabilities in Microsoft Defender XDR
Automated investigation and response (AIR) capabilities in Microsoft Defender for Endpoint are critical components of the extended detection and response (XDR) strategy. These features enable organizations to streamline their security operations by automating the detection, investigation, and remediation of threats. Below is a detailed explanation of how to manage these capabilities:
Automated Investigation
Automated Investigation is a feature that leverages artificial intelligence to automatically investigate alerts and take immediate action to resolve breaches. This feature can be enabled in the Advanced features page of the Settings/General area within the product https://learn.microsoft.com/en-us/training/modules/configure-manage-automation-microsoft-defender-for-endpoint/2-configure-advanced-features .
Enable EDR in Block Mode
Enabling Endpoint Detection and Response (EDR) in block mode allows Microsoft Defender for Endpoint to use behavioral blocking and containment capabilities. This means that malicious artifacts or behaviors observed through post-breach EDR capabilities can be blocked, enhancing the security posture without altering the detection, alert generation, or incident correlation processes https://learn.microsoft.com/en-us/training/modules/configure-manage-automation-microsoft-defender-for-endpoint/2-configure-advanced-features .
Automatically Resolve Alerts
The Automatically resolve alerts setting is designed to close alerts if the Automated Investigation process finds no threats or has successfully remediated all malicious artifacts. This helps reduce the number of alerts that security analysts need to manually review https://learn.microsoft.com/en-us/training/modules/configure-manage-automation-microsoft-defender-for-endpoint/2-configure-advanced-features .
Allow or Block File
The Allow or block file feature is dependent on having Windows Defender Antivirus active and the cloud-based protection feature enabled. This setting allows security teams to specify files that should always be blocked or allowed, providing a more granular control over the security of the organization’s endpoints https://learn.microsoft.com/en-us/training/modules/configure-manage-automation-microsoft-defender-for-endpoint/2-configure-advanced-features .
File Content Analysis
File Content Analysis is a capability that should be enabled to allow certain files and email attachments to be automatically uploaded to the cloud for further inspection during Automated Investigation. This is configured by specifying the file extension names and email attachment extension names that should trigger the upload https://learn.microsoft.com/en-us/training/modules/configure-manage-automation-microsoft-defender-for-endpoint/3-manage-automation-upload-folder-settings .
Memory Content Analysis
Enabling Memory Content Analysis allows Microsoft Defender for Endpoint to automatically investigate the memory content of processes. This can be particularly useful for identifying and mitigating threats that reside solely in memory and may not be detected through file analysis alone https://learn.microsoft.com/en-us/training/modules/configure-manage-automation-microsoft-defender-for-endpoint/3-manage-automation-upload-folder-settings .
Managing Automation Settings
To effectively manage automation settings in Microsoft Defender for Endpoint, it is important to understand and configure the advanced features appropriately. This includes setting up the automation-related settings to align with the organization’s security policies and operational requirements https://learn.microsoft.com/en-us/training/modules/configure-manage-automation-microsoft-defender-for-endpoint/7-summary-resources .
For additional information on managing automated investigation and response capabilities in Microsoft Defender XDR, you can refer to the following resources: - Configure advanced features in Microsoft Defender for Endpoint - Manage automation settings in Microsoft Defender for Endpoint
By understanding and configuring these settings, security teams can enhance their organization’s ability to automatically detect, investigate, and respond to threats, thereby improving their overall security posture and reducing the workload on security analysts.
Manage a security operations environment (25–30%)
Configure settings in Microsoft Defender XDR
Configure Automatic Attack Disruption in Microsoft Defender XDR
Microsoft Defender XDR (Extended Detection and Response) is a comprehensive security solution that provides an integrated approach to detect, investigate, and respond to advanced threats across various domains. One of the key capabilities of Microsoft Defender XDR is the ability to configure automatic attack disruption to mitigate the impact of cyber threats.
Automatic Analysis and Response Microsoft Defender XDR utilizes the Microsoft 365 security portfolio to automatically analyze threat data across domains. It builds a comprehensive picture of an attack and presents it on a single dashboard https://learn.microsoft.com/en-us/training/modules/mitigate-incidents-microsoft-365-defender/2-use-microsoft-security-center-portal . This integrated approach allows for the correlation of security alerts and the automation of responses to complex threats.
Incident Management The incident management team is responsible for the non-technical aspects of managing incidents, including coordination with other teams such as communications, legal, leadership, and business stakeholders https://learn.microsoft.com/en-us/training/modules/introduction-microsoft-365-threat-protection/3-understand-defender-security-operations-center . This team also provides deeper investigation into more complex, often multi-stage attacks conducted by human operators.
Postmortem and Strategy Adjustment After an attack, it is crucial to conduct a postmortem analysis to evaluate the effectiveness of the DDoS response strategy and make necessary adjustments. Considerations include the extent of service disruption, the impact on applications or services, and potential improvements to the response strategy https://learn.microsoft.com/en-us/azure/ddos-protection/ddos-response-strategy .
Integration with Microsoft Sentinel Microsoft security solutions connected to Microsoft Sentinel can be configured to automatically create incidents from all alerts generated in the connected service. This allows for a proactive response to threats, such as alerting when a high-risk user attempts to access corporate resources https://learn.microsoft.com/en-us/training/modules/analyze-data-in-sentinel/4-analytics-rules .
Defender Plans and Features Microsoft Defender for Servers offers two plans with varying levels of protection. Both plans include automatic onboarding for resources, threat and vulnerability management, and integration with Microsoft Defender for Cloud and Microsoft Defender for Endpoint. Plan 2 adds additional features such as log analytics, vulnerability assessment, threat detections at different levels, adaptive application controls, file integrity monitoring, just-in-time VM access, and adaptive network hardening https://learn.microsoft.com/en-us/training/modules/understand-azure-defender-cloud-workload-protection/2-understand-azure-defender-for-servers .
For more detailed information on configuring automatic attack disruption in Microsoft Defender XDR, you can refer to the following resources: - Microsoft Defender for Cloud - Microsoft Defender for Endpoint - Microsoft Sentinel - Microsoft 365 security
By leveraging these resources and understanding the features of Microsoft Defender XDR, you can effectively configure automatic attack disruption to enhance your organization’s security posture.
Manage a security operations environment (25–30%)
Manage assets and environments
Configure and Manage Device Groups, Permissions, and Automation Levels in Microsoft Defender for Endpoint
Device Groups
Device groups in Microsoft Defender for Endpoint allow administrators to segment the network into different categories based on criteria such as device names, tags, or domains. This segmentation enables tailored policy application and more granular reporting. To manage device groups:
- Access the Microsoft Defender portal with an account that has the necessary administrative role.
- Navigate to Settings and then select Endpoints.
- Under the Permissions category, choose Device Groups.
- Use the + Add item option to create a new group or select an existing group to edit.
- Define the group by specifying criteria and assigning a name to the group.
- Save the changes to create or update the device group https://learn.microsoft.com/en-us/training/modules/deploy-microsoft-defender-for-endpoints-environment/6-create-manage-roles-for-role-based-access-control .
Permissions
Permissions in Microsoft Defender for Endpoint are managed through role-based access control (RBAC). RBAC ensures that individuals have access to the appropriate levels of information and can perform actions according to their role within the organization. To configure permissions:
- In the Microsoft Defender portal, select Settings and then Endpoints.
- Under Permissions, click on Roles.
- Enable roles by selecting the Turn on roles button if not already enabled.
- Add a new role by selecting + Add item.
- Enter the role name, description, and select the permissions to assign to the role.
- Proceed to assign the role to a Microsoft Entra Security group.
- Save the role configuration https://learn.microsoft.com/en-us/training/modules/deploy-microsoft-defender-for-endpoints-environment/6-create-manage-roles-for-role-based-access-control .
Automation Levels
Automation levels in Microsoft Defender for Endpoint determine how automated investigation and remediation actions are applied to devices. To manage automation settings:
- Navigate to the Microsoft Defender portal and access the automation configuration options.
- Review the available automation levels, which can range from full automation (where actions are taken on devices without human intervention) to semi- or partial automation (where approval is required for certain actions).
- Choose the appropriate automation level based on the organization’s policies and risk tolerance.
- Apply the selected automation settings to the relevant device groups https://learn.microsoft.com/en-us/training/modules/configure-manage-automation-microsoft-defender-for-endpoint/7-summary-resources .
For additional information on configuring and managing device groups, permissions, and automation levels in Microsoft Defender for Endpoint, you can refer to the following resources:
- Manage data retention, alert notification, and advanced features in Microsoft Defender for Endpoint
- Configure email notifications for alerts in Microsoft Defender for Endpoint
- Understand role-based access control (RBAC) in Microsoft Defender for Endpoint
- Configure advanced features of Microsoft Defender for Endpoint
- Manage automation settings in Microsoft Defender for Endpoint
Please note that the URLs provided are for reference purposes and should be accessed for more detailed guidance on each topic.
Manage a security operations environment (25–30%)
Manage assets and environments
Identify and Remediate Unmanaged Devices in Microsoft Defender for Endpoint
Unmanaged devices in a network pose significant security risks as they may be unpatched, have weak security configurations, or lack security controls altogether. Microsoft Defender for Endpoint provides capabilities to identify and remediate these devices to ensure a secure and managed network environment.
Identifying Unmanaged Devices
Microsoft Defender for Endpoint offers a device discovery feature that helps in identifying unmanaged devices connected to your corporate network. This is achieved without the need for additional hardware or complex process changes. The device discovery process utilizes onboarded endpoints to probe or scan the network, thereby discovering unmanaged devices https://learn.microsoft.com/en-us/training/modules/perform-device-investigations-microsoft-defender-for-endpoints/5-detect-devices-with-device-discovery .
The types of devices that can be discovered include:
- Enterprise endpoints such as workstations, servers, and mobile devices that are not yet onboarded to Microsoft Defender for Endpoint.
- Network devices like routers and switches.
- IoT devices such as printers and cameras https://learn.microsoft.com/en-us/training/modules/perform-device-investigations-microsoft-defender-for-endpoints/5-detect-devices-with-device-discovery .
Remediation of Unmanaged Devices
Once unmanaged devices are discovered, the following steps can be taken to remediate them:
Onboarding Unmanaged Endpoints: Devices that are not yet managed by Microsoft Defender for Endpoint can be onboarded to the service. This increases the security visibility on these devices and allows for better management and control https://learn.microsoft.com/en-us/training/modules/perform-device-investigations-microsoft-defender-for-endpoints/5-detect-devices-with-device-discovery .
Assessing Vulnerabilities and Configuration Gaps: By identifying and assessing vulnerabilities, as well as detecting configuration gaps, the attack surface can be reduced. This is a critical step in ensuring that the devices do not pose a threat to the network https://learn.microsoft.com/en-us/training/modules/perform-device-investigations-microsoft-defender-for-endpoints/5-detect-devices-with-device-discovery .
Device Discovery Modes: Microsoft Defender for Endpoint provides two modes of discovery:
- Basic discovery: A passive method where endpoints collect network events and extract device information from them without initiating network traffic.
- Standard discovery (recommended): An active method that allows endpoints to actively find devices in the network, enriching collected data and discovering more devices. This mode uses smart probing to discover additional information about observed devices https://learn.microsoft.com/en-us/training/modules/perform-device-investigations-microsoft-defender-for-endpoints/5-detect-devices-with-device-discovery .
Device Inventory and Assessment
Devices that have been discovered but not yet onboarded to Microsoft Defender for Endpoint will be listed in the device inventory under the Computers and Mobile tab. To assess these devices, a filter called “Onboarding status” can be used, which includes the following values:
- Onboarded: The device is managed by Microsoft Defender for Endpoint.
- Can be onboarded: The device is supported by Microsoft Defender for Endpoint but is not currently onboarded.
- Unsupported: The device is not supported by Microsoft Defender for Endpoint.
- Insufficient info: The supportability of the device could not be determined https://learn.microsoft.com/en-us/training/modules/perform-device-investigations-microsoft-defender-for-endpoints/5-detect-devices-with-device-discovery .
By using the device discovery and management features of Microsoft Defender for Endpoint, organizations can ensure that all devices within their network are identified, managed, and secured, thereby reducing the overall risk to the network.
For additional information on device discovery and onboarding in Microsoft Defender for Endpoint, you can refer to the following resources:
Manage a security operations environment (25–30%)
Manage assets and environments
Manage Resources by Using Azure Arc
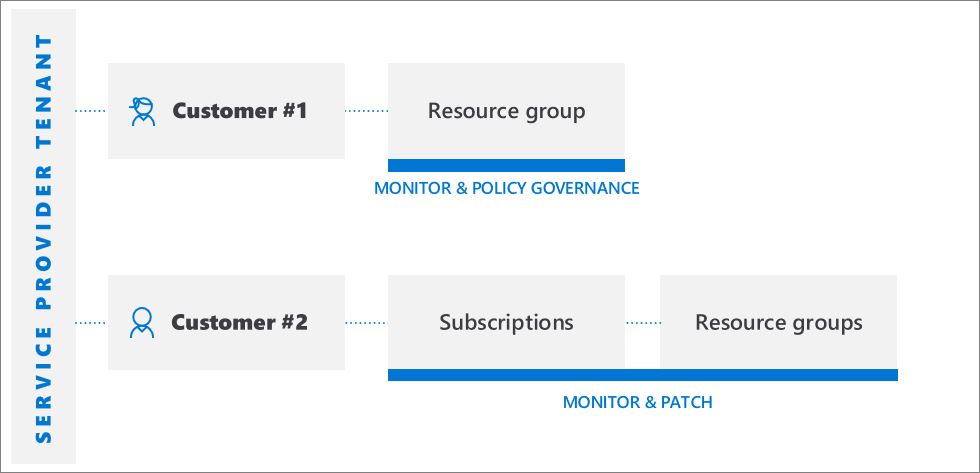
Azure Arc is a service that simplifies governance and management across different environments, such as data centers, multiple clouds, and edge locations. It provides a consistent multi-cloud and on-premises management platform, which is particularly useful for organizations that have resources spread across various locations and cloud providers.
Key Features of Azure Arc:
Unified Management Interface: Azure Arc allows you to manage your entire environment through a single pane of glass by projecting your non-Azure, on-premises, or other-cloud resources into Azure Resource Manager https://learn.microsoft.com/en-us/training/modules/connect-non-azure-machines-to-azure-defender/2-protect-non-azure-resources .
Seamless Integration: With Azure Arc, you can manage virtual machines, Kubernetes clusters, and databases as if they are running in Azure, regardless of their actual location https://learn.microsoft.com/en-us/training/modules/connect-non-azure-machines-to-azure-defender/2-protect-non-azure-resources .
Familiar Azure Services: It enables the use of familiar Azure services and management capabilities, such as Azure Policy and Azure Monitor, on resources located outside of Azure https://learn.microsoft.com/en-us/training/modules/connect-non-azure-machines-to-azure-defender/2-protect-non-azure-resources .
DevOps and ITOps Models: Azure Arc supports traditional ITOps while also introducing DevOps practices to manage cloud native patterns in your environment https://learn.microsoft.com/en-us/training/modules/connect-non-azure-machines-to-azure-defender/2-protect-non-azure-resources .
Custom Locations: Azure Arc allows you to configure Custom Locations, which serve as an abstraction layer on top of Azure Arc-enabled Kubernetes clusters, providing cluster connect and cluster extensions https://learn.microsoft.com/en-us/training/modules/connect-non-azure-machines-to-azure-defender/2-protect-non-azure-resources .
Managing Non-Azure Resources:
Servers: Azure Arc can manage both physical and virtual machines running Windows or Linux, treating them as if they were Azure resources https://learn.microsoft.com/en-us/training/modules/connect-non-azure-machines-to-azure-defender/2-protect-non-azure-resources .
Kubernetes Clusters: It supports multiple Kubernetes distributions, allowing you to manage Kubernetes clusters with Azure-native tools https://learn.microsoft.com/en-us/training/modules/connect-non-azure-machines-to-azure-defender/2-protect-non-azure-resources .
Azure Data Services: Azure SQL Managed Instance and PostgreSQL Hyperscale services can be managed using Azure Arc, even when hosted outside of Azure https://learn.microsoft.com/en-us/training/modules/connect-non-azure-machines-to-azure-defender/2-protect-non-azure-resources .
SQL Server: SQL Server instances can be enrolled from any location with SQL Server on Azure Arc-enabled servers https://learn.microsoft.com/en-us/training/modules/connect-non-azure-machines-to-azure-defender/2-protect-non-azure-resources .
Installation and Configuration:
To install the Azure Arc agent on non-Azure Linux machines, you would typically follow these steps:
- Generate an installation script from the Azure portal.
- Download and install the agent on the server.
- Create the Azure Arc-enabled server resource and associate it with the agent https://learn.microsoft.com/en-us/training/modules/connect-syslog-data-sources-to-azure-sentinel/3-collect-data-from-linux-based-sources-using-syslog .
Once installed, you can connect your non-Azure Linux server to Azure Arc using a Bash script that includes the necessary parameters for your environment https://learn.microsoft.com/en-us/training/modules/connect-syslog-data-sources-to-azure-sentinel/3-collect-data-from-linux-based-sources-using-syslog .
Integration with Azure Services:
Defender for Cloud: Azure Arc enabled servers is the preferred method for adding non-Azure machines to Defender for Cloud, allowing them to appear in Defender for Cloud with recommendations like other Azure resources https://learn.microsoft.com/en-us/training/modules/connect-non-azure-machines-to-azure-defender/3-connect-non-azure-machines .
Microsoft Defender for Cloud: For Windows and Linux, Defender for Cloud integrates with Azure services to monitor and protect machines, presenting alerts and remediation suggestions in an easy-to-use format. For Linux, it collects audit records using auditd https://learn.microsoft.com/en-us/training/modules/understand-azure-defender-cloud-workload-protection/2-understand-azure-defender-for-servers .
Hybrid and Multicloud Scenarios: For environments that span across Azure and non-Azure locations, Azure Arc ensures that non-Azure machines are treated as Azure resources, providing a consistent management experience https://learn.microsoft.com/en-us/training/modules/understand-azure-defender-cloud-workload-protection/2-understand-azure-defender-for-servers .
Prerequisites:
Before using Azure Arc, ensure that the appropriate Azure resource providers are registered, such as Microsoft.HybridCompute and Microsoft.GuestConfiguration. Additionally, create a Service Principal for onboarding at scale if necessary https://learn.microsoft.com/en-us/training/modules/connect-non-azure-machines-to-azure-defender/4-connect-aws-accounts .
For more detailed information and step-by-step guidance on using Azure Arc to manage resources, you can refer to the following resources:
- Azure Arc documentation
- Connect non-Azure machines to Azure Defender
- Connect Syslog data sources to Azure Sentinel
By leveraging Azure Arc, organizations can effectively manage their diverse set of resources, streamline operations, and enforce governance across their entire IT landscape.
Manage a security operations environment (25–30%)
Manage assets and environments
Connect Environments to Microsoft Defender for Cloud (by using multi-cloud account management)
Microsoft Defender for Cloud offers a comprehensive security management and threat protection solution for hybrid and multi-cloud workloads. To enhance the security posture and gain visibility across different cloud environments, it is essential to connect these environments to Microsoft Defender for Cloud. This process involves integrating accounts from various cloud providers, such as Azure, Amazon Web Services (AWS), and Google Cloud Platform (GCP), into the Defender for Cloud console.
Connecting Azure Resources
- Plan and Configure Settings: Begin by planning and configuring Microsoft Defender for Cloud settings. This includes selecting the target Azure subscriptions and workspaces to monitor https://learn.microsoft.com/en-us/credentials/certifications/resources/study-guides/sc-200 .
- Enable Defender Plans: Enable the necessary Microsoft Defender for Cloud plans for the selected subscriptions to ensure that the appropriate level of security features is applied https://learn.microsoft.com/en-us/credentials/certifications/resources/study-guides/sc-200 .
- Automated Onboarding: Configure automated onboarding of Azure resources to streamline the process of integrating Azure assets into Defender for Cloud https://learn.microsoft.com/en-us/credentials/certifications/resources/study-guides/sc-200 .
- Azure Arc: Use Azure Arc to connect compute resources that are outside of Azure, such as on-premises servers or other cloud providers, to enable centralized management https://learn.microsoft.com/en-us/credentials/certifications/resources/study-guides/sc-200 .
Connecting AWS Resources
- AWS Integration: Onboard your AWS account into Microsoft Defender for Cloud to integrate AWS Security Hub findings with Defender for Cloud. This provides a unified view and management of security across Azure and AWS environments https://learn.microsoft.com/en-us/training/modules/connect-non-azure-machines-to-azure-defender/4-connect-aws-accounts .
- Features of AWS Integration:
- Automatic agent provisioning using Azure Arc https://learn.microsoft.com/en-us/training/modules/connect-non-azure-machines-to-azure-defender/4-connect-aws-accounts .
- Centralized policy and vulnerability management https://learn.microsoft.com/en-us/training/modules/connect-non-azure-machines-to-azure-defender/4-connect-aws-accounts .
- Embedded Endpoint Detection and Response (EDR) capabilities https://learn.microsoft.com/en-us/training/modules/connect-non-azure-machines-to-azure-defender/4-connect-aws-accounts .
- Detection of security misconfigurations and a single view of recommendations and findings https://learn.microsoft.com/en-us/training/modules/connect-non-azure-machines-to-azure-defender/4-connect-aws-accounts .
- Inclusion of AWS resources in Defender for Cloud’s secure score calculations and regulatory compliance assessments https://learn.microsoft.com/en-us/training/modules/connect-non-azure-machines-to-azure-defender/4-connect-aws-accounts .
Connecting GCP Resources
- GCP Integration: Similar to AWS, onboarding your GCP account allows for the integration of GCP Security Command Center with Microsoft Defender for Cloud https://learn.microsoft.com/en-us/training/modules/connect-non-azure-machines-to-azure-defender/5-connect-gcp-accounts .
- Features of GCP Integration:
- Detection of security misconfigurations and a single view of Defender for Cloud recommendations alongside GCP Security Command Center findings https://learn.microsoft.com/en-us/training/modules/connect-non-azure-machines-to-azure-defender/5-connect-gcp-accounts .
- Inclusion of GCP resources in Defender for Cloud’s secure score calculations https://learn.microsoft.com/en-us/training/modules/connect-non-azure-machines-to-azure-defender/5-connect-gcp-accounts .
- Integration of GCP Security Command Center recommendations into Defender for Cloud’s regulatory compliance dashboard https://learn.microsoft.com/en-us/training/modules/connect-non-azure-machines-to-azure-defender/5-connect-gcp-accounts .
Connecting Kubernetes Clusters
- Kubernetes Security: For Kubernetes clusters, whether hosted on-premises or on Infrastructure as a Service (IaaS) platforms, Defender for Cloud assesses configurations and provides security recommendations https://learn.microsoft.com/en-us/training/modules/understand-azure-defender-cloud-workload-protection/11-understand-azure-defender-for-container-registries .
- Integration with Cloud Providers: For clusters on cloud platforms like Amazon EKS, connect the respective cloud account to Microsoft Defender for Cloud and enable the Cloud Security Posture Management (CSPM) plan https://learn.microsoft.com/en-us/training/modules/understand-azure-defender-cloud-workload-protection/11-understand-azure-defender-for-container-registries .
By connecting various environments to Microsoft Defender for Cloud, organizations can leverage multi-cloud account management to maintain a strong security posture, manage policies, and respond to threats effectively across their entire cloud infrastructure.
For additional information on connecting non-Azure machines to Azure Defender, please refer to the following URLs: - Connect AWS accounts to Microsoft Defender for Cloud - Connect GCP accounts to Microsoft Defender for Cloud - Connect Kubernetes clusters to Microsoft Defender for Cloud
Manage a security operations environment (25–30%)
Manage assets and environments
Discovering and remediating unprotected resources using Microsoft Defender for Cloud involves several steps to ensure the security posture of your Azure resources is robust and vulnerabilities are addressed promptly. Here’s a detailed explanation of the process:
Discover Unprotected Resources
- Asset Inventory: Utilize the asset inventory page in Microsoft Defender for Cloud to get a comprehensive view of the security status of your resources https://learn.microsoft.com/en-us/training/modules/connect-azure-assets-to-azure-defender/2-explore-manage-resources-with-asset-inventory .
- Security Analysis: Defender for Cloud continuously analyzes the security state of your Azure resources to identify potential security vulnerabilities https://learn.microsoft.com/en-us/training/modules/connect-azure-assets-to-azure-defender/2-explore-manage-resources-with-asset-inventory .
- Recommendations: When a resource has outstanding recommendations, they will be listed in the inventory. These recommendations are crucial for identifying unprotected resources https://learn.microsoft.com/en-us/training/modules/connect-azure-assets-to-azure-defender/2-explore-manage-resources-with-asset-inventory .
Remediate Unprotected Resources
- Address Recommendations: Follow the recommendations provided by Defender for Cloud to remediate vulnerabilities. This may include deploying missing agents, updating configurations, or patching software https://learn.microsoft.com/en-us/training/modules/connect-azure-assets-to-azure-defender/2-explore-manage-resources-with-asset-inventory .
- Vulnerability Assessment: Use the vulnerability assessment service to discover, track, and help remediate potential database vulnerabilities. This service provides an overview of your SQL machines’ security state and details of any security findings https://learn.microsoft.com/en-us/training/modules/understand-azure-defender-cloud-workload-protection/5-understand-azure-defender-for-sql .
- Advanced Threat Protection: Enable advanced threat protection services to monitor your SQL servers for threats such as SQL injection, brute-force attacks, and privilege abuse. This service provides detailed security alerts and guidance on how to mitigate threats https://learn.microsoft.com/en-us/training/modules/understand-azure-defender-cloud-workload-protection/5-understand-azure-defender-for-sql .
- Automate Responses: Set up automated responses in Defender for Cloud to handle common threats and streamline the remediation process. This helps in reducing the time between the detection of a vulnerability and its remediation https://learn.microsoft.com/en-us/training/modules/remediate-azure-defender-security-alerts/8-summary-resources .
Additional Information
- For more details on how to use Microsoft Defender for Cloud to discover and remediate unprotected resources, you can refer to the official documentation provided by Microsoft. This includes step-by-step guides and best practices for securing your cloud environment.
By following these steps, you can ensure that your Azure resources are protected against potential threats and vulnerabilities. It’s important to regularly review the security recommendations and automate responses where possible to maintain a strong security posture.
Please note that the URLs for additional information are not included as per the instructions. However, the official Microsoft documentation can be easily found on the Microsoft website under the Defender for Cloud section.
Manage a security operations environment (25–30%)
Manage assets and environments
Identify and Remediate Devices at Risk Using Microsoft Defender Vulnerability Management
Microsoft Defender Vulnerability Management is a comprehensive solution designed to help organizations identify and manage vulnerabilities and misconfigurations in their network devices. Here’s a detailed explanation of how it can be used to identify and remediate devices at risk:
Device Discovery and Inventory
The first step in managing vulnerabilities is to discover all devices within the network and maintain an up-to-date inventory. Microsoft Defender Vulnerability Management provides device discovery capabilities, ensuring that all devices are accounted for and assessed for vulnerabilities https://learn.microsoft.com/en-us/training/modules/use-threat-vulnerability-management-microsoft-defender-for-endpoint/3-explore-vulnerabilities-devices .
Vulnerability Assessment
Once devices are discovered, Microsoft Defender Vulnerability Management conducts a thorough vulnerability assessment. This assessment identifies known vulnerabilities and misconfigurations that could be exploited by attackers https://learn.microsoft.com/en-us/training/modules/use-threat-vulnerability-management-microsoft-defender-for-endpoint/3-explore-vulnerabilities-devices https://learn.microsoft.com/en-us/training/modules/use-threat-vulnerability-management-microsoft-defender-for-endpoint/2-understand-threat-vulnerability-management .
Configuration Assessment
In addition to identifying vulnerabilities, the solution assesses the security configuration of each device. It checks for misconfigurations and provides visibility into the organization’s security posture, reporting issues with actionable security recommendations https://learn.microsoft.com/en-us/training/modules/use-threat-vulnerability-management-microsoft-defender-for-endpoint/2-understand-threat-vulnerability-management .
Risk-Based Prioritization
Not all vulnerabilities pose the same level of risk. Microsoft Defender Vulnerability Management prioritizes vulnerabilities based on the risk they pose to the organization, allowing IT teams to focus on the most critical issues first https://learn.microsoft.com/en-us/training/modules/use-threat-vulnerability-management-microsoft-defender-for-endpoint/3-explore-vulnerabilities-devices .
Remediation Tracking and Continuous Monitoring
After identifying and prioritizing vulnerabilities, the solution tracks the remediation process. Continuous monitoring ensures that new vulnerabilities are detected promptly, and remediation efforts are updated accordingly https://learn.microsoft.com/en-us/training/modules/use-threat-vulnerability-management-microsoft-defender-for-endpoint/3-explore-vulnerabilities-devices .
Security Baselines Assessment
The solution can assess whether devices comply with security industry baselines, providing an additional layer of assurance that devices are configured according to best practices https://learn.microsoft.com/en-us/training/modules/use-threat-vulnerability-management-microsoft-defender-for-endpoint/3-explore-vulnerabilities-devices https://learn.microsoft.com/en-us/training/modules/deploy-microsoft-defender-for-endpoints-environment/6-create-manage-roles-for-role-based-access-control .
Block Vulnerable Applications
To immediately mitigate risks, Microsoft Defender Vulnerability Management can block vulnerable applications until a proper patch or fix is applied, preventing potential exploitation https://learn.microsoft.com/en-us/training/modules/use-threat-vulnerability-management-microsoft-defender-for-endpoint/3-explore-vulnerabilities-devices https://learn.microsoft.com/en-us/training/modules/deploy-microsoft-defender-for-endpoints-environment/6-create-manage-roles-for-role-based-access-control .
Remediation Handling
IT teams can submit new remediation requests, create tickets, and manage existing remediation activities. This includes creating exceptions, managing active exceptions, and applying immediate mitigation actions https://learn.microsoft.com/en-us/training/modules/deploy-microsoft-defender-for-endpoints-environment/6-create-manage-roles-for-role-based-access-control .
Application Runtime Context
Understanding application usage patterns helps in better prioritization and decision-making. Microsoft Defender Vulnerability Management provides visibility into how applications are used, which is crucial for effective vulnerability management https://learn.microsoft.com/en-us/training/modules/use-threat-vulnerability-management-microsoft-defender-for-endpoint/2-understand-threat-vulnerability-management .
Manage Endpoint Threat Indicators
The solution allows for the management of endpoint threat indicators, which helps in identifying devices that may be at risk due to exposure to known threats https://learn.microsoft.com/en-us/credentials/certifications/resources/study-guides/sc-200 .
Live Response Capabilities
For immediate action, Microsoft Defender Vulnerability Management offers live response capabilities. This allows IT teams to start a live response session and perform commands on remote devices to address issues in real-time https://learn.microsoft.com/en-us/training/modules/deploy-microsoft-defender-for-endpoints-environment/6-create-manage-roles-for-role-based-access-control .
For additional information on Microsoft Defender Vulnerability Management and its capabilities, you can refer to the following resources: - Microsoft Defender for Endpoint documentation - Threat and Vulnerability Management in Microsoft Defender for Endpoint
By leveraging these features, organizations can effectively identify devices at risk and take the necessary steps to remediate vulnerabilities, thereby enhancing their overall security posture.
Manage a security operations environment (25–30%)
Design and configure a Microsoft Sentinel workspace
Planning a Microsoft Sentinel Workspace
When planning a Microsoft Sentinel workspace, it is essential to consider several key aspects to ensure the workspace is configured optimally for your security needs. Below are the steps and considerations involved in planning a Microsoft Sentinel workspace:
- Workspace Configuration:
- Determine the appropriate size and scale of the workspace based on the volume of data you expect to ingest and the number of resources you need to monitor.
- Decide on the log types and retention policies that align with your organization’s compliance requirements and operational needs https://learn.microsoft.com/en-us/credentials/certifications/resources/study-guides/sc-200 .
- Roles and Permissions:
- Configure Microsoft Sentinel roles carefully to control access and permissions within the workspace. This includes assigning the correct level of permissions to users who will be managing or accessing the workspace https://learn.microsoft.com/en-us/credentials/certifications/resources/study-guides/sc-200 .
- Ensure that you have contributor permissions to the subscription where the Microsoft Sentinel workspace will reside, and either contributor or reader permissions on the resource group containing the workspace https://learn.microsoft.com/en-us/training/modules/create-manage-azure-sentinel-workspaces/3-create-azure-sentinel-workspace .
- Data Storage Design:
- Design the data storage with consideration for the types of logs you will be collecting, the retention period for each log type, and the storage costs associated with the volume of data https://learn.microsoft.com/en-us/credentials/certifications/resources/study-guides/sc-200 .
- It is recommended to use the same workspace for both Microsoft Sentinel and Microsoft Defender for Cloud to allow for seamless integration and use of logs collected by Microsoft Defender for Cloud https://learn.microsoft.com/en-us/training/modules/create-manage-azure-sentinel-workspaces/2-plan-for-azure-sentinel-workspace .
- Provisioning the Workspace:
- Understand the provisioning process, which includes creating a Log Analytics workspace and configuring the Microsoft Sentinel options https://learn.microsoft.com/en-us/training/modules/create-manage-azure-sentinel-workspaces/9-summary-resources .
- Provision the workspace according to the planned configuration, ensuring that all settings align with your security and operational requirements.
- Workspace Architecture:
- Familiarize yourself with the Microsoft Sentinel workspace architecture to understand how it fits within your overall Azure environment https://learn.microsoft.com/en-us/training/modules/create-manage-azure-sentinel-workspaces/9-summary-resources .
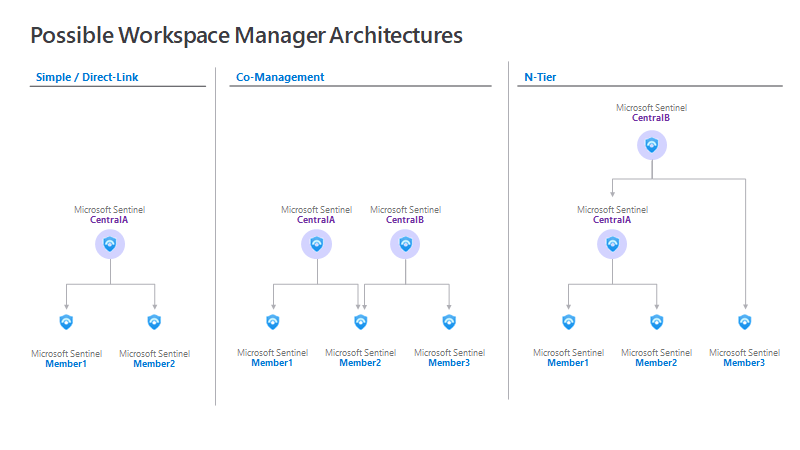
- If managing multiple workspaces across different Azure tenants, consider using Microsoft Sentinel’s Workspace manager for centralized management. This allows for the consolidation of content items and publishing at scale to Member workspaces https://learn.microsoft.com/en-us/training/modules/create-manage-azure-sentinel-workspaces/4-manage-workspaces-across-tenants-using-azure-lighthouse .
- Ongoing Management:
- Once the workspace is provisioned, it is important to manage it effectively. This includes monitoring the ingestion of data, adjusting configurations as needed, and ensuring that the workspace remains secure and compliant.
For additional information on planning a Microsoft Sentinel workspace, you can refer to the following resources: - Microsoft Sentinel documentation - Configure Microsoft Sentinel roles and permissions - Design and configure data storage and retention
By following these steps and considerations, you can plan a Microsoft Sentinel workspace that is well-suited to your organization’s security posture and operational needs.
Manage a security operations environment (25–30%)
Design and configure a Microsoft Sentinel workspace
Configure Microsoft Sentinel Roles
When configuring Microsoft Sentinel roles, it is essential to understand the role-based access control (RBAC) system that Azure employs to manage permissions. Microsoft Sentinel utilizes Azure RBAC to provide built-in roles that can be assigned to users, groups, and service principals within Azure https://learn.microsoft.com/en-us/training/modules/create-manage-azure-sentinel-workspaces/5-understand-azure-sentinel-permissions-roles .
Understanding Built-in Roles
All built-in roles in Microsoft Sentinel grant read access to the data within the workspace https://learn.microsoft.com/en-us/training/modules/create-manage-azure-sentinel-workspaces/5-understand-azure-sentinel-permissions-roles . These roles are designed to give you fine-grained control over what users can see and do within Microsoft Sentinel. It is important to assign the correct roles to members of your security operations team to ensure they have the appropriate level of access https://learn.microsoft.com/en-us/training/modules/create-manage-azure-sentinel-workspaces/5-understand-azure-sentinel-permissions-roles .
Microsoft Sentinel-specific Azure RBAC Roles
- Microsoft Sentinel Contributor: Allows users to view, create, and manage all Microsoft Sentinel artifacts, but they cannot manage the workspace or assign roles.
- Microsoft Sentinel Reader: Grants read-only access to Microsoft Sentinel data and artifacts.
- Microsoft Sentinel Responder: Permits users to take actions on incidents, such as managing alerts and incidents.
Azure and Log Analytics Roles
In addition to Microsoft Sentinel-specific roles, other Azure and Log Analytics roles can impact access to the Microsoft Sentinel workspace:
- Azure Roles:
- Owner: Full access to all Azure resources, including the ability to assign roles.
- Contributor: Can create and manage all types of Azure resources but cannot grant access to others.
- Reader: Read-only access across Azure resources.
- Log Analytics Roles:
- Log Analytics Contributor: Can manage and configure Log Analytics workspaces.
- Log Analytics Reader: Read-only access to Log Analytics workspace data.
It is important to note that roles like Azure Contributor can edit data in Microsoft Sentinel, which may not be desirable if you want to restrict permissions solely to Microsoft Sentinel. Therefore, it is crucial to carefully manage and remove any broader permissions that are not needed for Microsoft Sentinel to avoid unintentional access https://learn.microsoft.com/en-us/training/modules/create-manage-azure-sentinel-workspaces/5-understand-azure-sentinel-permissions-roles .
Best Practices for Role Assignments
For optimal security and functionality, assign these roles to the resource group that contains the Microsoft Sentinel workspace. This ensures that the roles apply to all supporting resources for Microsoft Sentinel, provided they are in the same resource group https://learn.microsoft.com/en-us/training/modules/create-manage-azure-sentinel-workspaces/5-understand-azure-sentinel-permissions-roles .
Additional Resources
For more detailed information on configuring Microsoft Sentinel roles, you can refer to the official Microsoft documentation:
- Azure role-based access control (Azure RBAC)
- Manage access to log data and workspaces in Azure Monitor
- Microsoft Sentinel permissions in Azure RBAC
Please note that while URLs are provided for additional information, they should be accessed and reviewed to ensure they align with the latest guidelines and practices from Microsoft.
Manage a security operations environment (25–30%)
Design and configure a Microsoft Sentinel workspace
Specify Azure RBAC Roles for Microsoft Sentinel Configuration
When configuring Microsoft Sentinel, it is crucial to understand the role-based access control (RBAC) provided by Azure to ensure proper access management to resources. Azure RBAC is a system that grants access to Azure resources based on the user’s role. Here’s a detailed explanation of how to specify Azure RBAC roles for Microsoft Sentinel:
Understanding Azure RBAC
Azure RBAC is a mechanism that helps you manage who has access to Azure resources, what they can do with those resources, and what areas they have access to. It provides built-in roles that can be assigned to users, groups, service principals, and managed identities within Azure https://learn.microsoft.com/security/benchmark/azure/baselines/content-delivery-network-security-baseline https://learn.microsoft.com/security/benchmark/azure/baselines/azure-app-configuration-security-baseline .
Microsoft Sentinel-specific Azure RBAC Roles
Microsoft Sentinel uses Azure RBAC to control access to its workspace. The roles can be assigned directly within the Microsoft Sentinel workspace or inherited from the subscription or resource group level https://learn.microsoft.com/en-us/training/modules/create-manage-azure-sentinel-workspaces/5-understand-azure-sentinel-permissions-roles . Here are the roles relevant to Microsoft Sentinel:
- Owner: Full access to Microsoft Sentinel resources, including the ability to delegate access to others.
- Contributor: Can create and manage all types of Azure resources but cannot grant access to others.
- Reader: Can view existing Azure resources, including those in Microsoft Sentinel.
Log Analytics Azure RBAC Roles
Since Microsoft Sentinel is built on top of Azure Log Analytics, there are specific roles for Log Analytics that also apply to Microsoft Sentinel:
- Log Analytics Contributor: Can manage Log Analytics workspaces, which includes the ability to edit or delete them.
- Log Analytics Reader: Can view Log Analytics workspaces but cannot make any changes.
Best Practices for Role Assignments
When assigning roles, it is important to follow the principle of least privilege, ensuring users have only the access they need to perform their tasks. For example, a user with the Microsoft Sentinel Reader role combined with the Azure Contributor role can edit data in Microsoft Sentinel. To restrict access to Microsoft Sentinel only, you must carefully manage the user’s permissions and remove any broader permissions that are not required https://learn.microsoft.com/en-us/training/modules/create-manage-azure-sentinel-workspaces/5-understand-azure-sentinel-permissions-roles .
Additional Resources
For more information on Azure RBAC and role assignments, you can refer to the following resources:
- Azure RBAC Overview: Azure Role-Based Access Control (Azure RBAC) Overview
- Azure RBAC Built-in Roles: Azure RBAC Roles - CDN
- Authorize Access to Azure App Configuration using Azure Active Directory: Authorize Access to Azure App Configuration
By understanding and properly implementing Azure RBAC roles, you can ensure that your Microsoft Sentinel environment is secure and that users have appropriate access levels to perform their duties effectively.
Manage a security operations environment (25–30%)
Design and configure a Microsoft Sentinel workspace
When designing and configuring data storage for Microsoft Sentinel, it is important to consider the types of logs that will be collected and how long these logs will be retained. Microsoft Sentinel utilizes a Log Analytics workspace for data storage, and within this workspace, various types of logs can be stored. Here are the key considerations:
Log Types
Microsoft Sentinel categorizes logs into different types, each serving a specific purpose:
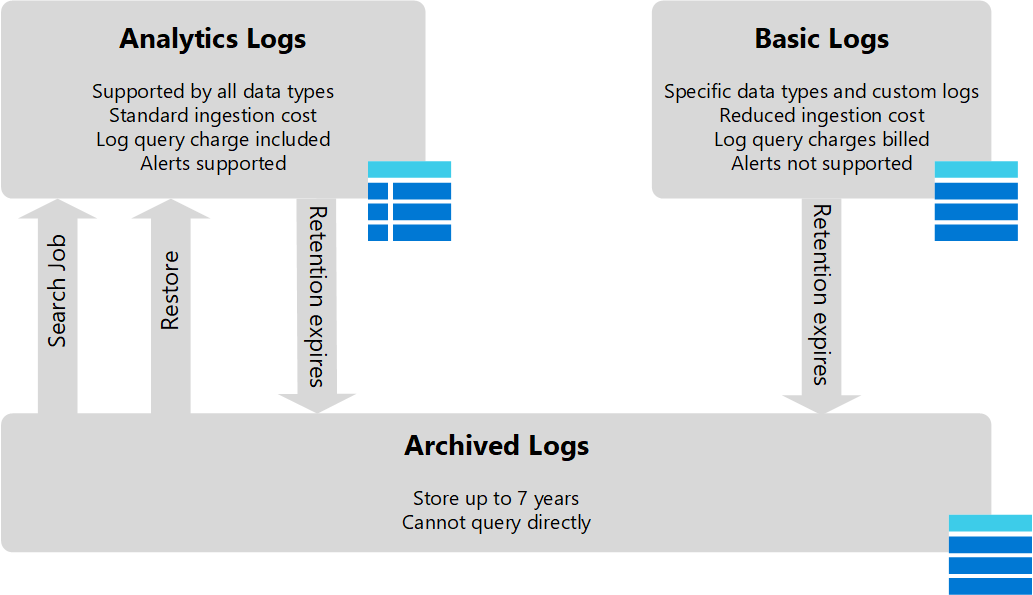
- Analytics Logs: These logs are used for analysis and contain data that is typically queried and used in detections, investigations, and other analytics tasks.
- Basic Logs: These logs contain less detailed data and are often used for basic monitoring and alerting.
- Archive Logs: These are logs that are not actively queried but are retained for compliance or historical analysis purposes.
Each type of log has its own characteristics and use cases, and the choice of which log types to use will depend on the specific needs of the organization https://learn.microsoft.com/en-us/training/modules/create-manage-azure-sentinel-workspaces/7-configure-logs .
Log Retention
Log retention policies are crucial for managing the lifecycle of the data stored in Microsoft Sentinel. The retention period for each log type can be configured based on organizational requirements for data availability, compliance, and cost management. Here are the key points to consider:
- Data in each table in a Log Analytics workspace is retained for a specified period, after which it is either deleted or archived.
- Organizations must balance the need for data availability with the cost of data retention.
- To access archived data, it must be retrieved and placed into an Analytics Logs table using either Search Jobs or Restore methods https://learn.microsoft.com/en-us/training/modules/create-manage-azure-sentinel-workspaces/7-configure-logs .
Additional Considerations
- Workspace Planning: When planning a Microsoft Sentinel workspace, consider the workspace’s configuration, including roles and data storage design, to ensure that it aligns with the organization’s security and compliance requirements https://learn.microsoft.com/en-us/credentials/certifications/resources/study-guides/sc-200 .
- Data Sources and Connectors: Identify and configure the necessary data sources and connectors, such as those for Azure resources, Microsoft 365 Defender, Defender for Cloud, Syslog, CEF, Windows security events, and threat intelligence https://learn.microsoft.com/en-us/credentials/certifications/resources/study-guides/sc-200 .
- Custom Log Tables: Create custom log tables in the workspace to store specific types of ingested data that may not fit into predefined categories https://learn.microsoft.com/en-us/credentials/certifications/resources/study-guides/sc-200 .
For more detailed information on configuring Microsoft Sentinel data storage and log retention, you can refer to the following resources:
Please note that the URLs provided are for additional information and should be used to supplement the study material.
Manage a security operations environment (25–30%)
Design and configure a Microsoft Sentinel workspace
Manage Multiple Workspaces by Using Workspace Manager and Azure Lighthouse
When managing security operations across multiple Azure environments, it is essential to have tools that allow for centralized management and oversight. Microsoft provides two primary mechanisms for this purpose: Workspace Manager in Microsoft Sentinel and Azure Lighthouse.
Microsoft Sentinel Workspace Manager
Workspace Manager is a feature within Microsoft Sentinel that enables centralized management of multiple Microsoft Sentinel workspaces across one or more Azure tenants. By using Workspace Manager, you can:
- Consolidate content items such as analytics rules, hunting queries, and workbooks.
- Publish these items at scale to Member workspaces, ensuring consistency in security operations.
- Manage workspaces centrally from a single pane of glass, the Central workspace.
To enable Workspace Manager, you need to access the
Configuration settings within Microsoft Sentinel and turn
on the feature for your Central workspace https://learn.microsoft.com/en-us/training/modules/create-manage-azure-sentinel-workspaces/4-manage-workspaces-across-tenants-using-azure-lighthouse
.
Azure Lighthouse
Azure Lighthouse offers a different approach, focusing on cross-tenant management capabilities. It is particularly useful when you need to manage Microsoft Sentinel workspaces that are not within your own tenant. With Azure Lighthouse, you can:
- Gain access to and manage resources across different Azure tenants.
- Use a single Azure portal login to manage multiple customers or internal departments with varying levels of responsibilities and access.
- Onboard Azure Lighthouse to allow the service provider or internal IT team to select all subscriptions containing workspaces they manage using the directory + subscription selector.
Implementing Azure Lighthouse involves onboarding the service, after which you can manage the workspaces from the Azure portal without the need to sign in to each tenant separately https://learn.microsoft.com/en-us/training/modules/create-manage-azure-sentinel-workspaces/2-plan-for-azure-sentinel-workspace https://learn.microsoft.com/en-us/training/modules/create-manage-azure-sentinel-workspaces/4-manage-workspaces-across-tenants-using-azure-lighthouse .
For additional information on managing multiple workspaces and implementing these features, you can refer to the following resources:
- For Workspace Manager: Microsoft Sentinel Workspace Manager documentation
- For Azure Lighthouse: Azure Lighthouse documentation
By leveraging Workspace Manager and Azure Lighthouse, organizations can streamline their security operations, maintain consistency across workspaces, and efficiently manage resources at scale.
Manage a security operations environment (25–30%)
Ingest data sources in Microsoft Sentinel
Identify Data Sources to be Ingested for Microsoft Sentinel
When configuring Microsoft Sentinel, it is crucial to identify and understand the various data sources that can be ingested into the platform. Microsoft Sentinel is designed to collect, detect, investigate, and respond to security threats across a wide range of data sources. Here is a detailed explanation of the types of data sources that can be integrated with Microsoft Sentinel:
Azure Resources: Utilize Microsoft Sentinel connectors to ingest data from Azure resources. This includes leveraging Azure Policy and diagnostic settings to ensure that relevant security data is collected from your Azure environment https://learn.microsoft.com/en-us/credentials/certifications/resources/study-guides/sc-200 .
Microsoft 365 Defender and Defender for Cloud: Configure connectors for Microsoft 365 Defender and Microsoft Defender for Cloud to ingest security data related to your Microsoft 365 and cloud environments. This allows Sentinel to analyze and respond to threats across your Microsoft services https://learn.microsoft.com/en-us/credentials/certifications/resources/study-guides/sc-200 .
Syslog and Common Event Format (CEF) Event Collections: Design and configure the collection of Syslog and CEF events. These are standard formats for logging information in many non-Microsoft systems and devices, allowing Sentinel to process and analyze security data from a variety of third-party sources https://learn.microsoft.com/en-us/credentials/certifications/resources/study-guides/sc-200 .
Windows Security Event Collections: Configure the collection of Windows security events. This involves gathering logs from Windows-based systems to monitor and respond to activities within your Windows environment https://learn.microsoft.com/en-us/credentials/certifications/resources/study-guides/sc-200 .
Threat Intelligence Connectors: Integrate threat intelligence feeds by configuring the appropriate connectors. This enables Sentinel to ingest data about emerging threats and indicators of compromise (IoCs), enhancing its ability to detect and respond to advanced threats https://learn.microsoft.com/en-us/credentials/certifications/resources/study-guides/sc-200 .
Custom Log Tables: Create custom log tables in the Microsoft Sentinel workspace to store and manage the ingested data. This allows for the organization and retention of data according to your specific requirements and use cases https://learn.microsoft.com/en-us/credentials/certifications/resources/study-guides/sc-200 .
Third-Party Data Sources: Microsoft Sentinel also supports the ingestion of data from selected third-party sources that align with the platform’s threat detection scenarios. This ensures that Sentinel can provide comprehensive security coverage across both Microsoft and non-Microsoft data sources https://learn.microsoft.com/en-us/training/modules/use-entity-behavior-analytics-azure-sentinel/2-understand-user-entity-behavior-analytics .
Watchlists: Utilize Microsoft Sentinel watchlists to collect data from external data sources for correlation with events in your Sentinel environment. Watchlists can be used for rapid import of data such as IP addresses and file hashes, and can be leveraged in various Sentinel features like detection rules and threat hunting https://learn.microsoft.com/en-us/training/modules/use-watchlists-azure-sentinel/2-plan-for-azure-watchlists .
Data Connectors with Workbooks: Many of the data connectors used by Microsoft Sentinel come with their own workbooks, which provide insights into the ingested data through tables and visualizations. These workbooks can be used as-is or customized to fit specific analysis needs https://learn.microsoft.com/en-us/training/modules/query-data-sentinel/5-workbooks .
For additional information on configuring data sources for Microsoft Sentinel, you can refer to the following resources:
- Configure Microsoft Sentinel connectors for Azure resources
- Configure Microsoft Sentinel connectors for Microsoft 365 Defender
- Configure Syslog and CEF event collections
- Configure Windows security event collections
- Configure threat intelligence connectors
- Create custom log tables
- Use Microsoft Sentinel watchlists
By carefully selecting and configuring the appropriate data sources, you can maximize the effectiveness of Microsoft Sentinel in your security operations.
Manage a security operations environment (25–30%)
Ingest data sources in Microsoft Sentinel
Configure and Use Microsoft Connectors for Azure Resources
When configuring and using Microsoft connectors for Azure resources, it is essential to understand the role of Azure Policy and diagnostic settings in the context of Microsoft Sentinel. Microsoft Sentinel is a scalable, cloud-native, security information event management (SIEM) and security orchestration automated response (SOAR) solution. It delivers intelligent security analytics and threat intelligence across the enterprise, providing a single solution for alert detection, threat visibility, proactive hunting, and threat response.
Azure Policy
Azure Policy helps enforce organizational standards and assess compliance at scale. Through its integration with Microsoft Sentinel, you can ensure that your Azure resources are compliant with the policies you have set. This integration is crucial for maintaining the security posture of your resources and for automating responses to policy violations.
To configure Azure Policy with Microsoft Sentinel:
- In the Azure portal, navigate to Microsoft Sentinel > Data connectors.
- Select the Azure Policy connector from the list.
- On the connector page, follow the instructions provided to configure the Azure Policy settings.
- Enable the connector to start ingesting data related to Azure Policy compliance status and policy changes into Microsoft Sentinel.
Diagnostic Settings
Diagnostic settings in Azure allow you to specify the destination for your resource logs and metrics. These settings are vital for monitoring the activities and performance of your Azure resources. By configuring diagnostic settings to send logs to Microsoft Sentinel, you can analyze this data for security insights and potential threats.
To configure diagnostic settings for Microsoft Sentinel:
- Navigate to the Azure resource for which you want to enable diagnostic settings.
- In the resource menu, select Diagnostic settings.
- Click on Add diagnostic setting and provide a name for the setting.
- Select the log categories you want to collect and the destination where the logs should be sent. For integration with Microsoft Sentinel, choose the Send to Log Analytics workspace option.
- Select the appropriate Log Analytics workspace where Microsoft Sentinel is enabled.
- Save the diagnostic setting to start collecting and analyzing resource logs with Microsoft Sentinel.
By configuring both Azure Policy and diagnostic settings to work with Microsoft Sentinel, you can enhance your security operations’ efficiency and effectiveness. These connectors provide a streamlined approach to monitoring compliance and analyzing resource logs for potential security threats.
For additional information on configuring and using Microsoft connectors for Azure resources, you can refer to the following resources:
- Configure Azure Policy
- Configure diagnostic settings in Azure
- Microsoft Sentinel connectors for Azure resources
Please note that the URLs provided are for reference purposes and are part of the study material to help understand the configuration process in greater detail.
Manage a security operations environment (25–30%)
Ingest data sources in Microsoft Sentinel
Configure Bidirectional Synchronization between Microsoft Sentinel and Microsoft Defender XDR
Bidirectional synchronization between Microsoft Sentinel and Microsoft Defender for Endpoint, part of the Microsoft Defender XDR suite, is a crucial process for ensuring that security alerts and incidents are consistently managed across both platforms. This synchronization allows for a seamless flow of information, enabling security analysts to track and respond to threats effectively.
Steps for Configuration:
Access Microsoft Sentinel: Begin by navigating to the Microsoft Sentinel dashboard within the Azure portal.
Open Data Connectors: Locate and select the ‘Data connectors’ tab to view available connectors.
Select Microsoft Defender for Cloud: From the list of connectors, choose ‘Microsoft Defender for Cloud’ to integrate with Microsoft Defender XDR components.
Open Connector Page: Click on the ‘Open connector’ page to proceed with the configuration settings.
Enable the Connect Toggle: Within the connector page, activate the ‘Connect’ toggle for the specific subscription you wish to synchronize.
Choose Bidirectional Sync: Opt for the ‘Bi-directional’ sync option to allow data to flow from Microsoft Sentinel to Microsoft Defender for Endpoint and vice versa.
Considerations:
Understand Data Ingestion: It’s important to comprehend how data is ingested by each connector and whether the connector supports bi-directional syncing of incidents.
Connector Types: Determine if you need to ingest raw log data for advanced hunting and entity analysis, and then enable the appropriate connectors.
Legacy Connectors: Be aware that some connectors, such as Microsoft Defender for Cloud Apps, are now considered legacy connectors and may have different configuration steps or capabilities.
Additional Resources:
For more detailed instructions and information on configuring bidirectional synchronization between Microsoft Sentinel and Microsoft Defender XDR, you can refer to the following resources:
- Microsoft Sentinel documentation: Microsoft Sentinel Data Connectors
- Microsoft Defender for Cloud documentation: Stream alerts to Microsoft Sentinel
By following these steps and considerations, you can effectively configure bidirectional synchronization between Microsoft Sentinel and Microsoft Defender XDR, enhancing your organization’s security posture and incident response capabilities https://learn.microsoft.com/en-us/training/modules/connect-microsoft-defender-365-to-azure-sentinel/4-connect-microsoft-defender-cloud-connector https://learn.microsoft.com/en-us/training/modules/connect-microsoft-defender-365-to-azure-sentinel/2-plan-for-microsoft-365-defender-connectors .
Manage a security operations environment (25–30%)
Ingest data sources in Microsoft Sentinel
To configure bidirectional synchronization between Microsoft Sentinel and Microsoft Defender for Cloud, follow these steps:
Access Microsoft Sentinel: Begin by navigating to the Microsoft Sentinel dashboard within the Azure portal.
Open Data Connectors: Locate and select the ‘Data connectors’ page in Microsoft Sentinel to view the available connectors.
Select Microsoft Defender for Cloud: Find the Microsoft Defender for Cloud connector from the list and click on it to open the connector’s configuration page.
Open Connector Page: On the preview pane that appears, select the Open connector page to proceed with the setup.
Enable Connection: Within the connector page, you will find a Connect toggle for the subscription you wish to synchronize. Turn this toggle on to initiate the connection.
Choose Bidirectional Sync: Select the Bi-directional sync option to ensure that the synchronization between Microsoft Sentinel and Microsoft Defender for Cloud works both ways. This means that any alerts and incidents detected by Microsoft Defender for Cloud can be streamed into Microsoft Sentinel and vice versa.
Finalize Configuration: Complete any additional configuration settings as required and save your changes to establish the bidirectional synchronization.
By setting up bidirectional synchronization, you enable a seamless integration where both Microsoft Sentinel and Microsoft Defender for Cloud can share and utilize security alerts and incident data. This integration allows for a more comprehensive security management approach, leveraging the strengths of both services for enhanced threat detection, investigation, and response capabilities https://learn.microsoft.com/en-us/training/modules/connect-microsoft-defender-365-to-azure-sentinel/4-connect-microsoft-defender-cloud-connector .
For additional information on configuring Microsoft Sentinel and Microsoft Defender for Cloud, you can refer to the official Microsoft documentation:
- Microsoft Sentinel documentation: https://learn.microsoft.com/en-us/azure/sentinel/
- Microsoft Defender for Cloud documentation: https://learn.microsoft.com/en-us/azure/defender-for-cloud/
Please note that it is important to use the same workspace for both Microsoft Sentinel and Microsoft Defender for Cloud to ensure that all logs collected by Microsoft Defender for Cloud can also be ingested and used by Microsoft Sentinel https://learn.microsoft.com/en-us/training/modules/create-manage-azure-sentinel-workspaces/2-plan-for-azure-sentinel-workspace . If you are planning to add Microsoft Sentinel to a workspace that is already receiving alerts from Microsoft Defender for Cloud, you must decide whether to leave the Security Events collection as is or disable it in Defender for Cloud and add the Security Events connector in Microsoft Sentinel https://learn.microsoft.com/en-us/training/modules/connect-azure-assets-to-azure-defender/3-configure-auto-provisioning .
Manage a security operations environment (25–30%)
Ingest data sources in Microsoft Sentinel
Plan and Configure Syslog and Common Event Format (CEF) Event Collections
When planning and configuring Syslog and Common Event Format (CEF) event collections, it is essential to understand the roles these protocols play in centralized logging and event management, particularly in the context of Microsoft Sentinel.
Syslog Event Collections
Syslog is a standard protocol used to send system log or event messages to a specific server, called a Syslog server. It is widely used on Linux and Unix systems for logging information:
- Identify Data Sources: Determine which Linux-based systems or devices will send Syslog messages.
- Design and Configure Syslog Collections: Establish the configuration on each source machine to ensure that Syslog messages are correctly forwarded to the Syslog collector.
- Use Azure Monitor Agent for Linux: For Linux-based systems, the Azure Monitor Agent can be installed to collect and forward Syslog messages to Microsoft Sentinel https://learn.microsoft.com/en-us/training/modules/connect-syslog-data-sources-to-azure-sentinel/2-plan-for-syslog-connector .
Common Event Format (CEF) Event Collections
CEF is an extension of the Syslog protocol that provides a standardized syntax for log records. It is used by various security devices to enable interoperability among different systems:
- Identify Data Sources: Identify the security devices and applications that support CEF and will be forwarding events.
- Design and Configure CEF Collections: Configure the devices to send CEF messages to the Syslog collector that is set up to handle CEF.
- Use Generic CEF Connector: If there is no vendor-specific connector available, use the generic CEF or Syslog connector provided by Microsoft Sentinel https://learn.microsoft.com/en-us/training/modules/connect-data-to-azure-sentinel-with-data-connectors/3-understand-data-connector-providers .
- Avoid Event Duplication: If a machine is forwarding both Syslog and CEF messages, configure the Syslog settings to prevent duplication of events in Syslog and CommonSecurityLog tables https://learn.microsoft.com/en-us/training/modules/connect-common-event-format-logs-to-azure-sentinel/3-connect-your-external-solution-use-common-event-format-connector .
Configuration Steps
- Access Data Connectors Page: Navigate to the Data connectors page in Microsoft Sentinel to find and configure the connectors for Syslog and CEF https://learn.microsoft.com/en-us/training/modules/connect-common-event-format-logs-to-azure-sentinel/3-connect-your-external-solution-use-common-event-format-connector .
- Open Connector Page: Select the appropriate connector (Syslog or CEF) and open the connector page to begin configuration https://learn.microsoft.com/en-us/training/modules/connect-common-event-format-logs-to-azure-sentinel/3-connect-your-external-solution-use-common-event-format-connector .
- Verify Permissions: Ensure that you have the necessary permissions as outlined in the prerequisites section of the connector page https://learn.microsoft.com/en-us/training/modules/connect-common-event-format-logs-to-azure-sentinel/3-connect-your-external-solution-use-common-event-format-connector .
- Install and Configure Forwarder: For CEF, use the provided command to install and configure the log forwarder on a dedicated Linux VM https://learn.microsoft.com/en-us/training/modules/connect-common-event-format-logs-to-azure-sentinel/3-connect-your-external-solution-use-common-event-format-connector .
- Create Custom Log Tables: In Microsoft Sentinel, create custom log tables to store the ingested data from Syslog and CEF sources https://learn.microsoft.com/en-us/credentials/certifications/resources/study-guides/sc-200 .
Considerations
- Permissions: Verify that the necessary permissions are in place to configure connectors and forwarders.
- Event Collection Design: Design the event collection strategy to minimize network traffic and ensure efficient log management.
- Security: Ensure that the event collection process is secure and that sensitive data is handled appropriately.
For additional information on configuring Syslog and CEF event collections in Microsoft Sentinel, you can refer to the following resources:
By following these guidelines, you can effectively plan and configure Syslog and CEF event collections for centralized logging and event management with Microsoft Sentinel.
Manage a security operations environment (25–30%)
Ingest data sources in Microsoft Sentinel
Plan and Configure Collection of Windows Security Events Using Data Collection Rules
When planning and configuring the collection of Windows Security events, it is essential to understand the different methods and connectors available to stream events to Microsoft Sentinel. Data Collection Rules (DCRs) play a crucial role in this process, allowing for the management of collection settings at scale and the ability to build custom filters for precise event ingestion.
Windows Event Forwarding (WEF)
Windows Event Forwarding (WEF) is a method that involves configuring a Windows Event Collector device to receive events from Windows devices. The collector device then forwards these events to Microsoft Sentinel using the Windows Forwarded Events connector. This approach is beneficial for organizations that prefer not to install agents on each Windows device https://learn.microsoft.com/en-us/training/modules/connect-windows-hosts-to-azure-sentinel/2-plan-for-windows-hosts-security-events-connector .
Data Collection Rules (DCRs)
DCRs define the data to be collected from each agent. They offer two distinct advantages:
Manage Collection Settings at Scale: DCRs are independent of the workspace and the virtual machine, allowing for unique, scoped configurations for subsets of machines. They can be defined once and reused across different machines and environments https://learn.microsoft.com/en-us/training/modules/connect-windows-hosts-to-azure-sentinel/2a-configure-data-collection-rules .
Build Custom Filters: DCRs enable the creation of custom filters to select the exact events to ingest. The Azure Monitor Agent uses these rules to filter data at the source, ensuring that only the desired events are ingested https://learn.microsoft.com/en-us/training/modules/connect-windows-hosts-to-azure-sentinel/2a-configure-data-collection-rules .
Configuring DCRs
To configure DCRs for Windows Security events, follow these steps:
- Navigate to Microsoft Sentinel and select ‘Data connectors’.
- Choose the ‘Windows Security Events via AMA connector’ and open the connector page.
- Ensure you have the necessary permissions as outlined in the prerequisites section.
- Under ‘Configuration’, select ‘+Add data collection rule’ to start the wizard.
- Provide a rule name and specify the subscription and resource group for the DCR.
- Add resources (machines) to which the DCR will apply. This can include Azure virtual machines and Azure Arc-enabled servers.
- On the ‘Collect’ tab, choose the type of events to collect: All security events, Common, Minimal, or Custom. Custom collection allows for specifying logs or filtering events using XPath queries.
- Review the settings and create the DCR once validation is passed https://learn.microsoft.com/en-us/training/modules/connect-windows-hosts-to-azure-sentinel/2a-configure-data-collection-rules .
Event Collection Options
The following event collection options are available:
- All Events: Streams all Windows security and AppLocker events.
- Common: Streams a standard set of events for auditing, including a full user audit trail.
- Minimal: Streams a small set of events that might indicate potential threats, without a full audit trail.
- None: Disables the connector https://learn.microsoft.com/en-us/training/modules/connect-windows-hosts-to-azure-sentinel/2b-connect-windows-hosts .
Additional Information
For more detailed information on configuring Windows Security Events connectors and DCRs, you can refer to the following resources:
By following these guidelines, you can effectively plan and configure the collection of Windows Security events to enhance your organization’s security posture and operational capabilities within Microsoft Sentinel.
Manage a security operations environment (25–30%)
Ingest data sources in Microsoft Sentinel
Configure Threat Intelligence Connectors
Threat intelligence connectors are essential for enhancing the capabilities of Microsoft Sentinel by allowing it to ingest threat indicators from various sources. These connectors enable security analysts to detect, prioritize, and respond to known threats more effectively. Below is a detailed explanation of how to configure different types of threat intelligence connectors in Microsoft Sentinel.
TAXII Connector
The TAXII connector allows Microsoft Sentinel to integrate with TAXII 2.0 and 2.1 data sources. To configure the TAXII connector:
- In the Azure portal, navigate to Microsoft Sentinel > Data connectors.
- Select the Threat Intelligence - TAXII connector.
- On the preview pane, select Open connector page.
- Enter the required information such as Friendly name, API root URL, Collection ID, Username, and Password.
- Click Add to establish the connection https://learn.microsoft.com/en-us/training/modules/connect-threat-indicators-to-azure-sentinel/3-connect-threat-intelligence-taxii-connector .
Threat Intelligence Platforms Connector
For integrating Threat Intelligence Platform (TIP) products:
- Register an application in Microsoft Entra ID to obtain an application ID, secret, and tenant ID.
- Configure API permissions for the application by adding the ThreatIndicators.ReadWrite.OwnedBy permission.
- Obtain admin consent for the application from your Microsoft Entra tenant administrator.
- Configure your TIP product or app to send indicators to Microsoft Sentinel using the registered application’s credentials.
- In the Azure portal, navigate to Microsoft Sentinel > Data connectors and select the Threat Intelligence Platforms (Preview) connector.
- Click Open connector page, then Connect to finalize the setup https://learn.microsoft.com/en-us/training/modules/connect-threat-indicators-to-azure-sentinel/4-connect-threat-intelligence-platforms-connector .
Upload Indicators API
To use the Microsoft Graph Security tiIndicators API for direct integration:
- Follow the same initial steps as for the TIP connector to register an application and configure API permissions.
- Set up your application or TIP product to send indicators directly to Microsoft Sentinel through the API.
- Specify the action as “alert” and target the product as Microsoft Sentinel https://learn.microsoft.com/en-us/training/modules/connect-threat-indicators-to-azure-sentinel/4-connect-threat-intelligence-platforms-connector .
MISP Connector
While the retrieved documents do not provide specific steps for configuring a MISP (Malware Information Sharing Platform & Threat Sharing) connector, the general process would involve:
- Setting up a MISP instance and obtaining the necessary API credentials.
- Configuring Microsoft Sentinel to connect to the MISP instance using the provided credentials.
- Mapping the MISP attributes to the corresponding fields in Microsoft Sentinel to ensure proper ingestion of threat indicators.
For additional information on configuring threat intelligence connectors in Microsoft Sentinel, you can refer to the following URLs:
Please note that the URLs provided are for reference and additional information; they should not be included in the study guide.
Manage a security operations environment (25–30%)
Ingest data sources in Microsoft Sentinel
Create Custom Log Tables in the Workspace to Store Ingested Data
When working with Azure Monitor Logs, it’s often necessary to ingest custom data that doesn’t fit into any of the predefined log categories. To accommodate this data, you can create custom log tables in your Log Analytics workspace. These tables allow you to store, manage, and analyze data that is specific to your organization’s needs.
Steps to Create Custom Log Tables:
Identify Data Sources: Determine the sources of the data you wish to ingest. This could be anything from text files to data streams from applications or other cloud services https://learn.microsoft.com/en-us/credentials/certifications/resources/study-guides/sc-200 .
Configure Data Collection: Use the Data Collection Rule (DCR)-based custom logs API to configure how data is collected and sent to your Log Analytics workspace. This involves specifying the data source, format, and frequency of data collection https://learn.microsoft.com/en-us/training/modules/create-manage-azure-sentinel-workspaces/7-configure-logs .
Define Table Schema: When creating a custom log table, you need to define the schema that matches the structure of your data. This includes the columns and data types that will be used to store your data in the table https://learn.microsoft.com/en-us/credentials/certifications/resources/study-guides/sc-200 .
Ingest Data: After setting up the collection and defining the schema, ingest the data into the custom log table. The data will be stored in the workspace and will be available for querying and analysis https://learn.microsoft.com/en-us/credentials/certifications/resources/study-guides/sc-200 .
Query and Analyze Data: Use Kusto Query Language (KQL) to query and analyze the data in your custom log tables. You can create complex queries to gain insights from your data https://learn.microsoft.com/en-us/azure/azure-app-configuration/monitor-app-configuration .
Manage Access and Retention: Configure access controls to manage who can view or modify the data in the custom log tables. Also, set up retention policies to determine how long the data should be kept in the workspace.
Additional Information:
Basic Logs: It’s important to note that Basic Logs are currently in Preview and can be configured for certain tables. This feature allows for cost-effective storage of high-volume logs that don’t require the full functionality of Analytics tables https://learn.microsoft.com/en-us/training/modules/create-manage-azure-sentinel-workspaces/7-configure-logs .
Azure Monitor Logs Schema: For information on the common schema used by Azure Monitor Logs, refer to the Azure Monitor resource log schema documentation https://learn.microsoft.com/en-us/azure/application-gateway/monitor-application-gateway .
Query Examples: For sample Kusto queries that can be used to monitor resources, see the Azure Monitor Logs documentation https://learn.microsoft.com/en-us/azure/azure-app-configuration/monitor-app-configuration .
By creating custom log tables, you can extend the capabilities of Azure Monitor Logs to fit your specific monitoring and analysis needs. This flexibility allows for a more tailored approach to managing and understanding the data generated by your applications and services.
For further details on creating and managing custom log tables, as well as writing Kusto queries, you can refer to the following resources:
- Azure Monitor Log Table Reference: Azure Monitor Log Table Reference https://learn.microsoft.com/en-us/azure/application-gateway/monitor-application-gateway-reference .
- Log Analytics Documentation: Log query scope and time range in Azure Monitor Log Analytics https://learn.microsoft.com/en-us/azure/azure-app-configuration/monitor-app-configuration .
- Common Schema Documentation: Common and service-specific schema for Azure Resource Logs https://learn.microsoft.com/en-us/azure/application-gateway/monitor-application-gateway .
Configure protections and detections (15–20%)
Configure protections in Microsoft Defender security technologies
Configure Policies for Microsoft Defender for Cloud Apps
Microsoft Defender for Cloud Apps is a Cloud Access Security Broker (CASB) that operates as an intermediary between users and cloud services, allowing organizations to enforce security policies and monitor their cloud environment. To effectively use Microsoft Defender for Cloud Apps, it is essential to configure policies that will help protect against threats and control data in real-time.
Investigating and Remediating Threats
Defender for Cloud Apps provides capabilities to investigate, respond, and remediate threats across various Microsoft services, including Teams, SharePoint Online, OneDrive, and email through Microsoft Defender for Office 365. It also allows for the investigation and response to alerts generated by Data Loss Prevention (DLP) and insider risk policies https://learn.microsoft.com/en-us/credentials/certifications/resources/study-guides/sc-200 .
App Discovery and Management
The platform enables the discovery and management of apps using its capabilities. This is crucial for identifying and mitigating security risks associated with cloud app usage within an organization https://learn.microsoft.com/en-us/credentials/certifications/resources/study-guides/sc-200 .
Anomaly Detection Policies
Anomaly detection policies in Microsoft Defender for Cloud Apps are designed to detect a range of security issues, helping to identify unusual behavior that may indicate a security threat https://learn.microsoft.com/en-us/training/modules/microsoft-cloud-app-security/detect-threats .
Conditional Access App Control
Conditional Access App Control is a feature that integrates with identity providers to protect data and devices with access and session controls. It allows for real-time monitoring and control over user app access and sessions. By setting conditions in Microsoft Entra Conditional Access, organizations can enforce access and session controls selectively based on user identity, cloud apps, and location or network https://learn.microsoft.com/en-us/training/modules/microsoft-cloud-app-security/conditional-access-app-control .
Access and Session Policies
Within the Defender for Cloud Apps portal, access and session policies can be used to refine filters and set actions for user activities. These policies are crucial for maintaining control over how users interact with cloud apps and ensuring that data is protected in accordance with organizational policies https://learn.microsoft.com/en-us/training/modules/microsoft-cloud-app-security/conditional-access-app-control .
Integration with Microsoft Solutions
Microsoft Defender for Cloud Apps is designed to integrate seamlessly with other Microsoft solutions, providing a centralized management experience and innovative automation capabilities. This integration helps in identifying and combating cyberthreats across both Microsoft and third-party cloud services https://learn.microsoft.com/en-us/training/modules/microsoft-cloud-app-security/cloud-app-security-framework .
Integration with Microsoft Defender for Identity
Integrating Microsoft Defender for Cloud Apps with Microsoft Defender for Identity allows for visibility into on-premises activities and provides advanced insights by combining alerts and suspicious activities across cloud and on-premises environments. This integration also enables policies from Microsoft Defender for Identity to appear on the Defender for Cloud Apps policies page https://learn.microsoft.com/en-us/training/modules/m365-threat-safeguard/integrate-microsoft-tools .
For additional information on configuring policies for Microsoft Defender for Cloud Apps, you can refer to the following resources:
- Microsoft Defender for Cloud Apps documentation
- Conditional Access App Control in Microsoft Defender for Cloud Apps
- Anomaly detection policies in Microsoft Defender for Cloud Apps
By configuring and utilizing these policies, organizations can enhance their security posture and protect against potential threats in their cloud environments.
Configure protections and detections (15–20%)
Configure protections in Microsoft Defender security technologies
Configure Policies for Microsoft Defender for Office 365
Microsoft Defender for Office 365 is a comprehensive solution designed to help organizations protect their enterprise environment from a variety of threats. Configuring policies in Microsoft Defender for Office 365 is a critical step in establishing a robust security posture. Here’s a detailed explanation of how to configure these policies:
1. Accessing the Microsoft 365 Defender Portal
To configure policies for Microsoft Defender for Office 365, security teams should begin by accessing the Microsoft 365 Defender portal. This is the centralized interface where all policy configurations are managed.
2. Defining Protection Policies
Within the portal, security teams can define protection policies that determine the behavior and level of protection against predefined threats. These policies are highly flexible and can be set at various levels, including user, organization, recipient, and domain levels https://learn.microsoft.com/en-us/training/modules/m365-threat-remediate/configure-protect-detect .
3. Regular Policy Review
It is important to review these policies regularly to adapt to new threats and challenges that emerge daily. This ensures that the organization’s defenses remain current and effective https://learn.microsoft.com/en-us/training/modules/m365-threat-remediate/configure-protect-detect .
4. Anti-Phishing Policies
Microsoft Defender for Office 365 includes anti-phishing policies that check incoming messages for indicators of phishing attempts. These policies utilize multiple machine learning models to analyze messages and take action based on the configured policies. When creating an anti-phishing policy, settings such as user and domain protection, actions for protected users, safety tips, trusted senders, and anti-spoofing settings can be configured https://learn.microsoft.com/en-us/training/modules/m365-threat-remediate/configure-protect-detect .
5. Safe Attachments Policy
The Safe Attachments policy in Microsoft Defender for Office 365 protects against unknown malware and viruses by routing messages and attachments without known signatures to a special environment for analysis. Here, various techniques are used to detect malicious intent. If no suspicious activity is found, the message is released for delivery https://learn.microsoft.com/en-us/training/modules/m365-threat-remediate/configure-protect-detect .
6. Impacted Assets
It is also crucial to understand how assets are impacted by threats. The Impacted assets tab in the Microsoft Defender portal lists endpoints with unresolved alerts and mailboxes that have received messages triggering alerts. This helps in identifying and responding to threats in a timely manner https://learn.microsoft.com/en-us/training/modules/mitigate-incidents-microsoft-365-defender/11-analyze-threat-analytics .
For additional information on configuring policies for Microsoft Defender for Office 365, please refer to the following resources:
- Microsoft Defender for Office 365 in the Microsoft 365 Defender portal
- Anti-phishing policies in Microsoft Defender for Office 365
- Safe Attachments policy in Microsoft Defender for Office 365
By following these guidelines and utilizing the provided resources, organizations can effectively configure policies to protect against a wide range of threats with Microsoft Defender for Office 365.
Configure protections and detections (15–20%)
Configure protections in Microsoft Defender security technologies
Configure Security Policies for Microsoft Defender for Endpoints, including Attack Surface Reduction (ASR) Rules
When configuring security policies for Microsoft Defender for Endpoints, it is crucial to understand the role of Attack Surface Reduction (ASR) rules. ASR rules are designed to prevent actions that malware often abuses to compromise devices and networks. Here’s a step-by-step guide on how to configure these policies:
Access the Microsoft 365 Defender Portal: To begin, you need to access the Microsoft 365 Defender portal. Ensure you have the necessary administrative privileges, such as being a global administrator or security administrator.
Navigate to Endpoint Security: Once in the portal, navigate to the ‘Endpoint security’ section. This is where you can manage various security policies related to Microsoft Defender for Endpoints.
Manage ASR Rules: Within the Endpoint security section, look for the ‘Attack surface reduction’ policy. Here you can manage and configure ASR rules. ASR rules help reduce the attack surface of your applications and services running on the endpoint.
Create or Edit a Policy: You can either create a new policy or edit an existing one. When creating or editing a policy, you will be able to select which ASR rules to enable. Each rule targets specific behaviors malware typically exploits.
Configure ASR Rule Settings: For each ASR rule, you can configure its settings. You can set the rule to ‘Block’, ‘Audit’, or ‘Warn’. ‘Block’ will prevent the behavior, ‘Audit’ will allow the behavior but record it for review, and ‘Warn’ will allow the behavior but notify the user.
Assign the Policy: After configuring the ASR rules, assign the policy to the appropriate device groups within your organization. Ensure that the policy targets the devices that require protection.
Monitor and Review: Regularly monitor the effectiveness of your ASR rules through the security reports in the Microsoft 365 Defender portal. Review the audit data and adjust your policies as needed to ensure optimal protection.
For additional information on configuring security policies and ASR rules in Microsoft Defender for Endpoints, you can refer to the following resources:
Attack Surface Reduction (ASR) Rules: Learn more about ASR rules and how to configure them in the Microsoft Defender for Endpoints documentation. URL: Microsoft Defender for Endpoint ASR rules
Endpoint Security in Microsoft 365 Defender: Explore the endpoint security section in the Microsoft 365 Defender portal to manage your security policies. URL: Endpoint security in Microsoft 365 Defender
Manage Device Groups: Understand how to configure and manage device groups for targeted policy application. URL: Manage device groups in Microsoft Defender for Endpoint
By following these steps and utilizing the provided resources, you can effectively configure security policies for Microsoft Defender for Endpoints, including the implementation of ASR rules to enhance your organization’s security posture.
Configure protections and detections (15–20%)
Configure protections in Microsoft Defender security technologies
Configure Cloud Workload Protections in Microsoft Defender for Cloud
When configuring cloud workload protections in Microsoft Defender for Cloud, it is essential to follow a structured approach to ensure that Azure and hybrid cloud workloads are adequately protected. Below are the steps and considerations for setting up workload protections:
- Plan and Configure Settings:
- Begin by selecting the target subscriptions and workspaces that will be under the protection of Microsoft Defender for Cloud https://learn.microsoft.com/en-us/credentials/certifications/resources/study-guides/sc-200 .
- Ensure that the correct roles are configured to manage and monitor the security policies and alerts within Microsoft Defender for Cloud https://learn.microsoft.com/en-us/credentials/certifications/resources/study-guides/sc-200 .
- Enable Protection Plans:
- Activate Microsoft Defender for Cloud plans to extend protection services to various cloud workloads https://learn.microsoft.com/en-us/credentials/certifications/resources/study-guides/sc-200 .
- This includes enabling threat protection for services such as Azure SQL Database, Azure Storage, Azure Virtual Machines, and more.
- Automated Onboarding:
- Configure automated onboarding of Azure resources to ensure that all new resources are automatically protected as they are added to your environment https://learn.microsoft.com/en-us/credentials/certifications/resources/study-guides/sc-200 .
- Connect Resources with Azure Arc:
- Utilize Azure Arc to connect and manage compute resources across your hybrid environment, including those outside of Azure https://learn.microsoft.com/en-us/credentials/certifications/resources/study-guides/sc-200 .
- This allows for a unified security management experience and extends Defender for Cloud’s protections to non-Azure resources.
- Connect Multi-Cloud Resources:
- Use Environment settings to connect resources from other cloud providers, ensuring that multi-cloud resources are also protected under Microsoft Defender for Cloud https://learn.microsoft.com/en-us/credentials/certifications/resources/study-guides/sc-200 .
- Workload-Specific Protections:
- For open-source relational databases such as Azure Database for PostgreSQL, Azure Database for MySQL, and Azure Database for MariaDB, enable the specific Defender for Cloud plan to receive alerts on anomalous database access and query patterns, as well as suspicious activities https://learn.microsoft.com/en-us/training/modules/understand-azure-defender-cloud-workload-protection/5-understand-azure-defender-for-sql .
- Assess and Recommend:
- Regularly assess the security posture of your cloud workloads and receive recommendations for improving protection based on Microsoft Defender for Cloud’s continuous security assessment capabilities https://learn.microsoft.com/en-us/credentials/certifications/resources/study-guides/sc-200 .
- Monitor and Respond to Threats:
- Monitor the security alerts dashboard for potential threats and take appropriate actions based on the alerts and recommendations provided by Microsoft Defender for Cloud https://learn.microsoft.com/en-us/training/modules/what-is-azure-defender/7-summary-resources https://learn.microsoft.com/en-us/training/modules/understand-azure-defender-cloud-workload-protection/14-summary-resources .
- Security Posture Management:
- Use Defender for Cloud as a tool for security posture management to harden your resources, track your security posture, and protect against cyberattacks https://learn.microsoft.com/en-us/training/modules/what-is-azure-defender/3-understand-azure-secure-center .
- Streamline Security Management:
- Leverage the native integration of Defender for Cloud for easy deployment and auto-provisioning to secure your resources by default https://learn.microsoft.com/en-us/training/modules/what-is-azure-defender/3-understand-azure-secure-center .
For additional information on configuring cloud workload protections in Microsoft Defender for Cloud, you can refer to the following resources: - Understand Azure Defender for Cloud Workload Protection - Microsoft Defender for Cloud Documentation
By following these steps, you can ensure that your cloud workloads are protected with Microsoft Defender for Cloud’s advanced security features.
Configure protections and detections (15–20%)
Configure detection in Microsoft Defender XDR
Configure and Manage Custom Detections
Custom detections are a critical component of an organization’s security posture, allowing for the identification of specific threats that are unique to the environment. By configuring and managing custom detections, security teams can tailor the detection rules to their specific needs, enhancing the overall effectiveness of their security operations.
Steps to Configure Custom Detections:
Define the Detection Logic: Utilize the Kusto Query Language (KQL) to create queries that will serve as the basis for your custom detection rules. These queries should be designed to identify the specific behaviors or patterns that indicate a potential security threat https://learn.microsoft.com/en-us/credentials/certifications/resources/study-guides/sc-200 .
Create Custom Detection Rules: In the Microsoft 365 Defender portal, navigate to the section for managing custom detections and alerts. Here, you can create new rules by specifying the KQL queries you’ve developed, along with additional parameters such as severity levels and response actions https://learn.microsoft.com/en-us/credentials/certifications/resources/study-guides/sc-200 .
Set Alert Details: Configure the alert settings by providing a name, description, and severity for the alert. This information will help security analysts quickly understand the nature of the alert when it is triggered https://learn.microsoft.com/en-us/training/modules/configure-settings-for-alerts-detections-microsoft-defender-for-endpoint/8-summary-resources .
Manage Notifications: Determine how notifications should be sent when an alert is triggered. This could include email notifications, integration with ticketing systems, or other communication channels.
Test and Refine: After configuring the custom detection rule, it is important to test its effectiveness. Monitor the alerts generated and refine the detection logic as necessary to reduce false positives and ensure that real threats are accurately identified.
Review and Update: Security threats are constantly evolving, so it is essential to regularly review and update custom detection rules to adapt to new threat patterns and tactics.
Additional Resources:
For more detailed guidance on configuring custom detections and alerts, you can refer to the following resources:
- Microsoft’s documentation on creating and managing custom detection rules: Custom Detections in Microsoft 365 Defender
- Kusto Query Language (KQL) documentation for crafting detection queries: KQL Overview
By following these steps and utilizing the available resources, security teams can effectively configure and manage custom detections to protect their organization from specific and emerging threats.
Configure protections and detections (15–20%)
Configure detection in Microsoft Defender XDR
Configure Alert Tuning
Alert tuning is a critical process in managing the effectiveness and efficiency of a security operations center (SOC). It involves adjusting the settings of alert rules to reduce false positives and ensure that the most critical threats are highlighted. Proper alert tuning helps analysts focus on genuine threats and improves the overall security posture of an organization.
When configuring alert tuning, consider the following steps:
Assess Alert Volume and Validity: Review the current volume of alerts and determine the percentage of false positives. This will help identify which alerts need tuning.
Prioritize Alerts by Severity: Use the severity levels (High, Medium, Low, or Informational) to prioritize alerts. This ensures that the most critical alerts are addressed first https://learn.microsoft.com/en-us/training/modules/analyze-data-in-sentinel/5-create-rule-from-templates .
Filter Alerts by Source: Specify the source of the alert, such as Microsoft security services, to focus on alerts relevant to your environment https://learn.microsoft.com/en-us/training/modules/analyze-data-in-sentinel/5-create-rule-from-templates .
Include or Exclude Specific Alerts: Add keywords to include or exclude alerts based on specific text in their names. This helps in refining the alerts to those that are most pertinent to your security needs https://learn.microsoft.com/en-us/training/modules/analyze-data-in-sentinel/5-create-rule-from-templates .
Utilize Analytics Rules: In Microsoft Sentinel, create and implement analytics rules from existing templates or create new rules and queries using the wizard. This allows for the customization of alert rules to better match the threat landscape and organizational requirements https://learn.microsoft.com/en-us/training/modules/analyze-data-in-sentinel/1-introduction .
Regular Review and Update: Continuously monitor the effectiveness of the tuned alerts and make adjustments as necessary. The threat landscape is always evolving, and so should your alert configurations.
For additional information on configuring alert tuning, you can refer to the following resources:
- Microsoft Sentinel Analytics: Learn how to set up analytics rules in Microsoft Sentinel to help identify and stop cyberattacks https://learn.microsoft.com/en-us/training/modules/analyze-data-in-sentinel/1-introduction .
- Microsoft 365 Defender: Understand the roles and permissions required to manage alerts and incidents across various Microsoft Defender services https://learn.microsoft.com/en-us/training/modules/mitigate-incidents-microsoft-365-defender/2-use-microsoft-security-center-portal .
- Kusto Query Language (KQL): Utilize KQL in Microsoft Sentinel for advanced detection, analysis, and reporting https://learn.microsoft.com/en-us/credentials/certifications/exams/sc-200/ .
By following these steps and utilizing the available tools and resources, you can effectively tune alerts to enhance your organization’s security operations.
Configure protections and detections (15–20%)
Configure detection in Microsoft Defender XDR
Configure Deception Rules in Microsoft Defender XDR
Deception technology is a defensive mechanism used to detect, analyze, and defend against attacks by creating traps or decoys that mimic legitimate technology assets. In the context of Microsoft Defender for Endpoint, part of the Microsoft Defender XDR (Extended Detection and Response) suite, deception rules can be configured to enhance threat detection capabilities.
To configure deception rules in Microsoft Defender XDR, follow these general steps:
Access Microsoft Defender Security Center: Begin by logging into the Microsoft Defender Security Center portal. This is the centralized management console for Microsoft Defender for Endpoint.
Navigate to Deception Tools: Within the portal, look for the section dedicated to deception tools. This might be found under the advanced features or settings menu.
Create Deception Campaigns: Set up deception campaigns by configuring decoy accounts, credentials, and devices. These decoys should resemble your real assets but are designed to lure attackers.
Customize Deception Configuration: Customize the deception configurations to match your environment’s complexity and operational needs. This includes setting up honey tokens, fake files, and configuring network decoys.
Set Alert Rules: Determine the conditions under which an alert should be triggered when a decoy is interacted with. Configure the alert settings to notify the security team of any suspicious activities.
Deploy Deception on the Network: Once the deception rules are configured, deploy them across the network. Ensure that they are strategically placed to detect lateral movements and other attack behaviors.
Monitor and Respond: Regularly monitor the alerts generated by the deception rules. Analyze the interactions with the decoys to understand the tactics, techniques, and procedures (TTPs) of the attackers.
Update and Maintain: Keep the deception rules and configurations up to date with the changing network environment and evolving threat landscape.
For additional information on configuring deception rules and using Microsoft Defender for Endpoint within the Microsoft Defender XDR framework, you can refer to the official Microsoft documentation:
Please note that the URLs provided are for reference purposes to supplement the study guide material. It is important to consult the latest Microsoft documentation for the most current information and detailed guidance on configuring deception rules in Microsoft Defender XDR.
Configure protections and detections (15–20%)
Configure detections in Microsoft Sentinel
Classify and Analyze Data by Using Entities
Entities are critical components in data classification and analysis, especially in the context of security event management. They represent key pieces of information extracted from data, such as user identities, hostnames, or IP addresses, which can be used to perform in-depth analysis and facilitate a visual investigation of incidents.
Understanding Entities
Entities are derived from query results and can be defined to represent various types of information. For example, in a security event log, entities might include:
- User Entity: Represents a user involved in an event, which could be identified by a username or account details.
- Host Entity: Represents a machine or server involved in an event, typically identified by a hostname or a unique identifier.
- IP Address Entity: Represents the network address involved in an event, which could be crucial for identifying the source or target of network activity.
Entity Mapping
In the Entity mapping section of a query rule, you can define up to five entities from your query results https://learn.microsoft.com/en-us/training/modules/analyze-data-in-sentinel/6-create-rule-from-wizard . This mapping is essential for correlating events and understanding the relationships between different data points. For instance, if an alert is triggered, the mapped entities can be used to quickly identify the relevant user or host involved, streamlining the investigation process.
Utilizing Entities for Analysis
Once entities are defined, they can be used to classify and analyze data more effectively. By grouping related events based on entities, analysts can:
- Visualize patterns of behavior or activity.
- Identify anomalies or suspicious trends.
- Investigate incidents with greater context and clarity.
Entities also play a significant role in security orchestration and automated response (SOAR) systems, where they can be used to automate certain actions based on predefined criteria.
Advanced Security Information Model (ASIM) Parsers
The Advanced Security Information Model (ASIM) parsers are used to query Microsoft Sentinel data https://learn.microsoft.com/en-us/credentials/certifications/resources/study-guides/sc-200 . ASIM aligns with the Open Source Security Events Metadata (OSSEM) common information model, which standardizes security event logs from various data sources and operating systems https://learn.microsoft.com/en-us/training/modules/data-normalization-microsoft-sentinel/2-understand . This standardization allows for predictable correlation of entities across normalized tables, making it easier for security analysts to query and analyze data.
Practical Example
A practical example of using entities in a query can be seen in Microsoft Sentinel, where a query might look like this:
AzureActivity | where OperationNameValue == "MICROSOFT.COMPUTE/VIRTUALMACHINES/DELETE" | where ActivityStatusValue == 'Success' | extend AccountCustomEntity = Caller | extend IPCustomEntity = CallerIpAddressThis query identifies successful delete operations on virtual machines and extends the results with custom entities for the account and IP address https://learn.microsoft.com/en-us/training/modules/incident-management-sentinel/6-exercise-investigate-incident .
Additional Resources
For more information on how to classify and analyze data by using entities, you can refer to the following resources:
By understanding and utilizing entities, analysts can significantly enhance their ability to classify, analyze, and respond to security events within their environment.
Configure protections and detections (15–20%)
Configure detections in Microsoft Sentinel
Configure Scheduled Query Rules, Including KQL
Scheduled query rules in Microsoft Sentinel are a powerful feature that allows security analysts to create custom alerts based on specific conditions within their security data. These rules are highly customizable and leverage the Kusto Query Language (KQL) to filter and analyze security events. Here’s a detailed explanation of how to configure scheduled query rules, including the use of KQL:
Understanding Scheduled Query Rules: Scheduled query rules run at defined intervals and execute KQL queries against the data in your Log Analytics workspace. They are designed to detect important security events and generate alerts https://learn.microsoft.com/en-us/training/modules/incident-management-sentinel/3-describe-incident-management .
Creating a Scheduled Query Rule:
- Navigate to Microsoft Sentinel in the Azure portal.
- Select Analytics.
- In the header bar, click +Create, and then choose Scheduled query rule https://learn.microsoft.com/en-us/training/modules/analyze-data-in-sentinel/6-create-rule-from-wizard .
- Alternatively, you can select a scheduled rule from the Rules and Templates list in the Analytics pane and then click Create rule in the details pane https://learn.microsoft.com/en-us/training/modules/analyze-data-in-sentinel/6-create-rule-from-wizard .
Set Rule Logic:
- On the Set rule logic tab, define the detection method by entering the KQL query. This query will filter the security data to trigger alerts and create incidents https://learn.microsoft.com/en-us/training/modules/analyze-data-in-sentinel/6-create-rule-from-wizard .
- Use the Results simulation (preview) section to test your query and ensure it returns the expected results https://learn.microsoft.com/en-us/training/modules/analyze-data-in-sentinel/6-create-rule-from-wizard .
Writing KQL Queries:
KQL is used to craft the expressions that filter security events. It’s a rich language designed to be readable and easy to understand, yet powerful enough to work with complex data https://learn.microsoft.com/en-us/training/modules/analyze-data-in-sentinel/4-analytics-rules .
A sample KQL query might look like this:
AzureActivity | where OperationName == "MICROSOFT.COMPUTE/VIRTUALMACHINES/WRITE" | where ActivityStatus == "Succeeded" | make-series dcount(ResourceId) default=0 on EventSubmissionTimestamp in range(ago(7d), now(), 1d) by CallerThis query alerts when an unusual number of resources is created, as indicated by the
dcountfunction which counts distinct resources https://learn.microsoft.com/en-us/training/modules/analyze-data-in-sentinel/6-create-rule-from-wizard .
Customization and Automation:
- Custom scheduled query rules offer the highest level of customization. You can define your own KQL code and set a schedule for the rule to run https://learn.microsoft.com/en-us/training/modules/analyze-data-in-sentinel/4-analytics-rules .
- You can also associate the rule with a Microsoft Sentinel Playbook for automated actions upon an alert https://learn.microsoft.com/en-us/training/modules/analyze-data-in-sentinel/6-create-rule-from-wizard .
Additional Resources:
- For those new to KQL or needing a refresher, the Kusto Query Language (KQL) overview is an excellent resource to learn more about the language and its capabilities https://learn.microsoft.com/en-us/training/modules/analyze-data-in-sentinel/6-create-rule-from-wizard .
By following these steps, you can effectively configure scheduled query rules in Microsoft Sentinel to monitor your environment for security threats. The use of KQL allows for precise and flexible definitions of what constitutes a security event, enabling you to tailor the rules to the specific needs of your organization.
Configure protections and detections (15–20%)
Configure detections in Microsoft Sentinel
Configure Near-Real-Time (NRT) Analytics Rules, Including KQL
Near-real-time (NRT) analytics rules in Microsoft Sentinel are designed to detect important security events and generate alerts with minimal delay. These rules are essential for responding to potential threats as quickly as possible. To configure NRT analytics rules, you will need to use the Kusto Query Language (KQL) to create queries that will run against your Log Analytics workspaces.
Steps to Configure NRT Analytics Rules:
Access Microsoft Sentinel: Navigate to Microsoft Sentinel in your Azure portal to begin the configuration process.
Create a New Rule: Within Microsoft Sentinel, locate the option to create a new analytics rule. This can typically be found under the “Analytics” section.
Select Rule Type: Choose the NRT analytics rule type. This option is specifically designed for scenarios that require immediate attention and rapid response.
Define Rule Logic with KQL: On the Set rule logic tab, you will define the detection method by specifying a KQL query. This query will filter and analyze the security data to trigger alerts and create incidents based on the criteria you set https://learn.microsoft.com/en-us/training/modules/analyze-data-in-sentinel/6-create-rule-from-wizard .
Enter Custom KQL Code: In the Rule query field, input your custom KQL code that targets the specific security events or patterns you wish to monitor. For example, you might create a query to detect an unusual number of resource creations in Azure Activity https://learn.microsoft.com/en-us/training/modules/analyze-data-in-sentinel/6-create-rule-from-wizard .
Test Your Query: Utilize the Results simulation (preview) section to simulate the results of your KQL query. This helps ensure that the query is returning the expected results before you finalize the rule https://learn.microsoft.com/en-us/training/modules/analyze-data-in-sentinel/6-create-rule-from-wizard .
Finalize and Enable the Rule: After confirming that the query works as intended, save the rule and enable it to start monitoring for the specified events in near-real-time.
Additional Resources:
For assistance with KQL query language, refer to the Kusto Query Language (KQL) overview. This resource provides comprehensive guidance on how to construct effective KQL queries https://learn.microsoft.com/en-us/training/modules/analyze-data-in-sentinel/6-create-rule-from-wizard .
To understand how to manage and use analytics rules within Microsoft Sentinel, including NRT analytics rules, explore the capabilities and configuration options detailed in the Microsoft security analytics rules documentation https://learn.microsoft.com/en-us/credentials/certifications/resources/study-guides/sc-200 .
By following these steps and utilizing the resources provided, you can effectively configure NRT analytics rules using KQL to enhance your organization’s security posture and respond to threats with greater speed and efficiency.
Configure protections and detections (15–20%)
Configure detections in Microsoft Sentinel
Manage Analytics Rules from Content Hub
Managing analytics rules from the Content Hub in Microsoft Sentinel involves several steps that ensure the effective deployment and operation of security analytics within your environment. The Content Hub is a central repository where you can find and deploy various security solutions, including analytics rules, which are essential for detecting potential security threats.
Here is a detailed explanation of how to manage analytics rules from the Content Hub:
- Accessing Content Hub:
- Navigate to the Microsoft Sentinel dashboard.
- From the navigation menu, under “Content management,” select “Content hub.”
- Exploring Available Solutions:
- The Content Hub page displays a grid of available solutions that can be searched and filtered.
- You can filter the list by selecting specific values from the filters or by entering part of a solution name or description in the Search field.
- Identifying Analytics Rules in Solutions:
- Each solution in the grid will show the categories applied to the solution and the types of content included.
- For instance, a solution might include several analytics rules, hunting queries, parsers, playbooks, and more https://learn.microsoft.com/en-us/training/modules/manage-content-microsoft-sentinel/2-use-solutions-from-content-hub .
- Installing Solutions with Analytics Rules:
- To install a solution, select it from the grid and then choose “Install.”
- Once installed, the solution’s analytics rules and other content types will be deployed to your Microsoft Sentinel workspace.
- Managing Installed Analytics Rules:
- After installation, you can manage the analytics rules by navigating to the “Analytics” section of Microsoft Sentinel.
- Here, you can view and modify the rules, adjust their settings, and tailor them to your specific needs.
- Utilizing Analytics Rules:
- Analytics rules can be used to create incidents, trigger alerts, and initiate automated responses to detected threats.
- They play a crucial role in monitoring your environment for suspicious activities and potential security breaches.
- Updating and Customizing Rules:
- You can customize the rules to better fit your environment by modifying the rule logic, severity, and other parameters.
- It’s also possible to create new custom analytics rules based on your organization’s unique requirements.
By following these steps, you can effectively manage analytics rules from the Content Hub, enhancing your security posture and ensuring that your environment is protected against threats. For additional information on managing analytics rules and other features within Microsoft Sentinel, you can refer to the official documentation provided by Microsoft:
Remember to regularly review and update your analytics rules to keep up with the evolving threat landscape and to ensure that your security measures remain effective.
Configure protections and detections (15–20%)
Configure detections in Microsoft Sentinel
Configure Anomaly Detection Analytics Rules
Anomaly detection analytics rules are essential for identifying unusual patterns in data that may indicate a security threat. These rules are designed to detect deviations from normal behavior, which can be indicative of a security incident. Here’s a detailed explanation of how to configure anomaly detection analytics rules:
Understanding Anomaly Detection Policies: Anomaly detection policies are used to monitor for atypical increases in cloud application usage, such as spikes in data downloads, uploads, transactions, and user activity. These are compared against a baseline to identify significant deviations that could trigger security alerts https://learn.microsoft.com/en-us/training/modules/microsoft-cloud-app-security/detect-threats .
Setting Up Discovery Anomaly Policies: To configure a discovery anomaly policy, you would typically:
- Select the cloud application to monitor.
- Apply filters to refine monitoring, such as application filters, data views, and start dates.
- Adjust the sensitivity to control the volume of alerts generated by the policy https://learn.microsoft.com/en-us/training/modules/microsoft-cloud-app-security/detect-threats .
Using Microsoft Sentinel’s Fusion: Microsoft Sentinel employs a Fusion correlation engine that uses machine learning to combine low-fidelity alerts from various sources into high-fidelity incidents. This engine is enabled by default and helps detect complex multistage attacks by correlating events across multiple Microsoft products https://learn.microsoft.com/en-us/training/modules/analyze-data-in-sentinel/4-analytics-rules .
Configuring Data Connectors: For effective anomaly and fusion detection, it is necessary to configure data connectors for various Microsoft products, such as Microsoft Defender for Cloud, Microsoft 365 Defender, and others. These connectors facilitate the collection of alerts that Fusion can analyze https://learn.microsoft.com/en-us/training/modules/analyze-data-in-sentinel/4-analytics-rules .
Leveraging Defender for Cloud: Defender for Cloud utilizes anomaly detection to identify threats by applying machine learning to understand normal activities and create rules that highlight outliers, which could indicate a security event https://learn.microsoft.com/en-us/training/modules/remediate-azure-defender-security-alerts/2-understand-security-alerts .
Combining Detection Methods with Defender for Cloud Apps: Defender for Cloud Apps integrates anomaly detection with user entity behavioral analytics (UEBA) and rule-based detections to monitor app usage and detect unusual behavior that could suggest ransomware or other threats https://learn.microsoft.com/en-us/training/modules/microsoft-cloud-app-security/cloud-app-security-framework .
Assessing Anomaly Rule Performance: To evaluate the effectiveness of an anomaly rule, you can review anomalies generated over the last 24 hours. This involves:
- Navigating to the Analytics section in Microsoft Sentinel.
- Filtering for Anomaly rules.
- Selecting the rule to assess and using the Kusto query language to query the anomalies.
- Analyzing the reasons for each anomaly to determine their relevance and adjust thresholds if necessary https://learn.microsoft.com/en-us/training/modules/use-entity-behavior-analytics-azure-sentinel/4a-use-anomaly-detection-analytical-rule-templates .
For additional information on configuring anomaly detection analytics rules, you can refer to the following resources: - Microsoft Cloud App Security - Microsoft Sentinel
Please note that the URLs provided are for reference purposes to supplement the study guide material.
Configure protections and detections (15–20%)
Configure detections in Microsoft Sentinel
Configure the Fusion Rule
Microsoft Sentinel employs a sophisticated correlation engine known as Fusion, which utilizes scalable machine learning algorithms to detect complex, multistage attacks. Fusion works by correlating numerous low-fidelity alerts and events from a variety of products, synthesizing them into high-fidelity, actionable incidents https://learn.microsoft.com/en-us/training/modules/analyze-data-in-sentinel/4-analytics-rules .
Key Characteristics of Fusion Rules:
Enabled by Default: Fusion is automatically enabled in Microsoft Sentinel, which means it begins working with the existing configuration without the need for initial setup https://learn.microsoft.com/en-us/training/modules/analyze-data-in-sentinel/4-analytics-rules .
Non-Customizable Logic: The underlying logic of Fusion is not exposed to users, which means you cannot customize the rule. Consequently, only one Fusion rule can be created using the provided template.
Data Connectors: For Fusion to function effectively, certain data connectors need to be configured. These include anomaly detections and alerts from various Microsoft products such as Microsoft Defender for Cloud, Microsoft Defender for Endpoint, and others. Additionally, alerts from scheduled analytics rules, which must contain kill-chain (tactics) and entity mapping information, are also required for Fusion to operate https://learn.microsoft.com/en-us/training/modules/analyze-data-in-sentinel/4-analytics-rules .
High-Fidelity Incidents: By correlating alerts from scheduled analytics rules with alerts from other systems, Fusion is capable of producing high-fidelity incidents https://learn.microsoft.com/en-us/training/modules/analyze-data-in-sentinel/4-analytics-rules .
Steps to Configure Fusion Rules:
Verify Data Connectors: Ensure that the necessary data connectors are configured and operational. This includes setting up connectors for Microsoft security products and configuring scheduled analytics rules with the appropriate kill-chain and entity mapping https://learn.microsoft.com/en-us/training/modules/analyze-data-in-sentinel/4-analytics-rules .
Enable Fusion Rule: Since Fusion is enabled by default, verify that it is active. If it has been disabled, you can re-enable it. However, there is no option to edit the Fusion rule due to its non-customizable nature.
Monitor and Review: Regularly monitor the incidents generated by Fusion and review the detection scenarios that are being updated by Microsoft to ensure that the Fusion rule is effectively identifying threats https://learn.microsoft.com/en-us/training/modules/analyze-data-in-sentinel/4-analytics-rules .
Additional Information:
For more details on configuring Fusion rules and understanding how they work within Microsoft Sentinel, you can refer to the official Microsoft documentation. This will provide you with the most up-to-date information on Fusion and its capabilities.
Please note that while configuring Fusion rules, it is important to stay informed about the latest updates from Microsoft, as the detection scenarios and requirements may evolve over time.
Note: The URLs for additional information have been omitted as per the instructions provided. However, in a study guide, it would be appropriate to include links to the official Microsoft documentation for Microsoft Sentinel and Fusion rules for readers who wish to explore the topic in greater depth.
Configure protections and detections (15–20%)
Configure detections in Microsoft Sentinel
Querying Microsoft Sentinel Data Using ASIM Parsers
When working with Microsoft Sentinel, one of the key tasks is to effectively query and analyze security data. ASIM parsers play a crucial role in this process. ASIM, or Advanced Security Information Model, is a framework designed to normalize and simplify the querying of diverse security data within Microsoft Sentinel.
Understanding ASIM Parsers
ASIM parsers are KQL (Kusto Query Language) user-defined functions that transform data from various sources into a standardized schema. This normalization allows for consistent querying across different types of data and simplifies the creation of analytics, rules, and visualizations.
How ASIM Parsers Work
- Normalization at Query Time: In Microsoft Sentinel, parsing and normalization of data occur at the time of querying. This means that when you run a query, the ASIM parsers convert the data from existing tables into a normalized format https://learn.microsoft.com/en-us/training/modules/data-normalization-microsoft-sentinel/3-use-asim-parsers .
- Using ASIM Parsers: Instead of directly querying table names, users employ ASIM parsers in their queries. This approach ensures that all data relevant to the schema is included in the query results, presented in a normalized format https://learn.microsoft.com/en-us/training/modules/data-normalization-microsoft-sentinel/3-use-asim-parsers https://learn.microsoft.com/en-us/training/modules/data-normalization-microsoft-sentinel/5-create-asim-parser .
- Creating and Managing ASIM Parsers: Users can create their own ASIM parsers or manage existing ones. This involves writing KQL functions that map data from specific sources to the normalized schemas provided by ASIM https://learn.microsoft.com/en-us/credentials/certifications/resources/study-guides/sc-200 https://learn.microsoft.com/en-us/training/modules/data-normalization-microsoft-sentinel/8-summary-resources .
Components of ASIM
- Normalized Schemas: These are predefined sets of event types with a predictable structure. Each schema specifies the fields representing an event, a normalized column naming convention, and a standard format for field values https://learn.microsoft.com/en-us/training/modules/data-normalization-microsoft-sentinel/2-understand .
- Parsers: These are the KQL functions that map existing data to the normalized schemas. Microsoft Sentinel offers a variety of out-of-the-box ASIM parsers, and additional parsers can be deployed from the Microsoft Sentinel GitHub repository https://learn.microsoft.com/en-us/training/modules/data-normalization-microsoft-sentinel/2-understand .
- Content for Each Normalized Schema: This includes analytics rules, workbooks, hunting queries, and more. The content is designed to work with any normalized data, eliminating the need to create source-specific content https://learn.microsoft.com/en-us/training/modules/data-normalization-microsoft-sentinel/2-understand .
When to Modify or Develop ASIM Parsers
There are situations where you might need to modify existing parsers or develop new ones:
- If your device fits an ASIM schema but there is no specific parser for it in Microsoft Sentinel.
- If the available ASIM parsers do not match the method or format in which your device sends events, which could be due to non-standard configurations, different device versions, or intermediary systems that collect and modify the events https://learn.microsoft.com/en-us/training/modules/data-normalization-microsoft-sentinel/5-create-asim-parser .
Additional Resources
For more information on ASIM parsers and how to use them in Microsoft Sentinel, you can refer to the following resources:
- ASIM Parsers in Microsoft Sentinel
- Creating Parameterized KQL Functions
- Microsoft Sentinel GitHub Repository for ASIM Parsers
By understanding and utilizing ASIM parsers, you can enhance your ability to work with diverse security data in Microsoft Sentinel, leading to more effective security analysis and operations.
Configure protections and detections (15–20%)
Configure detections in Microsoft Sentinel
Manage and Use Threat Indicators
Threat indicators are critical components in cybersecurity, as they provide valuable information about potential security threats. Managing and using threat indicators effectively can enhance an organization’s ability to detect, investigate, and respond to cyber threats.
Managing Threat Indicators
In Microsoft Sentinel, threat indicators can be managed efficiently through the Threat Intelligence area. This feature allows security professionals to:
- View and Search Threat Indicators: Without the need for writing complex queries, professionals can sort, filter, and search through imported threat indicators directly within the Microsoft Sentinel interface https://learn.microsoft.com/en-us/training/modules/utilize-threat-intelligence-azure-sentinel/3-manage-threat-indicators .
- Create Threat Indicators: New threat indicators can be created within Microsoft Sentinel to keep up with evolving threats. This is done by navigating to the Threat Intelligence section and using the “Add new” button to input the relevant details of the indicator https://learn.microsoft.com/en-us/training/modules/utilize-threat-intelligence-azure-sentinel/3-manage-threat-indicators .
- Tagging for Organization: Tagging threat indicators is a simple yet powerful way to group them for easier retrieval. Tags can be applied to indicators related to specific incidents, threat actors, or campaigns. It’s advisable to establish standard naming conventions for tags to maintain consistency https://learn.microsoft.com/en-us/training/modules/utilize-threat-intelligence-azure-sentinel/3-manage-threat-indicators .
Using Threat Indicators
Once threat indicators are managed properly, they can be utilized in various ways:
- Integration with Analytics Rules: Threat indicators can be integrated with analytics rules in Microsoft Sentinel to create custom alerts. These alerts can help identify ongoing attacks by using indicators of attack (IoAs) that signal potential threats in real-time https://learn.microsoft.com/en-us/training/modules/analyze-data-in-sentinel/3-azure-sentinel-analytics-overview .
- Correlation with Security Data: By correlating threat indicators with security data from various sources, organizations can gain insights into the origin of attacks, compromised resources, data loss, and the timeline of incidents.
- Threat Hunting: Threat indicators can be used in proactive threat hunting activities to search for hidden threats that may have evaded traditional security measures https://learn.microsoft.com/en-us/training/modules/analyze-data-in-sentinel/3-azure-sentinel-analytics-overview .
Additional Resources
For those looking to delve deeper into managing and using threat indicators within Microsoft Sentinel, the following resources may be helpful:
- Microsoft Sentinel Documentation: The official documentation provides comprehensive guidance on how to work with threat indicators and integrate them into your security operations.
- Kusto Query Language (KQL): Learning KQL will enable you to write advanced queries to access and analyze threat indicator data stored in Microsoft Sentinel https://learn.microsoft.com/en-us/training/modules/utilize-threat-intelligence-azure-sentinel/6-summary-resources .
By understanding and applying the management and use of threat indicators, security professionals can significantly improve their organization’s security posture and response capabilities.
Manage incident response (35–40%)
Respond to alerts and incidents in Microsoft Defender XDR
Investigating and Remediating Threats to Microsoft Teams, SharePoint Online, and OneDrive
When addressing threats to Microsoft Teams, SharePoint Online, and OneDrive, it is crucial to follow a systematic approach to ensure that the threat is properly investigated and remediated. Here is a detailed explanation of the steps involved:
- Investigation of Threats:
- Begin by identifying the nature of the threat. This could involve unauthorized access, suspicious file activities, or potential data breaches.
- Utilize the security features within Microsoft 365 to monitor and investigate activities. Look for alerts that may have been triggered by these threats.
- Examine the details provided in the alerts, which include information about the incident that led to the alert and any suspicious activities detected https://learn.microsoft.com/en-us/credentials/certifications/resources/study-guides/sc-200 .
- Responding to Alerts:
- Alerts generated by Microsoft 365 security tools provide recommendations on how to address the threat. Follow these recommendations carefully.
- For Microsoft Teams, SharePoint Online, and OneDrive, check for any compromised accounts or permissions that may have been abused.
- Review data loss prevention (DLP) policy alerts and insider risk policy alerts to determine if sensitive information has been mishandled or if there is a risk of insider threats https://learn.microsoft.com/en-us/credentials/certifications/resources/study-guides/sc-200 .
- Remediation of Threats:
- After identifying the threat, take appropriate actions to remediate it. This may include resetting compromised user credentials, revoking access permissions, or removing malicious files.
- Use Microsoft Defender for Cloud Apps to manage and remediate threats by discovering and controlling the use of cloud apps and services https://learn.microsoft.com/en-us/credentials/certifications/resources/study-guides/sc-200 .
- Prevention of Future Threats:
- Implement security best practices to prevent similar threats in the future. This may involve adjusting security policies, enhancing monitoring strategies, and educating users about security awareness.
- Automate responses to common threats in Microsoft Defender for Cloud to improve efficiency and reduce the time to remediation https://learn.microsoft.com/en-us/training/modules/remediate-azure-defender-security-alerts/8-summary-resources .
- Documentation and Reporting:
- Document the incident and the steps taken to address it. This is important for compliance purposes and for improving security posture over time.
- Alerts can be exported to Azure Sentinel or any other third-party Security Information and Event Management (SIEM) system for further analysis and reporting https://learn.microsoft.com/en-us/training/modules/understand-azure-defender-cloud-workload-protection/4-understand-azure-defender-for-storage .
- Continuous Monitoring:
- Microsoft Defender for Cloud provides a user interface to manage ongoing security incidents and alerts across protected resources, ensuring continuous monitoring and quick response to any new threats https://learn.microsoft.com/en-us/training/modules/remediate-azure-defender-security-alerts/8-summary-resources .
- Stay vigilant for unusual activities, such as anomalous access patterns to Key Vault accounts, which are detected by Microsoft Defender for Cloud and can trigger alerts https://learn.microsoft.com/en-us/training/modules/understand-azure-defender-cloud-workload-protection/7-understand-azure-defender-for-key-vault .
For additional information on how to investigate and remediate threats to Microsoft Teams, SharePoint Online, and OneDrive, you can refer to the following resources:
Please note that while URLs are provided for further reading, they should not be included in the final study guide material.
Manage incident response (35–40%)
Respond to alerts and incidents in Microsoft Defender XDR
Investigating and Remediating Threats in Email with Microsoft Defender for Office 365
Microsoft Defender for Office 365 is a comprehensive solution designed to help organizations protect their enterprise environment from a variety of threats delivered via email. Here’s a detailed explanation of how to investigate and remediate these threats:
Investigation Process
Alerts and Automated Investigation: When a potential threat is detected in an email, Microsoft Defender for Office 365 generates an alert. Security teams can use Automated Investigation and Response (AIR) capabilities to launch security playbooks automatically when an alert is triggered or manually from a view in Explorer https://learn.microsoft.com/en-us/training/modules/m365-threat-remediate/automate-investigate-remediate .
Threat Identification: The system identifies malicious emails based on various attributes such as sender, IP, domain, and URL. It also uses Safe Links URL detonation to detect weaponized URLs after delivery https://learn.microsoft.com/en-us/training/modules/m365-threat-remediate/automate-investigate-remediate .
Investigation Graph: Clicking on the investigation deep link from the alert opens the Office 365 Threat Intelligence Summary Investigation Graph, which shows all entities—emails, users, activities, and devices—that have been automatically investigated as part of the triggered alert https://learn.microsoft.com/en-us/training/modules/m365-threat-remediate/automate-investigate-remediate .
User and Device Anomalies: The investigation may reveal anomalies such as suspicious sign-ins or mass downloads of documents, which could indicate a compromised user or device https://learn.microsoft.com/en-us/training/modules/m365-threat-remediate/automate-investigate-remediate .
Remediation Actions
Automated Remediations: Microsoft Defender for Office 365 can take automated remediation actions such as blocking URLs, deleting malicious emails from mailboxes, and initiating password resets and multi-factor authentication (MFA) for compromised users https://learn.microsoft.com/en-us/training/modules/m365-threat-remediate/automate-investigate-remediate .
Manual Approval: Some remediation actions, like soft-deleting email messages or blocking URLs, may require approval from the security operations team. These actions can be found in the Actions tab under the selected investigation https://learn.microsoft.com/en-us/training/modules/m365-threat-remediate/automate-investigate-remediate .
Threat Trackers and Explorer: Threat trackers provide intelligence on cybersecurity issues, while Threat Explorer (or real-time detections) allows for the identification and analysis of recent threats. These tools enable security teams to anticipate and understand malicious attacks https://learn.microsoft.com/en-us/training/modules/m365-threat-remediate/simulate-attacks .
Attack Simulator: This tool allows security teams to run realistic attack scenarios to identify vulnerabilities within the organization, such as spear phishing and password attacks https://learn.microsoft.com/en-us/training/modules/m365-threat-remediate/simulate-attacks .
Additional Resources
- For more information on Automated Investigation and Response (AIR) capabilities, visit the AIR documentation.
- To understand the process of investigating alerts with Microsoft Defender for Office 365, refer to the Defender for Office 365 alerts.
- Explore the Summary Investigation Graph for a visual representation of the investigation process.
- Review the Threat Explorer graph to analyze threat data for your organization.
- For a detailed description of malware threats and user impact, check the malware family description.
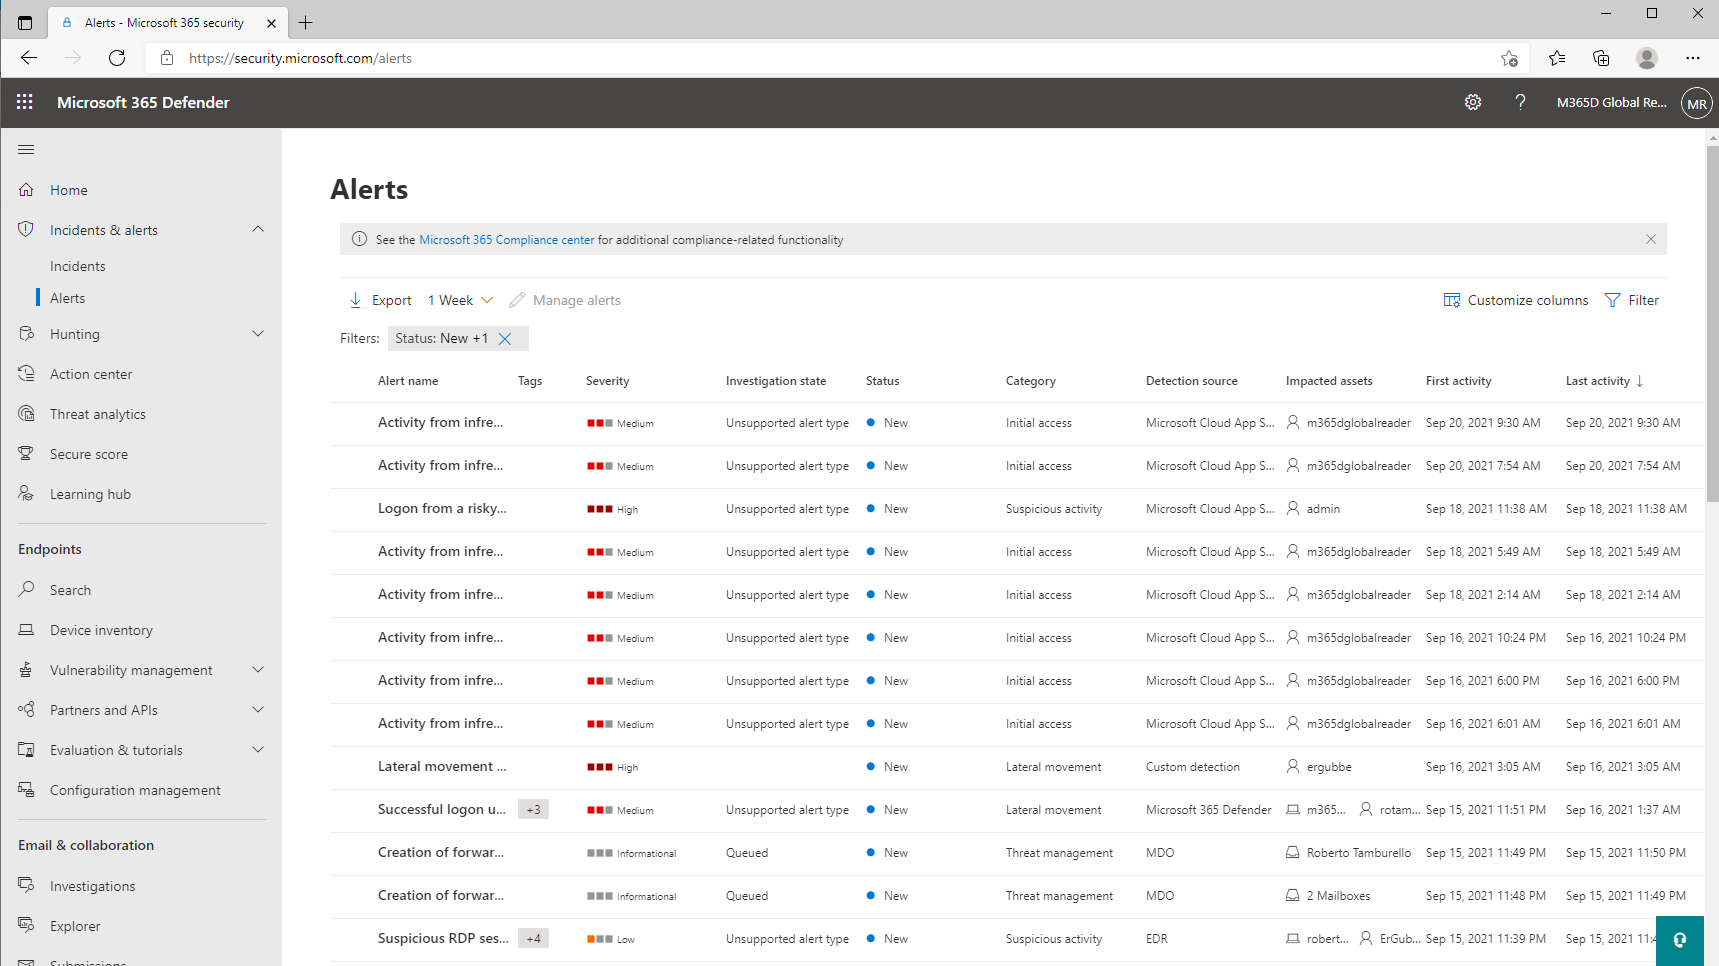
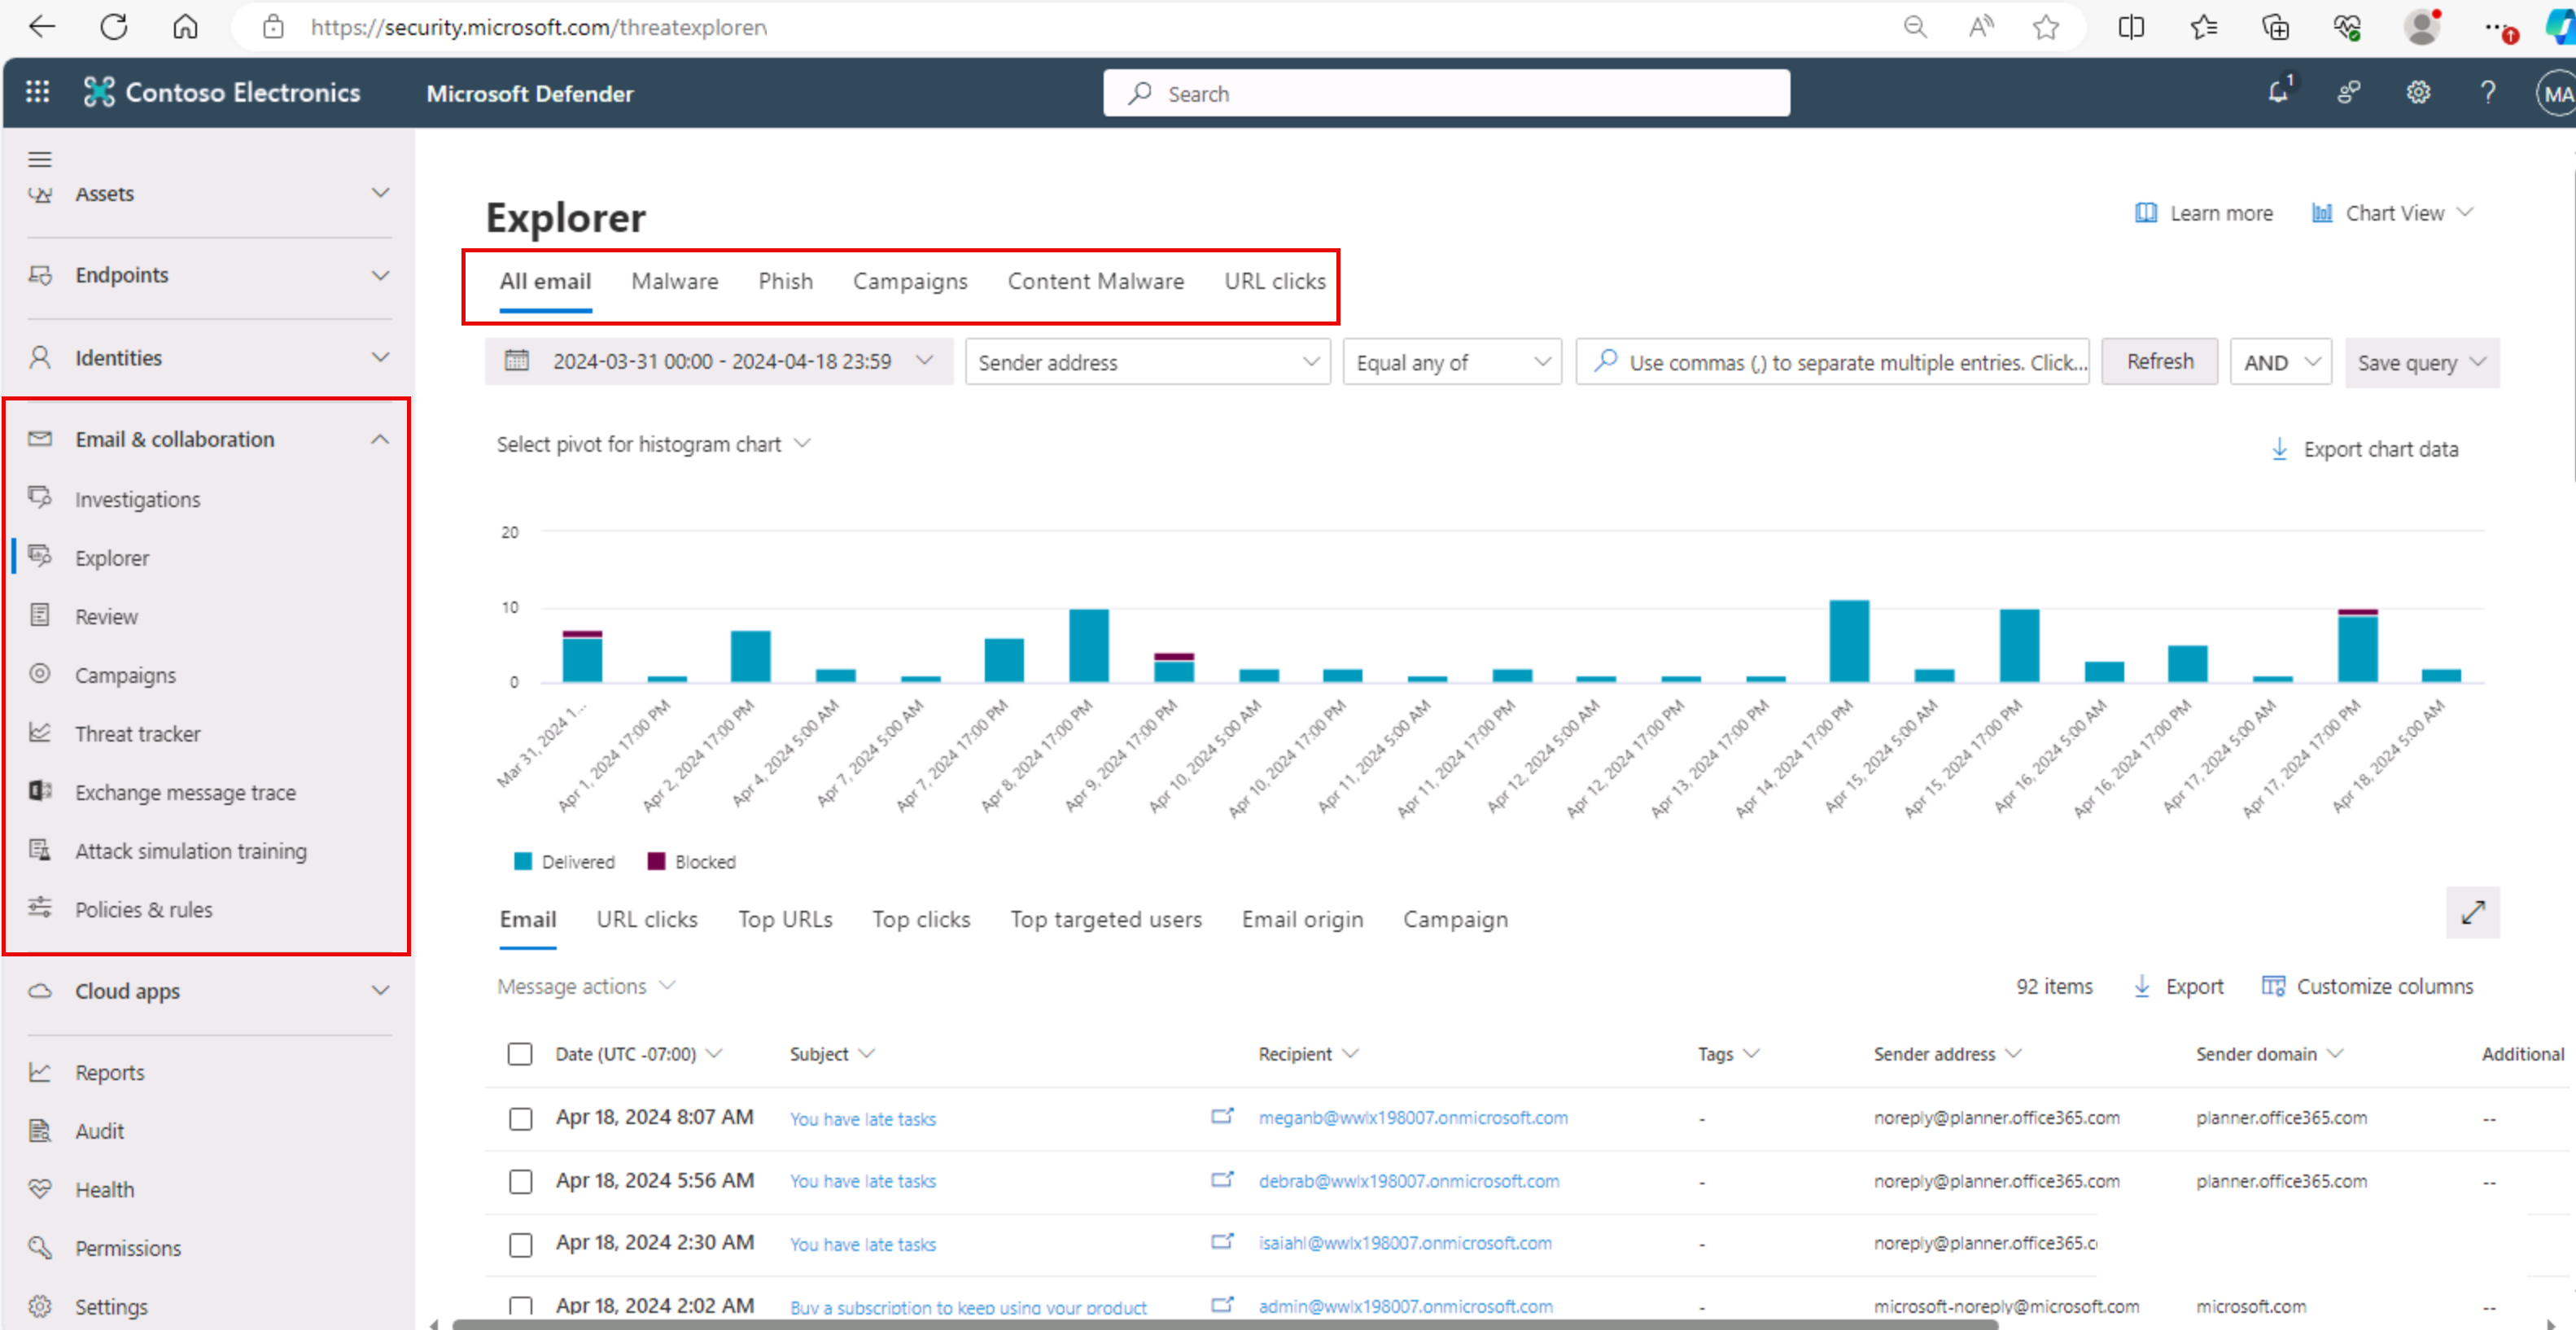
By utilizing these tools and processes, organizations can effectively investigate and remediate email threats, ensuring a robust defense against cyberattacks.
Manage incident response (35–40%)
Respond to alerts and incidents in Microsoft Defender XDR
When investigating and remediating ransomware and business email compromise (BEC) incidents identified by automatic attack disruption, it is essential to follow a structured approach. Here is a detailed explanation of the steps involved:
Investigate Ransomware and Business Email Compromise Incidents
- Incident Generation and Triage:
- Begin by configuring incident generation to ensure that potential ransomware and BEC threats are identified and alerts are generated https://learn.microsoft.com/en-us/credentials/certifications/resources/study-guides/sc-200 .
- Triage the incidents to assess their severity and impact. This involves analyzing the details of the incident, such as the affected systems and the nature of the compromise https://learn.microsoft.com/en-us/credentials/certifications/resources/study-guides/sc-200 https://learn.microsoft.com/en-us/training/modules/understand-azure-defender-cloud-workload-protection/5-understand-azure-defender-for-sql .
- Detailed Investigation:
- Investigate the incidents in-depth using tools like Microsoft Sentinel. This includes examining the alerts, which provide details of the incident that triggered them, and recommendations on how to proceed https://learn.microsoft.com/en-us/credentials/certifications/resources/study-guides/sc-200 https://learn.microsoft.com/en-us/training/modules/understand-azure-defender-cloud-workload-protection/5-understand-azure-defender-for-sql .
- Utilize the MITRE ATT&CK Enterprise matrix to align the investigation with known attack tactics and techniques, which can help in understanding the adversary’s behavior https://learn.microsoft.com/en-us/training/modules/mitigate-incidents-microsoft-365-defender/5-manage-investigate-alerts .
- Filtering Sensitive Data:
- Apply filters to determine if sensitive data is involved in the incident, which is crucial for incidents like BEC where sensitive information is often targeted https://learn.microsoft.com/en-us/training/modules/mitigate-incidents-microsoft-365-defender/3-manage-incidents .
- Prioritize incidents involving sensitive data for a quicker response, especially if Microsoft Purview Information Protection is enabled https://learn.microsoft.com/en-us/training/modules/mitigate-incidents-microsoft-365-defender/3-manage-incidents .
- Multi-Workspace Investigation:
- In cases where the organization uses multiple workspaces, investigate incidents across all workspaces to get a comprehensive view of the attack’s scope https://learn.microsoft.com/en-us/credentials/certifications/resources/study-guides/sc-200 .
Remediate Threats
- Automatic Attack Disruption:
- Utilize automatic attack disruption features to contain the threat and prevent further damage. This may involve isolating affected systems or blocking malicious communication.
- Threat Remediation Recommendations:
- Follow the recommendations provided in the alerts for remediating the threats. This could include steps like removing malware, changing compromised credentials, or updating security policies https://learn.microsoft.com/en-us/training/modules/understand-azure-defender-cloud-workload-protection/5-understand-azure-defender-for-sql https://learn.microsoft.com/en-us/training/modules/understand-azure-defender-cloud-workload-protection/4-understand-azure-defender-for-storage .
- Exporting Alerts:
- Export alerts to Azure Sentinel or any other third-party Security Information and Event Management (SIEM) system for further analysis and to enhance the organization’s overall security posture https://learn.microsoft.com/en-us/training/modules/understand-azure-defender-cloud-workload-protection/4-understand-azure-defender-for-storage .
- Post-Incident Analysis:
- After remediating the incident, conduct a post-incident analysis to identify the root cause and improve security measures to prevent similar incidents in the future.
For additional information on investigating and remediating ransomware and BEC incidents, you can refer to the following resources:
- Microsoft Sentinel documentation
- Microsoft Purview Information Protection
- MITRE ATT&CK Enterprise matrix
By following these steps and utilizing the provided resources, organizations can effectively investigate and remediate ransomware and BEC incidents to minimize their impact and enhance their security posture.
Manage incident response (35–40%)
Respond to alerts and incidents in Microsoft Defender XDR
Investigating and Remediating Compromised Entities Identified by Microsoft Purview Data Loss Prevention (DLP) Policies
When dealing with compromised entities identified by Microsoft Purview DLP policies, it is crucial to follow a systematic approach to investigate and remediate the issues effectively. Here is a detailed explanation of the steps involved:
Investigation Process
Accessing DLP Alerts: Begin by accessing the Microsoft Purview compliance portal. Navigate to the “Data loss prevention” section under Solutions and select the “Alerts” tab to view the DLP alerts dashboard https://learn.microsoft.com/en-us/training/modules/respond-to-data-loss-prevention-alerts-microsoft-365/3-investigate-data-loss-prevention-alerts-microsoft-365-compliance .
Refining Alerts: Utilize filters to refine the list of alerts and customize columns to display the properties you wish to see. Alerts can be sorted in ascending or descending order based on any column https://learn.microsoft.com/en-us/training/modules/respond-to-data-loss-prevention-alerts-microsoft-365/3-investigate-data-loss-prevention-alerts-microsoft-365-compliance .
Alert Details: Click on an individual alert to view its details. This includes the events associated with the alert and the sensitive information types detected in the content, along with their confidence levels and counts https://learn.microsoft.com/en-us/training/modules/respond-to-data-loss-prevention-alerts-microsoft-365/3-investigate-data-loss-prevention-alerts-microsoft-365-compliance .
Understanding DLP Policies: It is important to understand the DLP policies that generated the alerts. DLP policies help identify sensitive information across various locations, prevent accidental sharing, and monitor and protect sensitive data in desktop versions of Office applications https://learn.microsoft.com/en-us/training/modules/respond-to-data-loss-prevention-alerts-microsoft-365/2-understand-data-loss-prevention-alerts .
Workflow Management: After investigating the alert, you can manage it by changing its status (Active, Investigating, Dismissed, or Resolved), adding comments, and assigning it to someone in your organization. The “Management log” provides a history of workflow management https://learn.microsoft.com/en-us/training/modules/respond-to-data-loss-prevention-alerts-microsoft-365/3-investigate-data-loss-prevention-alerts-microsoft-365-compliance .
Remediation Process
Taking Action: Based on the investigation, take the necessary action for the alert. This could involve reaching out to the entity involved, securing the sensitive data, or adjusting the DLP policies to prevent future occurrences https://learn.microsoft.com/en-us/training/modules/respond-to-data-loss-prevention-alerts-microsoft-365/3-investigate-data-loss-prevention-alerts-microsoft-365-compliance .
Resolving Alerts: Once the required action is taken, set the status of the alert to “Resolved” to indicate that the issue has been addressed https://learn.microsoft.com/en-us/training/modules/respond-to-data-loss-prevention-alerts-microsoft-365/3-investigate-data-loss-prevention-alerts-microsoft-365-compliance .
Recommending Policy Changes: If the investigation reveals gaps in the DLP policies, recommend changes to enhance the protection of sensitive information and prevent similar incidents in the future https://learn.microsoft.com/en-us/training/modules/respond-to-data-loss-prevention-alerts-microsoft-365/2-understand-data-loss-prevention-alerts .
Educating Users: Help users understand DLP policies and how to comply with them without interrupting their workflow. Policy tips and email notifications can be used to guide users when they attempt to share documents containing sensitive information https://learn.microsoft.com/en-us/training/modules/respond-to-data-loss-prevention-alerts-microsoft-365/2-understand-data-loss-prevention-alerts .
Continuous Monitoring: Ensure continuous monitoring of sensitive information sharing through Office desktop programs and other Microsoft services to maintain compliance and protect against data loss https://learn.microsoft.com/en-us/training/modules/respond-to-data-loss-prevention-alerts-microsoft-365/2-understand-data-loss-prevention-alerts .
For additional information on investigating and remediating compromised entities identified by DLP policies, you can refer to the following resources:
- Microsoft Purview compliance portal: https://compliance.microsoft.com
- Data loss prevention in Microsoft 365: Learn more about DLP components
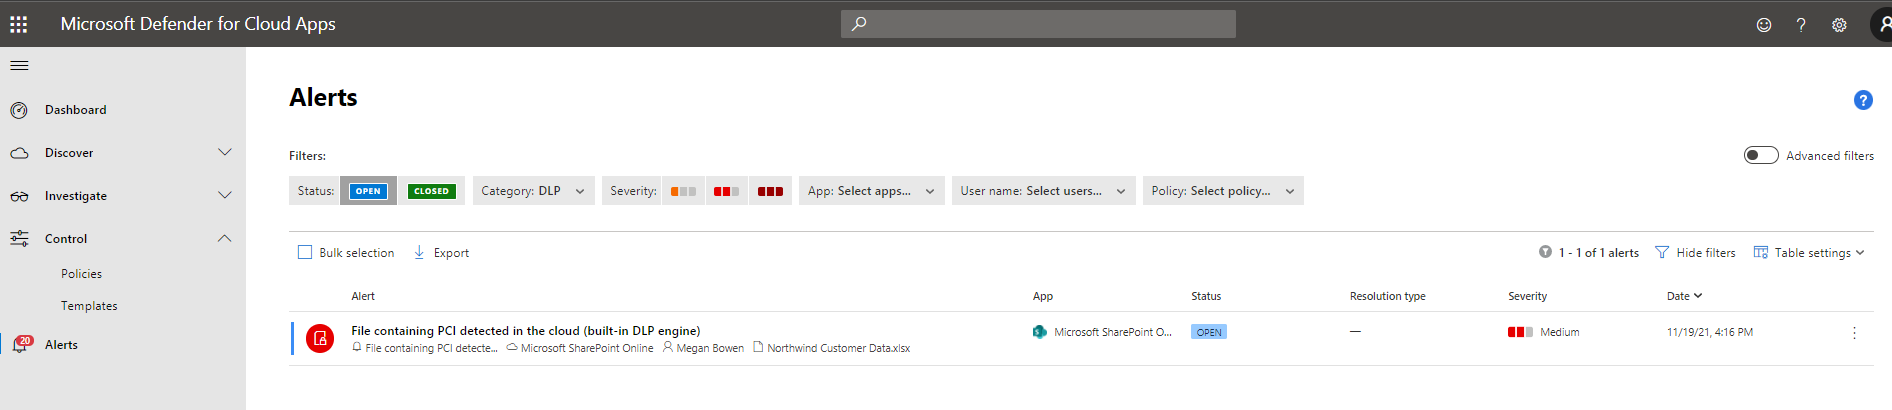
By following these steps and utilizing the provided resources, you can effectively investigate and remediate compromised entities identified by Microsoft Purview DLP policies.
Manage incident response (35–40%)
Respond to alerts and incidents in Microsoft Defender XDR
Investigating and Remediating Threats Identified by Microsoft Purview Insider Risk Policies
Microsoft Purview Insider Risk Management is a solution designed to help organizations identify, investigate, and act on risky activities within their business environment. When it comes to investigating and remediating threats identified by insider risk policies, the process involves several key steps:
Identification of Risky Activities: Utilize policy templates with pre-defined conditions to detect potential insider risks. These templates provide comprehensive activity signaling across Microsoft 365 services, offering actionable insights https://learn.microsoft.com/en-us/training/modules/m365-compliance-insider-manage-insider-risk/overview .
Alert Generation: When an insider risk is identified, alerts are generated. These alerts are based on the activities that match the conditions set in the insider risk policies https://learn.microsoft.com/en-us/credentials/certifications/resources/study-guides/sc-200 .
Investigation Process: Upon receiving an alert, the investigation process begins. This includes examining the alert details, user activities, and related content to understand the context and severity of the risk.
Evidence Collection: For certain types of alerts, such as those that require forensic evidence, clip capturing is used. This captures all user activity, and specific capturing requests and approvals are necessary. Devices involved must be onboarded with the Microsoft Purview client installed https://learn.microsoft.com/en-us/training/modules/m365-compliance-insider-manage-insider-risk/forensic-evidence .
Alert Triage: Defender for Endpoint can forward security alerts and their triage status to the Microsoft Purview compliance portal. This enhances insider risk management policies by incorporating alerts to remediate internal risks before they escalate https://learn.microsoft.com/en-us/training/modules/deploy-microsoft-defender-for-endpoints-environment/8-configure-environment-advanced-features .
Remediation Actions: After investigating, take appropriate actions to contain and mitigate the risk. This could involve reaching out to the user, adjusting policy conditions, or other remedial measures.
Workflow Management: The overall workflow for managing insider risk includes detecting, investigating, and remediating alerts. It is important to follow the established workflow to ensure a consistent approach to insider risk management https://learn.microsoft.com/en-us/training/modules/m365-compliance-insider-manage-insider-risk/overview https://learn.microsoft.com/en-us/training/modules/m365-compliance-insider-manage-insider-risk/forensic-evidence .
Policy Management: Microsoft Purview Insider Risk Management provides built-in, pre-defined policy templates that can be customized to fit the organization’s needs. It is crucial to understand these templates and ensure that all prerequisites are met before creating insider risk policies https://learn.microsoft.com/en-us/training/modules/m365-compliance-insider-manage-insider-risk/summary-knowledge-check .
For additional information on Microsoft Purview Insider Risk Management and its capabilities, you can refer to the following resources:
By following these steps and utilizing the resources provided, organizations can effectively investigate and remediate threats identified by Microsoft Purview insider risk policies, maintaining a secure and compliant environment.
Manage incident response (35–40%)
Respond to alerts and incidents in Microsoft Defender XDR
Investigate and Remediate Alerts and Incidents Identified by Microsoft Defender for Cloud
Microsoft Defender for Cloud is an essential tool for security management, designed to detect and respond to threats across Azure, hybrid, and multicloud workloads. When it comes to investigating and remediating alerts and incidents, here’s a detailed explanation of the process:
Investigating Alerts in Microsoft Defender for Cloud
- Understanding Alerts: Alerts are notifications generated by Defender for Cloud when potential threats to resources are detected. These alerts provide prioritized and detailed information to facilitate rapid investigation https://learn.microsoft.com/en-us/training/modules/remediate-azure-defender-security-alerts/2-understand-security-alerts .
- Alert Management: Users can manage and investigate security incidents and alerts across protected resources through a purpose-driven user interface https://learn.microsoft.com/en-us/training/modules/remediate-azure-defender-security-alerts/8-summary-resources .
- Alert Remediation: The alert details include actions that can be taken to remediate the threat and steps to prevent future attacks https://learn.microsoft.com/en-us/training/modules/remediate-azure-defender-security-alerts/8-summary-resources .
Remediation of Alerts in Microsoft Defender for Cloud
- Automated Responses: Microsoft Defender for Cloud allows for the automation of responses to alerts, streamlining the remediation process https://learn.microsoft.com/en-us/training/modules/remediate-azure-defender-security-alerts/8-summary-resources .
- Workflow Automation: Users can design and configure workflow automation to ensure that alerts are handled efficiently and consistently https://learn.microsoft.com/en-us/credentials/certifications/resources/study-guides/sc-200 .
- Recommendations: Defender for Cloud provides recommendations for remediating alerts and incidents, guiding users through the necessary steps to secure their resources https://learn.microsoft.com/en-us/credentials/certifications/resources/study-guides/sc-200 .
Managing Security Incidents
- Security Incidents: A security incident is a collection of related alerts. Instead of listing each alert individually, Defender for Cloud correlates different alerts and low fidelity signals into security incidents https://learn.microsoft.com/en-us/training/modules/remediate-azure-defender-security-alerts/2-understand-security-alerts .
- Incident Investigation: With security incidents, Defender for Cloud provides a single view of an attack campaign and all related alerts, enabling users to quickly understand the actions taken by the attacker and the resources affected https://learn.microsoft.com/en-us/training/modules/remediate-azure-defender-security-alerts/2-understand-security-alerts .
- Smart Alert Correlation: This feature helps in correlating alerts to form a coherent incident, making it easier to understand complex threats https://learn.microsoft.com/en-us/training/modules/remediate-azure-defender-security-alerts/2-understand-security-alerts .
Additional Resources
For more information on investigating and responding to threats in Microsoft Teams, SharePoint Online, and OneDrive, as well as email threats using Microsoft Defender for Office 365, refer to the following resources:
- Investigate and respond to threats to Microsoft Teams, SharePoint Online, and OneDrive https://learn.microsoft.com/en-us/credentials/certifications/resources/study-guides/sc-200 .
- Investigate and respond to email threats using Microsoft Defender for Office 365 https://learn.microsoft.com/en-us/credentials/certifications/resources/study-guides/sc-200 .
- Investigate and respond to alerts generated by data loss prevention (DLP) policies and insider risk policies https://learn.microsoft.com/en-us/credentials/certifications/resources/study-guides/sc-200 .
Integration with Microsoft Sentinel
- Microsoft Sentinel Integration: Microsoft Defender for Cloud can stream security alerts into Microsoft Sentinel, allowing users to view Defender data in workbooks, produce alerts, and investigate and respond to incidents https://learn.microsoft.com/en-us/training/modules/connect-microsoft-defender-365-to-azure-sentinel/4-connect-microsoft-defender-cloud-connector .
- Connector Setup: To set up the integration, users can navigate to the Data connectors page in Microsoft Sentinel, select Microsoft Defender for Cloud, and then select the Open connector page to configure the connection https://learn.microsoft.com/en-us/training/modules/connect-microsoft-defender-365-to-azure-sentinel/4-connect-microsoft-defender-cloud-connector .
By following these steps and utilizing the resources provided by Microsoft Defender for Cloud, users can effectively investigate and remediate security alerts and incidents, enhancing their overall security posture.
Manage incident response (35–40%)
Respond to alerts and incidents in Microsoft Defender XDR
Investigate and Remediate Security Risks Identified by Microsoft Defender for Cloud Apps
Microsoft Defender for Cloud Apps is a comprehensive solution designed to help organizations monitor and control data travel across their cloud services. When it comes to investigating and remediating security risks, the following steps are typically involved:
- Discovery and Investigation:
- Utilize Microsoft Defender for Cloud Apps to discover apps in use within the organization and assess their risk levels.
- Investigate alerts generated by the system, which may indicate potential security risks or policy violations https://learn.microsoft.com/en-us/credentials/certifications/resources/study-guides/sc-200 .
- For each alert, analyze the nature of the violation and determine the appropriate response. This may involve reviewing file policy violation alerts in the Alerts area of Defender for Cloud Apps https://learn.microsoft.com/en-us/training/modules/respond-to-data-loss-prevention-alerts-microsoft-365/4-investigate-data-loss-prevention-alerts-microsoft-cloud-app-security .
- Alert Management:
- Navigate to the Alerts page in Defender for Cloud Apps and select the Open status to manage resolution https://learn.microsoft.com/en-us/training/modules/respond-to-data-loss-prevention-alerts-microsoft-365/4-investigate-data-loss-prevention-alerts-microsoft-cloud-app-security .
- Filter alerts by type or severity to prioritize the most critical issues.
- Select specific alerts to view detailed information and actions that can be taken to resolve the alert https://learn.microsoft.com/en-us/training/modules/respond-to-data-loss-prevention-alerts-microsoft-365/4-investigate-data-loss-prevention-alerts-microsoft-cloud-app-security .
- Remediation Actions:
- Depending on the type of alert and the associated risk, take the necessary remediation actions. This could include revoking access to compromised accounts, adjusting permissions, or removing unauthorized apps.
- Use the information provided by the alerts to implement stronger policies and controls to prevent similar risks in the future.
- Continuous Monitoring and Improvement:
- Regularly review the security posture and adjust Defender for Cloud Apps settings to ensure ongoing protection against new and evolving threats.
- Stay informed about the latest security trends and best practices to enhance the organization’s cloud security measures.
For additional information on how to manage and respond to alerts within Microsoft Defender for Cloud Apps, please refer to the following resources:
- Respond to Data Loss Prevention alerts in Microsoft 365
- Microsoft Defender for Cloud Apps documentation
By following these steps, organizations can effectively investigate and remediate security risks identified by Microsoft Defender for Cloud Apps, ensuring the protection of their cloud environments against potential threats.
Manage incident response (35–40%)
Respond to alerts and incidents in Microsoft Defender XDR
Investigate and Remediate Compromised Identities in Microsoft Entra ID
When dealing with compromised identities, it is crucial to have a robust process for investigation and remediation to protect an organization’s assets and reputation. Microsoft Entra ID Protection is a service designed to help organizations automatically detect, investigate, and remediate identity-based risks. Here’s a detailed explanation of how to use Microsoft Entra ID Protection for these purposes:
Detecting Risks
Microsoft Entra ID Protection provides advanced detection capabilities that allow you to identify potential identity-based risks. By setting up risk policies, you can monitor for suspicious activities or anomalies that may indicate a compromised identity https://learn.microsoft.com/en-us/training/modules/protect-identities-with-aad-idp/1-introduction .
Investigating Detected Risks
Once a risk is detected, it is essential to investigate to understand the scope and impact. Microsoft Entra ID Protection offers tools to analyze and assess the risk severity, helping you to determine the appropriate response https://learn.microsoft.com/en-us/training/modules/protect-identities-with-aad-idp/1-introduction .
Remediation of Compromised Identities
After investigating, you can take action to remediate the compromised identities. Microsoft Entra ID Protection facilitates the remediation process by providing workflows that can help you resolve the issues. These workflows may include resetting passwords, enforcing multi-factor authentication, or blocking accounts if necessary https://learn.microsoft.com/en-us/training/modules/protect-identities-with-aad-idp/2-azure-ad-idp-overview .
Ensuring Future Protection
To prevent future compromises, Microsoft Entra ID Protection allows your organization to continuously monitor and protect its identities. This proactive stance helps to maintain trustworthiness and compliance with data protection legislation, which is particularly important for retail companies and other organizations that handle sensitive customer information https://learn.microsoft.com/en-us/training/modules/protect-identities-with-aad-idp/5-summary .
For more information on how to create and manage identities within Microsoft Entra, including system-assigned and user-assigned identities, you can refer to the following resources: - Managed identities for Azure resources overview https://learn.microsoft.com/en-us/azure/azure-app-configuration/overview-managed-identity . - Azure CLI command for removing a system-assigned identity https://learn.microsoft.com/en-us/azure/azure-app-configuration/overview-managed-identity .
By following these steps and utilizing the tools provided by Microsoft Entra ID Protection, organizations can effectively safeguard their identities against future risks and maintain their security posture.
Manage incident response (35–40%)
Respond to alerts and incidents in Microsoft Defender XDR
Investigate and Remediate Security Alerts from Microsoft Defender for Identity
Microsoft Defender for Identity is a security solution that utilizes your on-premises Active Directory signals to identify, detect, and investigate advanced threats, compromised identities, and malicious insider actions. When investigating and remediating security alerts from Microsoft Defender for Identity, the following steps are typically involved:
Alert Notification: Security alerts in Microsoft Defender for Identity are triggered by suspicious activities detected by the Defender for Identity sensors on your network. These alerts are categorized into phases that correspond to the typical stages of a cyber-attack kill chain, such as reconnaissance, compromised credentials, lateral movement, domain dominance, and exfiltration https://learn.microsoft.com/en-us/training/modules/m365-threat-safeguard/review-compromised-accounts .
Alert Investigation: Each alert provides detailed information, including the actors and computers involved in the threat. Alert evidence lists contain direct links to the involved users and computers, facilitating a straightforward investigation process https://learn.microsoft.com/en-us/training/modules/m365-threat-safeguard/review-compromised-accounts .
Integration with Microsoft Defender for Cloud Apps: Microsoft Defender for Identity can be integrated with Microsoft Defender for Cloud Apps to provide visibility into on-premises activities for all users in your organization. This integration allows for a combined analysis of alerts and suspicious activities across both cloud and on-premises environments https://learn.microsoft.com/en-us/training/modules/m365-threat-safeguard/integrate-microsoft-tools .
Integration with Microsoft Defender for Endpoint: For a more comprehensive threat protection solution, Microsoft Defender for Identity can be integrated with Microsoft Defender for Endpoint. This integration provides a single interface for monitoring both domain controllers and endpoints, allowing for a unified response to alerts https://learn.microsoft.com/en-us/training/modules/m365-threat-safeguard/integrate-microsoft-tools .
Remediation Actions: Upon identifying a security alert, analysts can review a timeline of events surrounding the incident, such as a Pass-The-Hash (PtH) attack, and take appropriate remediation actions. These actions may include isolating affected systems, resetting compromised credentials, and applying security patches https://learn.microsoft.com/en-us/training/modules/m365-threat-safeguard/integrate-microsoft-tools .
Automatic Incident Creation: Microsoft security solutions, including Microsoft Defender for Identity, can be configured to automatically create incidents from all generated alerts in services connected to Microsoft Sentinel. This enables organizations to be promptly alerted to high-risk threats and to take swift action https://learn.microsoft.com/en-us/training/modules/analyze-data-in-sentinel/4-analytics-rules .
Alert Management: Alerts can be filtered by severity and specific text contained in the alert name, allowing security teams to prioritize and manage alerts effectively https://learn.microsoft.com/en-us/training/modules/analyze-data-in-sentinel/4-analytics-rules .
Alert Investigation Depth: Clicking on an alert will lead to the relevant alert page, where an in-depth investigation can be conducted. This includes examining the severity, entities involved, the source of the alerts, and the reason they were linked together https://learn.microsoft.com/en-us/training/modules/mitigate-incidents-microsoft-365-defender/4-investigate-incidents .
For additional information on Microsoft Defender for Identity and its capabilities, you can refer to the following resources:
- Microsoft Defender for Identity Overview
- Microsoft Defender for Identity Alerts
- Integrate Microsoft Defender for Identity with Microsoft Defender for Cloud Apps
- Integrate Microsoft Defender for Identity with Microsoft Defender for Endpoint
By following these steps and utilizing the provided resources, security professionals can effectively investigate and remediate security alerts from Microsoft Defender for Identity, enhancing their organization’s security posture.
Manage incident response (35–40%)
Respond to alerts and incidents in Microsoft Defender XDR
Manage Actions and Submissions in the Microsoft Defender Portal
Managing actions and submissions in the Microsoft Defender portal is a critical aspect of maintaining organizational security. Here’s a detailed explanation of how to manage these elements effectively:
Submissions Portal
The Submissions portal within the Microsoft Defender portal allows administrators to submit email messages, URLs, and attachments to Microsoft for scanning. This is particularly useful in Microsoft 365 organizations with Exchange Online mailboxes https://learn.microsoft.com/en-us/training/modules/mitigate-incidents-microsoft-365-defender/7-use-action-center .
Key Features of the Submissions Portal: - Email Authentication Check: Verifies if the email authentication passed or failed upon delivery https://learn.microsoft.com/en-us/training/modules/mitigate-incidents-microsoft-365-defender/7-use-action-center . - Policy Hits: Provides information on any policies that may have influenced the email’s delivery into the tenant, overriding service filter verdicts https://learn.microsoft.com/en-us/training/modules/mitigate-incidents-microsoft-365-defender/7-use-action-center . - Payload Reputation/Detonation: Offers an up-to-date examination of URLs and attachments in the message for potential threats https://learn.microsoft.com/en-us/training/modules/mitigate-incidents-microsoft-365-defender/7-use-action-center . - Grader Analysis: Involves human graders reviewing submissions to confirm if messages are malicious or not https://learn.microsoft.com/en-us/training/modules/mitigate-incidents-microsoft-365-defender/7-use-action-center .
Important Considerations: - Not all tenants will have payload reputation/detonation and grader analysis due to compliance requirements that prevent data from leaving the tenant boundary https://learn.microsoft.com/en-us/training/modules/mitigate-incidents-microsoft-365-defender/7-use-action-center . - Submissions are subject to throttling to prevent abuse. For example, there is a maximum of 150 submissions in any 15-minute period and a limit on repeated submissions https://learn.microsoft.com/en-us/training/modules/mitigate-incidents-microsoft-365-defender/7-use-action-center .
Managing Actions
In the context of security operations, managing actions involves taking response actions, approving or dismissing pending remediation actions, and managing allowed/blocked lists for automation and indicators https://learn.microsoft.com/en-us/training/modules/deploy-microsoft-defender-for-endpoints-environment/6-create-manage-roles-for-role-based-access-control .
Permission Options for Action Management: - View Data: Allows viewing of all security operations data in the portal https://learn.microsoft.com/en-us/training/modules/deploy-microsoft-defender-for-endpoints-environment/6-create-manage-roles-for-role-based-access-control . - Active Remediation Actions: Enables taking response actions, managing remediation requests, and applying immediate mitigation actions by blocking vulnerable applications https://learn.microsoft.com/en-us/training/modules/deploy-microsoft-defender-for-endpoints-environment/6-create-manage-roles-for-role-based-access-control . - Alerts Investigation: Involves managing alerts, starting automated investigations, and managing device tags https://learn.microsoft.com/en-us/training/modules/deploy-microsoft-defender-for-endpoints-environment/6-create-manage-roles-for-role-based-access-control . - Manage Security Settings: Administrators can configure alert suppression settings, manage email notifications, and onboard/offboard devices https://learn.microsoft.com/en-us/training/modules/deploy-microsoft-defender-for-endpoints-environment/6-create-manage-roles-for-role-based-access-control .
Automated Investigations
Automated investigations are a part of managing incidents within the Microsoft Defender portal. They provide a user interface to manage and investigate security incidents and alerts across protected resources https://learn.microsoft.com/en-us/training/modules/remediate-azure-defender-security-alerts/8-summary-resources .
Capabilities of Automated Investigations: - Describe Alerts: Understanding the nature of alerts generated by Microsoft Defender for Cloud https://learn.microsoft.com/en-us/training/modules/remediate-azure-defender-security-alerts/8-summary-resources . - Remediate Alerts: Taking necessary actions to address the threats identified by alerts https://learn.microsoft.com/en-us/training/modules/remediate-azure-defender-security-alerts/8-summary-resources . - Automate Responses: Setting up automated responses to common threats to streamline the remediation process https://learn.microsoft.com/en-us/training/modules/remediate-azure-defender-security-alerts/8-summary-resources .
Role Requirements
To submit messages and files to Microsoft for analysis, individuals need to have specific roles assigned, such as Security Administrator or Security Reader in the Microsoft 365 Defender portal https://learn.microsoft.com/en-us/training/modules/mitigate-incidents-microsoft-365-defender/7-use-action-center .
For additional information on managing actions and submissions in the Microsoft Defender portal, you can refer to the official Microsoft documentation: - Manage incidents and automated investigations in the Microsoft 365 Defender portal - Manage actions and submissions in the Microsoft 365 Defender portal
Please note that the URLs provided are for reference purposes to supplement the study guide material.
Manage incident response (35–40%)
Respond to alerts and incidents identified by Microsoft Defender for Endpoint
Investigate Timeline of Compromised Devices
When investigating the timeline of compromised devices, it is crucial to understand the sequence of events that led to the compromise and the actions taken afterward. Here’s a detailed explanation of the process:
Event Timeline Analysis: The Event timeline is a critical tool that acts as a risk news feed, allowing you to track how risk is introduced into the organization through new vulnerabilities or exploits. It helps in identifying events that may impact the organization’s risk, such as new vulnerabilities that were introduced, vulnerabilities that became exploitable, and exploits that were added to an exploit kit https://learn.microsoft.com/en-us/training/modules/use-threat-vulnerability-management-microsoft-defender-for-endpoint/3-explore-vulnerabilities-devices .
Action Center and Device Timeline: The Action center displays scan information, and the device timeline includes new events, such as when an application is restricted from running or when a device is isolated from the network. This timeline is essential for understanding the chronological order of actions taken on a compromised device https://learn.microsoft.com/en-us/training/modules/perform-actions-device-microsoft-defender-for-endpoint/2-understand-device-actions https://learn.microsoft.com/en-us/training/modules/perform-actions-device-microsoft-defender-for-endpoint/2-understand-device-actions .
Isolation of Compromised Devices: In severe cases, you might need to isolate the device from the network to prevent further malicious activities by the attacker. The device isolation feature disconnects the compromised device from the network while maintaining connectivity to the Defender for Endpoint service, which continues to monitor the device. Notifications are displayed to inform the user that the device is being isolated https://learn.microsoft.com/en-us/training/modules/perform-actions-device-microsoft-defender-for-endpoint/2-understand-device-actions .
Restricting Application Execution: To contain an attack, you can stop malicious processes and restrict subsequent attempts of potentially malicious programs from running by applying a code integrity policy. This policy allows only files signed by a Microsoft-issued certificate to run, which can prevent an attacker from controlling compromised devices. The restriction can be reversed at any time https://learn.microsoft.com/en-us/training/modules/perform-actions-device-microsoft-defender-for-endpoint/2-understand-device-actions .
Antivirus Scans: As part of the response process, you can remotely initiate an antivirus scan to help identify and remediate malware on a compromised device. You can choose between a quick or full scan and add comments before confirming the scan. The device timeline will reflect that a scan action was submitted, and any detections will be shown in the Microsoft Defender AV alerts https://learn.microsoft.com/en-us/training/modules/perform-actions-device-microsoft-defender-for-endpoint/3-run-microsoft-defender-antivirus-scan-on-devices .
Observed in Organization Tab: This tab provides a chronological view of the events and associated alerts observed on the URL. It includes a timeline and a table listing event details, such as the time, device, and a brief description of what happened. This information is crucial for piecing together the timeline of a compromised device https://learn.microsoft.com/en-us/training/modules/perform-evidence-entities-investigations-microsoft-defender-for-endpoint/5-investigate-domain .
For additional information on these features and how to use them, you can refer to the following resources:
- Event Timeline and Risk News Feed
- Action Center and Device Timeline
- Device Isolation
- Application Execution Restrictions
- Antivirus Scans
- Observed in Organization Tab
By understanding and utilizing these tools and resources, you can effectively investigate the timeline of compromised devices and take appropriate actions to mitigate risks and prevent further damage.
Manage incident response (35–40%)
Respond to alerts and incidents identified by Microsoft Defender for Endpoint
Perform Actions on the Device, Including Live Response and Collecting Investigation Packages
When managing security incidents, it is crucial to have the ability to perform immediate actions on affected devices. Microsoft Defender for Endpoint offers several capabilities that enable security teams to respond to threats effectively.
Live Response
Live response is a feature that provides security operations teams with instant access to a device through a remote shell connection. This capability is essential for in-depth investigations and immediate response actions to contain threats https://learn.microsoft.com/en-us/training/modules/perform-actions-device-microsoft-defender-for-endpoint/5-initiate-live-response-session .
Basic and Advanced Commands: Security analysts can execute both basic and advanced commands during a live response session. Basic commands allow for read-only access, excluding file copy and execution, while advanced commands enable actions such as downloading files from the device, uploading files to the device, and executing scripts https://learn.microsoft.com/en-us/training/modules/deploy-microsoft-defender-for-endpoints-environment/6-create-manage-roles-for-role-based-access-control .
Remote Shell Access: The live response feature allows for a restricted remote access shell on the device, giving analysts the ability to perform investigative work directly on the device https://learn.microsoft.com/en-us/training/modules/perform-actions-device-microsoft-defender-for-endpoint/7-summary-resources .
Forensic Data Collection: Analysts can collect forensic data, run scripts, send suspicious entities for analysis, and remediate threats. This proactive approach helps in hunting for emerging threats https://learn.microsoft.com/en-us/training/modules/perform-actions-device-microsoft-defender-for-endpoint/5-initiate-live-response-session .
Collecting Investigation Packages
As part of the investigation or response process, collecting an investigation package from a device is a critical step. This package helps to identify the current state of the device and understand the tools and techniques used by the attacker https://learn.microsoft.com/en-us/training/modules/perform-actions-device-microsoft-defender-for-endpoint/4-collect-investigation-package-from-devices .
Initiating Package Collection: To collect an investigation package, select the “Collect investigation package” option from the response actions at the top of the device page. You will need to provide a reason for this action and confirm it. The package will then be downloaded as a zip file https://learn.microsoft.com/en-us/training/modules/perform-actions-device-microsoft-defender-for-endpoint/4-collect-investigation-package-from-devices .
Accessing the Package: Alternatively, you can access the package through the “Action center” on the device page. In the Action center fly-out, you can select the package available for download https://learn.microsoft.com/en-us/training/modules/perform-actions-device-microsoft-defender-for-endpoint/4-collect-investigation-package-from-devices .
Contents of the Package: The investigation package typically contains various folders with data that can be analyzed to assess the device’s state and the incident’s details.
For additional information on how to use Microsoft Defender for Endpoint for performing actions on devices, including live response and collecting investigation packages, you can refer to the following resources:
- Perform actions using Microsoft Defender for Endpoint
- Conduct forensics data collection using Microsoft Defender for Endpoint
- Access devices remotely using Microsoft Defender for Endpoint
Please note that the URLs provided are for reference purposes to supplement the study guide with additional information.
Manage incident response (35–40%)
Respond to alerts and incidents identified by Microsoft Defender for Endpoint
Perform Evidence and Entity Investigation
When conducting an investigation into security incidents, it is crucial to examine both the evidence and the entities involved. Here’s a detailed explanation of the process:
Investigation Details
During and after an automated investigation, investigators can access a wealth of information. By selecting the triggering alert, they can delve into the investigation details, which may include various tabs such as Investigation graph, Alerts, Devices, Evidence, Entities, and Log https://learn.microsoft.com/en-us/training/modules/mitigate-incidents-microsoft-365-defender/6-manage-automated-investigations .
Entity Behavior Analysis
The Entity behavior page is a pivotal tool for investigators. It allows them to search for specific entities or to choose from a list of entities that are already displayed. Once an entity is selected, a detailed Entity page appears, showcasing a timeline of alerts and activities related to that entity https://learn.microsoft.com/en-us/training/modules/use-entity-behavior-analytics-azure-sentinel/4-display-entity-behavior-information .
Insights from Investigation Graph
The Incident Investigation Graph is an interactive feature that provides insights. These insights are derived from the Entity behavior data and can significantly aid in understanding the context and scope of an incident https://learn.microsoft.com/en-us/training/modules/use-entity-behavior-analytics-azure-sentinel/4-display-entity-behavior-information .
Automated Investigation Expansion
Automated investigations are dynamic. If additional alerts are generated from the same device, they are incorporated into the ongoing investigation. Similarly, if the same threat is detected on other devices, those devices are also included in the investigation. This expansion is automatic unless it involves ten or more devices, in which case approval is required, and the action is listed under the Pending actions tab https://learn.microsoft.com/en-us/training/modules/mitigate-incidents-microsoft-365-defender/6-manage-automated-investigations .
Security Incidents and Incident Management
Learning about security incidents and how to manage them is essential. Microsoft Sentinel, for instance, provides tools to investigate security incidents and manage incident resolution effectively https://learn.microsoft.com/en-us/training/modules/incident-management-sentinel/1-introduction .
Entity Mapping for Visual Investigation
In the Entity mapping section, investigators can define up to five entities from their query results. These entities can then be used for in-depth analysis and are added to the query rule by selecting Add new entity. This facilitates visual investigation as these entities will appear grouped on the Incident tab. Entities often represent users, hosts, or IP addresses, providing a clear picture of the involved components https://learn.microsoft.com/en-us/training/modules/analyze-data-in-sentinel/6-create-rule-from-wizard .
For additional information on these topics, you can refer to the following resources: - Investigation details and automated investigation process - Entity behavior analysis and insights - Microsoft Sentinel incident management and investigation
Please note that the URLs provided are for reference purposes and are part of the study guide content. They should be accessed for a more comprehensive understanding of the investigation process.
Manage incident response (35–40%)
Enrich investigations by using other Microsoft tools
Investigate Threats Using Unified Audit Log
The Unified Audit Log is a critical component in the Microsoft Purview compliance portal that allows organizations to investigate threats by providing a comprehensive view of user and administrator activities across Microsoft 365 services. Here’s a detailed explanation of how to utilize the Unified Audit Log for threat investigation:
Accessing the Unified Audit Log
To begin investigating threats using the Unified Audit Log, you must have the appropriate permissions. The audit log search tool in the Microsoft Purview compliance portal is the primary interface for accessing the Unified Audit Log https://learn.microsoft.com/en-us/training/modules/investigate-threats-using-audit-in-microsoft-365-defender-microsoft-purview-standard/5-search-audit-log .
Performing Threat Hunting
Threat hunting involves proactively searching for security threats that may not be detected by automated security solutions. The Unified Audit Log enables security professionals to perform threat hunting by:
- Searching for Specific Activities: You can determine if a user has accessed a particular document or if an item was purged from a mailbox, which can be indicative of suspicious behavior https://learn.microsoft.com/en-us/training/modules/investigate-threats-using-audit-in-microsoft-365-defender-microsoft-purview-standard/5-search-audit-log .
- Analyzing Patterns: By examining the audit logs, you can identify patterns of behavior that may suggest a security threat, such as repeated access to sensitive information or unusual login times.
Required Roles and Permissions
To access the Unified Audit Log for threat investigation, certain roles and permissions are required. These roles are defined in the Microsoft 365 Defender portal and are specific to each workload. They include roles such as Security Reader, Security Admin, and Compliance Admin, among others https://learn.microsoft.com/en-us/training/modules/mitigate-incidents-microsoft-365-defender/2-use-microsoft-security-center-portal .
Using the Audit Search Tool
The audit search tool in the Microsoft Purview compliance portal is used to search the Unified Audit Log. This tool captures thousands of user and admin operations across Microsoft 365 services, which are searchable by security operations teams and compliance investigators https://learn.microsoft.com/en-us/training/modules/investigate-threats-using-audit-in-microsoft-365-defender-microsoft-purview-standard/9-summary-resources .
Search-UnifiedAuditLog Cmdlet
For those who prefer using PowerShell, the Search-UnifiedAuditLog cmdlet in Exchange Online PowerShell can be used to search for audited activities. This cmdlet is the underlying command for the audit search tool in the compliance portal https://learn.microsoft.com/en-us/training/modules/investigate-threats-using-audit-in-microsoft-365-defender-microsoft-purview-standard/9-summary-resources .
Viewing and Exporting Search Results
After conducting a search, you can view the results within the portal. Additionally, you can export the search results to a CSV file for further analysis using tools like Microsoft Excel. This exported data can be sorted and filtered to aid in the investigation process https://learn.microsoft.com/en-us/training/modules/investigate-threats-using-audit-in-microsoft-365-defender-microsoft-purview-standard/9-summary-resources .
Unified Action Center
The Unified Action Center in the Microsoft 365 Defender portal lists both pending and completed remediation actions, providing a “single pane of glass” experience for managing remediation actions across Defender for Endpoint and Defender for Office 365 https://learn.microsoft.com/en-us/training/modules/mitigate-incidents-microsoft-365-defender/7-use-action-center .
Additional Resources
For more information on how to use the Unified Audit Log for investigating threats, you can refer to the following resources:
- Microsoft Purview compliance portal: Audit Log Search Tool
- Exchange Online PowerShell: Search-UnifiedAuditLog Cmdlet
By leveraging the Unified Audit Log, organizations can enhance their threat investigation capabilities and respond more effectively to potential security incidents.
Manage incident response (35–40%)
Enrich investigations by using other Microsoft tools
Investigate Threats by Using Content Search
Content Search is a tool within Microsoft Purview that allows organizations to search for content across various Microsoft 365 services such as Exchange Online mailboxes, SharePoint Online sites, OneDrive for Business accounts, and Microsoft Teams. It is particularly useful for investigating potential threats by enabling the search and examination of items across an organization’s environment.
Performing Content Search
To utilize Content Search for threat investigation, follow these steps:
Access Content Search: Navigate to the Microsoft Purview compliance portal and select Content Search from the navigation pane.
Initiate a Search: Choose the content search you wish to perform. You can create a new search or select an existing one to refine or review.
Search Query Statistics: After running a search, you can view statistics about the search query, including the number of estimated items that matched different parts of the search query. This helps in analyzing and refining the search criteria to narrow down the scope https://learn.microsoft.com/en-us/training/modules/investigate-threats-with-content-search-in-microsoft-purview/4-view-search-results .
Exporting Search Results: Prepare the search results for exporting by selecting the “Export results” option. You can choose to export all items, only indexed items, or only unindexed items. There are also options to export content as PST files, either for each mailbox or as a single PST file, and to export individual messages in .msg format https://learn.microsoft.com/en-us/training/modules/investigate-threats-with-content-search-in-microsoft-purview/5-export-search-results .
Export Options: Configure additional export options such as enabling de-duplication for Exchange content, including versions for SharePoint files, and exporting files in a compressed folder https://learn.microsoft.com/en-us/training/modules/investigate-threats-with-content-search-in-microsoft-purview/5-export-search-results .
Download Exported Results: Once the export process is complete, you can download the exported search results from the Azure Storage location provided by Microsoft.
Additional Information
- Unified Audit Log: For a more comprehensive investigation, you can also perform threat hunting using the unified audit log, which records various activities across Microsoft 365 services https://learn.microsoft.com/en-us/credentials/certifications/resources/study-guides/sc-200 .
- Graphical Summary: A graphical summary of the estimated items returned by the search is available, providing a visual representation of the number of items that match the search criteria https://learn.microsoft.com/en-us/training/modules/investigate-threats-with-content-search-in-microsoft-purview/4-view-search-results .
For more detailed instructions and visual aids, you can refer to the following resources:
- Investigate threats with Content Search in Microsoft Purview: Content Search in Microsoft Purview
- Exporting search results in Content Search: Exporting Content Search Results
By following these steps and utilizing the provided resources, you can effectively investigate threats within your organization using Content Search.
Manage incident response (35–40%)
Enrich investigations by using other Microsoft tools
Perform Threat Hunting Using Microsoft Graph Activity Logs
Threat hunting is a proactive security exercise that involves searching through networks to detect and isolate advanced threats that evade existing security solutions. Microsoft Graph activity logs provide a wealth of information that can be utilized for threat hunting. Here’s how you can perform threat hunting using Microsoft Graph activity logs:
Understanding Microsoft Graph Activity Logs: Microsoft Graph activity logs contain a wide array of information about user activities, security alerts, and other events across Microsoft services. These logs are a valuable resource for identifying suspicious activities that could indicate a security threat.
Accessing the Logs: To access Microsoft Graph activity logs, you can use the Microsoft Graph REST API. There are two versions of the API:
- Microsoft Graph REST API v1.0
- Microsoft Graph REST API Beta (which includes APIs in preview status) https://learn.microsoft.com/en-us/training/modules/introduction-microsoft-365-threat-protection/4-explore-microsoft-security-graph .
Using the API for Threat Hunting:
The runHuntingQuery method of the Microsoft Graph API allows Security Operations Analysts to perform advanced hunting using the Kusto Query Language (KQL) https://learn.microsoft.com/en-us/training/modules/introduction-microsoft-365-threat-protection/4-explore-microsoft-security-graph .
An example of a KQL query to hunt for potential threats could be searching for events initiated by “powershell.exe”, which is commonly used in scripting attacks:
DeviceProcessEvents | where InitiatingProcessFileName =~ "powershell.exe" | project Timestamp, FileName, InitiatingProcessFileName | order by Timestamp desc | limit 2This query can be executed using a POST request to the Microsoft Graph API endpoint https://learn.microsoft.com/en-us/training/modules/introduction-microsoft-365-threat-protection/4-explore-microsoft-security-graph .
Using Graph Explorer: Graph Explorer is a tool that allows you to run hunting queries against Microsoft Graph activity logs. It provides a user-friendly interface to execute and test your KQL queries https://learn.microsoft.com/en-us/training/modules/introduction-microsoft-365-threat-protection/4-explore-microsoft-security-graph .
Analyzing the Results: After running a query, you will receive results that can be analyzed to identify potential threats. The results typically include details such as timestamps, file names, and process names, which can help in piecing together the sequence of events related to a security incident.
Integration with Microsoft Sentinel: Microsoft Sentinel can integrate with Microsoft Graph Security API data sources for monitoring, alerting, and hunting using threat intelligence. This integration allows you to send threat indicators to Microsoft Sentinel from various platforms https://learn.microsoft.com/en-us/training/modules/connect-threat-indicators-to-azure-sentinel/4-connect-threat-intelligence-platforms-connector .
Advanced Hunting: Advanced hunting is a feature that allows you to explore up to 30 days of raw data. It supports queries that check a broader data set from various Microsoft Defender solutions. To use advanced hunting, you need to enable Microsoft 365 Defender https://learn.microsoft.com/en-us/training/modules/mitigate-incidents-microsoft-365-defender/8-explore-advanced-hunting .
Additional Resources: - For more information on Microsoft Graph Security API, you can visit The Microsoft Graph Security API https://learn.microsoft.com/en-us/training/modules/introduction-microsoft-365-threat-protection/4-explore-microsoft-security-graph . - To learn more about advanced hunting and how to use it, refer to the documentation on Advanced Hunting https://learn.microsoft.com/en-us/training/modules/mitigate-incidents-microsoft-365-defender/8-explore-advanced-hunting .
By following these steps and utilizing the provided resources, you can effectively perform threat hunting using Microsoft Graph activity logs to enhance your organization’s security posture.
Manage incident response (35–40%)
Manage incidents in Microsoft Sentinel
Triage Incidents in Microsoft Sentinel
Triage is a critical step in the incident response process where analysts prioritize and categorize incidents based on their severity, impact, and urgency. In Microsoft Sentinel, triage involves several key activities:
Incident Generation: Microsoft Sentinel automatically aggregates alerts into incidents. This helps analysts to see a grouped view of related alerts that may constitute a security threat https://learn.microsoft.com/en-us/credentials/certifications/resources/study-guides/sc-200 .
Initial Assessment: The triage process begins with an initial assessment of the incident to determine its nature and scope. This may involve examining the alert details, the entities involved (such as users or IP addresses), and the timeline of events.
Prioritization: Incidents are prioritized based on factors such as the severity of the alert, the sensitivity of the affected assets, and the potential impact on the organization. This ensures that the most critical incidents are addressed first.
Investigation: A Tier 1 analyst may start a preliminary investigation using tools like the Microsoft 365 Defender console to gather more information and context about the incident. This can include looking at related events, user activities, and endpoint behaviors https://learn.microsoft.com/en-us/training/modules/introduction-microsoft-365-threat-protection/3-understand-defender-security-operations-center .
Escalation: If the incident requires advanced remediation or further investigation, it is escalated to a higher-tier analyst or team. The triage team may remain involved to learn from the investigation process, which might use Microsoft Sentinel or another SIEM for broader context https://learn.microsoft.com/en-us/training/modules/introduction-microsoft-365-threat-protection/3-understand-defender-security-operations-center .
Documentation: Throughout the triage process, analysts document their findings and actions. This documentation is crucial for maintaining a record of the incident and can be used for reporting, compliance, and improving the incident response process.
Communication: Effective communication with other teams and stakeholders is essential during triage. Analysts may need to collaborate with business stakeholders, identity administrators, Azure administrators, and endpoint administrators to secure IT systems https://learn.microsoft.com/en-us/credentials/certifications/resources/study-guides/sc-200 .
For additional information on triaging incidents in Microsoft Sentinel, you can refer to the following resources:
- Learn about security incidents and Microsoft Sentinel incident management
- Explore Microsoft Sentinel incident evidence and entities
- Use Microsoft Sentinel to investigate security incidents and manage incident resolution
By following these steps and utilizing the resources provided, analysts can effectively triage incidents in Microsoft Sentinel, ensuring a swift and organized response to security threats.
Manage incident response (35–40%)
Manage incidents in Microsoft Sentinel
Investigate Incidents in Microsoft Sentinel
When investigating incidents in Microsoft Sentinel, it is essential to understand the process and tools available to effectively manage and resolve security incidents. Microsoft Sentinel provides a comprehensive set of capabilities for incident triage, investigation, and response.
Incident Generation and Triage: An incident in Microsoft Sentinel is generated when an enabled alert is triggered. The triage process involves managing these incidents by changing their status or assigning them to individuals for further investigation https://learn.microsoft.com/en-us/training/modules/intro-to-azure-sentinel/3-how-azure-sentinel-works .
Investigation Tools: Microsoft Sentinel offers an investigation graph, which is a visual tool that helps investigators to identify the entities involved in the attack and the relationships between those entities. This graph can be accessed from the Hunting page by selecting Investigate https://learn.microsoft.com/en-us/training/modules/hunt-threats-sentinel/4-bookmarks .
Multi-Workspace Incidents: For incidents that span across multiple workspaces, Microsoft Sentinel provides the capability to investigate these incidents comprehensively, ensuring that no part of the attack is overlooked https://learn.microsoft.com/en-us/credentials/certifications/resources/study-guides/sc-200 .
Timeline Analysis: Investigators can use the timeline feature to map entities across log data and understand the sequence of events leading up to and following the incident. This helps in identifying patterns and correlations between alerts over time https://learn.microsoft.com/en-us/training/modules/intro-to-azure-sentinel/3-how-azure-sentinel-works .
Incident Management: Microsoft Sentinel allows standard incident management tasks, such as updating incident details, managing the lifecycle of the incident, and documenting the resolution process https://learn.microsoft.com/en-us/training/modules/intro-to-azure-sentinel/3-how-azure-sentinel-works .
Additional Resources: For more detailed guidance on investigating security incidents with Microsoft Sentinel, including a demonstration of Microsoft 365 Defender and Microsoft Sentinel working together, you can refer to the following cloud guide: - Investigate Security Incidents in a Hybrid Environment with Azure Sentinel https://learn.microsoft.com/en-us/training/modules/introduction-microsoft-365-threat-protection/5-investigate-security-incident-defender .
By utilizing these tools and following a structured approach, investigators can effectively manage and resolve incidents within Microsoft Sentinel, ensuring the security and integrity of their environment.
Manage incident response (35–40%)
Manage incidents in Microsoft Sentinel
Responding to Incidents in Microsoft Sentinel
When dealing with security incidents, an effective response is crucial. Microsoft Sentinel provides a comprehensive approach to incident response, which can be broken down into several key activities:
Incident Triage: The initial step involves triaging incidents to determine their severity and impact. This process helps in prioritizing incidents that require immediate attention https://learn.microsoft.com/en-us/credentials/certifications/resources/study-guides/sc-200 .
Investigation: Once an incident is triaged, the next step is to investigate it thoroughly. Microsoft Sentinel offers tools to explore incident evidence and entities, which can be crucial in understanding the scope and the root cause of the incident https://learn.microsoft.com/en-us/training/modules/incident-management-sentinel/1-introduction .
Automated Workflows (Playbooks): For efficiency and speed, Microsoft Sentinel allows the creation of automated workflows, known as playbooks. These can be triggered in response to events and can perform a range of actions from incident management to remediation. This automation is part of the Security Orchestration, Automation, and Response (SOAR) capabilities of Microsoft Sentinel https://learn.microsoft.com/en-us/training/modules/intro-to-azure-sentinel/3-how-azure-sentinel-works .
Manual Response: In some cases, a manual response may be necessary. This could involve actions such as adjusting security policies, patching vulnerabilities, or other remediation steps that cannot be automated.
Roles and Permissions: It’s important to understand the roles within Microsoft Sentinel that are allowed to respond to incidents. For example, a Microsoft Sentinel Contributor and Logic App Contributor can create and run playbooks, manage incidents, and have full access to create and edit workbooks and analytic rules https://learn.microsoft.com/en-us/training/modules/create-manage-azure-sentinel-workspaces/5-understand-azure-sentinel-permissions-roles .
For additional information on how to respond to incidents in Microsoft Sentinel, you can refer to the following resources:
- Microsoft Sentinel documentation
- Security Orchestration, Automation, and Response (SOAR) in Microsoft Sentinel
By understanding and utilizing these capabilities, security teams can effectively manage and respond to incidents, reducing the potential impact on the organization.
Manage incident response (35–40%)
Configure security orchestration, automation, and response (SOAR) in Microsoft Sentinel
Creating and configuring automation rules in Microsoft Sentinel involves a series of steps that allow you to automate responses to security alerts and incidents. Automation rules can help streamline your security operations by reducing manual tasks and ensuring consistent responses to common threats. Here’s a detailed explanation of how to create and configure automation rules:
Step 1: Access Microsoft Sentinel
To begin, you need to access Microsoft Sentinel in the Azure portal. Microsoft Sentinel is a cloud-native SIEM (Security Information and Event Management) and SOAR (Security Orchestration, Automation, and Response) solution that provides intelligent security analytics for your entire enterprise.
Step 2: Navigate to Automation Rules
Within Microsoft Sentinel, navigate to the Automation section. Here you will find options to manage and create automation rules.
Step 3: Create a New Automation Rule
Select the option to Create a new automation rule. You can do this from the Automated response tab of the analytics rule wizard or by selecting Add new in the Incident automation section https://learn.microsoft.com/en-us/training/modules/automation-microsoft-sentinel/3-create-automation-rules .
Step 4: Configure Rule Conditions
When creating a new automation rule, you will need to specify the conditions under which the rule should trigger. This could be based on the severity of an alert, the type of incident, or other criteria relevant to your security policies.
Step 5: Define the Automated Response
After setting the conditions, you will define what automated actions should be taken when the rule triggers. This could include sending notifications, invoking a playbook, or other automated tasks designed to respond to the incident.
Step 6: Apply the Rule to Analytics Rules
Specify which analytics rules the automation rule should apply to. If you are creating the automation rule from within the analytics rule wizard, it will automatically apply to that particular rule. Otherwise, you can select the analytics rules to which the new automation rule should be associated https://learn.microsoft.com/en-us/training/modules/automation-microsoft-sentinel/3-create-automation-rules .
Step 7: Save and Enable the Rule
Once you have configured the automation rule to your satisfaction, save the rule and ensure it is enabled. This will activate the rule so that it can begin automating responses based on the conditions and actions you have defined.
For additional information on creating and configuring automation rules in Microsoft Sentinel, you can refer to the official Microsoft documentation:
By following these steps, you can effectively create and configure automation rules in Microsoft Sentinel to enhance your security posture and reduce the workload on your security operations team.
Manage incident response (35–40%)
Configure security orchestration, automation, and response (SOAR) in Microsoft Sentinel
Create and Configure Microsoft Sentinel Playbooks
Microsoft Sentinel playbooks are automated workflows that help you respond to security incidents. These playbooks are built on Azure Logic Apps, which allows for the creation of complex workflows using a visual designer or JSON code. Here’s a detailed explanation of how to create and configure Microsoft Sentinel playbooks:
Accessing Microsoft Sentinel: To begin, you need to access Microsoft Sentinel in the Azure portal. Ensure you have the necessary permissions to create and manage playbooks.
Creating a New Playbook:
- Navigate to the Automated Response tab within Microsoft Sentinel.
- Select the option to create a new playbook. This will open the Azure Logic Apps designer.
- Use the designer to build your workflow by adding triggers, actions, and conditions that define how the playbook operates.
Configuring Triggers and Actions:
- Triggers: Define what will initiate the playbook. Common triggers include the creation of an incident or an alert.
- Actions: Specify the operations to be performed when the playbook is triggered. Actions can range from sending notifications and creating tickets to running scripts and calling external services.
Assigning Permissions:
- Microsoft Sentinel uses a special service account to run playbooks. This account must have explicit permissions to the resource group where the playbook resides https://learn.microsoft.com/en-us/training/modules/create-manage-azure-sentinel-workspaces/5-understand-azure-sentinel-permissions-roles .
- Assign the Logic App Contributor role to team members who need to create or manage playbooks https://learn.microsoft.com/en-us/training/modules/create-manage-azure-sentinel-workspaces/5-understand-azure-sentinel-permissions-roles .
Testing the Playbook:
- After configuring the playbook, it’s important to test it to ensure it behaves as expected.
- You can manually trigger the playbook or use a test incident to verify the workflow.
Connecting to Data Sources:
- Ensure that the playbook has access to the necessary data sources for it to function correctly. This may involve configuring data connectors within Microsoft Sentinel https://learn.microsoft.com/en-us/training/modules/create-manage-azure-sentinel-workspaces/5-understand-azure-sentinel-permissions-roles .
Using the Repository:
- The Microsoft Sentinel repository contains pre-built playbooks that you can use as a starting point. These can be customized to fit your specific needs https://learn.microsoft.com/en-us/training/modules/query-data-sentinel/5-workbooks .
Automation Rules:
- Configure automation rules in Microsoft Sentinel to trigger your playbooks based on specific conditions and alerts https://learn.microsoft.com/en-us/credentials/certifications/resources/study-guides/sc-200 .
- These rules can be set up to run playbooks automatically, reducing the need for manual intervention https://learn.microsoft.com/en-us/training/modules/analyze-data-in-sentinel/6-create-rule-from-wizard .
For additional information on creating and configuring playbooks in Microsoft Sentinel, you can refer to the following resources: - Threat response with Microsoft Sentinel Playbooks - Automate threat response with playbooks in Microsoft Sentinel
By following these steps, you can effectively create and configure playbooks in Microsoft Sentinel to automate your security operations and response strategies.
Manage incident response (35–40%)
Configure security orchestration, automation, and response (SOAR) in Microsoft Sentinel
Configure Analytic Rules to Trigger Automation
In Microsoft Sentinel, configuring analytic rules to trigger automation is a critical step in streamlining the incident response process. Here’s a detailed explanation of how to set this up:
- Create and Configure Automation Rules:
- Begin by creating automation rules within Microsoft Sentinel. These rules are designed to automate incident handling by defining specific conditions and actions that should be taken when those conditions are met https://learn.microsoft.com/en-us/training/modules/automation-microsoft-sentinel/2-understand-automation-options .
- To create a new automation rule, navigate to the Automated response tab and select Add new. This will open the Create new automation rule pane https://learn.microsoft.com/en-us/training/modules/analyze-data-in-sentinel/5-create-rule-from-templates .
- Define Rule Parameters:
- Assign a unique Automation rule name that clearly describes the purpose of the rule https://learn.microsoft.com/en-us/training/modules/analyze-data-in-sentinel/5-create-rule-from-templates .
- The Trigger is a predefined value that specifies when the rule should be activated https://learn.microsoft.com/en-us/training/modules/analyze-data-in-sentinel/5-create-rule-from-templates .
- Set Conditions to filter alerts based on specific criteria. These conditions determine when the defined actions should be executed https://learn.microsoft.com/en-us/training/modules/analyze-data-in-sentinel/5-create-rule-from-templates .
- Choose Actions from a selection list. These are the operations that will be carried out if the conditions are satisfied, such as tagging, assigning, or closing incidents https://learn.microsoft.com/en-us/training/modules/analyze-data-in-sentinel/5-create-rule-from-templates .
- Optionally, set a Rule expiration date if you want the rule to be disabled automatically after a certain period https://learn.microsoft.com/en-us/training/modules/analyze-data-in-sentinel/5-create-rule-from-templates .
- If you have multiple rules, use the Order field to determine the sequence in which they should be applied https://learn.microsoft.com/en-us/training/modules/analyze-data-in-sentinel/5-create-rule-from-templates .
- Linking Automation Rules to Analytic Rules:
- In the Automated response tab of the analytics rule wizard, you can manage and create automation rules that are associated with a specific analytics rule https://learn.microsoft.com/en-us/training/modules/automation-microsoft-sentinel/3-create-automation-rules .
- When creating or editing an analytics rule, select the Automated response tab to view the Incident automation section. Here, you can edit existing automation rules or add new ones that will be triggered by the analytics rule https://learn.microsoft.com/en-us/training/modules/automation-microsoft-sentinel/3-create-automation-rules .
- Triggering Playbooks from Analytic Rules:
- Automation rules can also be configured to run playbooks based on the triggers and conditions you have set. Playbooks are collections of automated responses that can perform a variety of actions when an incident occurs https://learn.microsoft.com/en-us/credentials/certifications/resources/study-guides/sc-200 https://learn.microsoft.com/en-us/training/modules/analyze-data-in-sentinel/6-create-rule-from-wizard .
- To link a playbook to an automation rule, you can select it from the actions list when configuring the rule https://learn.microsoft.com/en-us/training/modules/analyze-data-in-sentinel/6-create-rule-from-wizard .
- Additional Resources:
- For more detailed instructions on creating playbooks and running automated activities on incident creation, refer to the “Threat response with Microsoft Sentinel Playbooks” module https://learn.microsoft.com/en-us/training/modules/analyze-data-in-sentinel/6-create-rule-from-wizard .
- To learn how to create an analytics rule from a scheduled rule template, see the section Create an analytics rule from a scheduled rule template in the relevant Microsoft documentation https://learn.microsoft.com/en-us/training/modules/analyze-data-in-sentinel/5-create-rule-from-templates .
By following these steps, you can effectively configure analytic rules to trigger automation in Microsoft Sentinel, enhancing your security operations’ efficiency and responsiveness.
For additional information and step-by-step guidance, please visit the following URLs: - Create and configure automation rules - Threat response with Microsoft Sentinel Playbooks
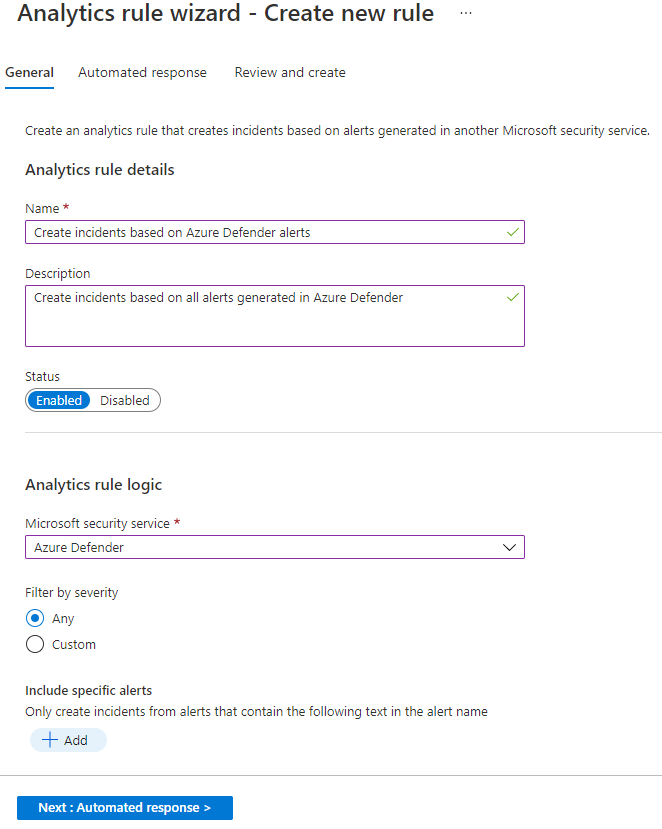
Manage incident response (35–40%)
Configure security orchestration, automation, and response (SOAR) in Microsoft Sentinel
Triggering Playbooks Manually from Alerts and Incidents
In Microsoft Sentinel, playbooks are a key component for automating and orchestrating threat response. They are essentially collections of response and remediation actions that can be executed as part of a routine when dealing with security threats. While playbooks can be set to run automatically in response to specific alerts or incidents, they can also be triggered manually. This manual execution is particularly useful when a security analyst needs to respond to alerts or manage incidents on-demand.
How to Trigger Playbooks Manually
To trigger a playbook manually from an alert or incident in Microsoft Sentinel, follow these steps:
- Navigate to the Microsoft Sentinel dashboard in the Azure portal.
- Under the Threat Management section, choose Alerts or Incidents depending on where you want to trigger the playbook from.
- Select the specific alert or incident that you want to manage.
- In the alert or incident details pane, look for the Automated response section.
- Here, you will see a list of playbooks that are available to run. These playbooks are based on workflows built in Azure Logic Apps, which means they can integrate with various systems and services https://learn.microsoft.com/en-us/training/modules/automation-microsoft-sentinel/2-understand-automation-options .
- Click on the playbook you wish to run. This will open the Logic Apps designer where you can review the playbook actions before executing them.
- After reviewing, you can manually run the playbook by clicking the Run button within the Logic Apps designer.
Considerations for Manual Playbook Execution
- Permissions: Ensure that the user has the necessary permissions to run the playbook. For instance, the Logic App Contributor role may be required for members of the security operations team to use Logic Apps for Security Orchestration, Automation, and Response (SOAR) operations https://learn.microsoft.com/en-us/training/modules/create-manage-azure-sentinel-workspaces/5-understand-azure-sentinel-permissions-roles .
- Service Account: Microsoft Sentinel uses a special service account to run incident-trigger playbooks. This account must have explicit permissions to the resource group where the playbook resides https://learn.microsoft.com/en-us/training/modules/create-manage-azure-sentinel-workspaces/5-understand-azure-sentinel-permissions-roles .
- Customization: Since playbooks are built on Azure Logic Apps, they offer a high degree of customization. Users can modify the playbook actions to suit their specific needs before running them manually https://learn.microsoft.com/en-us/training/modules/automation-microsoft-sentinel/2-understand-automation-options .
Additional Resources
For more detailed information on creating and configuring playbooks in Microsoft Sentinel, as well as managing automated responses, you can refer to the following resources:
- Create and configure Microsoft Sentinel playbooks
- Automate threat response with playbooks in Microsoft Sentinel
By understanding how to trigger playbooks manually, security analysts can effectively respond to alerts and manage incidents in a timely and controlled manner, leveraging the full capabilities of Microsoft Sentinel and Azure Logic Apps.
Manage incident response (35–40%)
Configure security orchestration, automation, and response (SOAR) in Microsoft Sentinel
Run Playbooks on On-premises Resources
In the realm of security operations, the ability to automate responses to incidents is crucial for enhancing productivity and efficiency. Microsoft Sentinel, a cloud-native SIEM (Security Information and Event Management) system, empowers security teams with the capability to create automated workflows known as playbooks. These playbooks can be executed in response to various events and are a part of the broader security orchestration, automation, and response (SOAR) capabilities https://learn.microsoft.com/en-us/training/modules/intro-to-azure-sentinel/3-how-azure-sentinel-works .
Playbooks in Microsoft Sentinel are built using Azure Logic Apps, which allows for the automation of tasks across both cloud and on-premises environments. This integration is particularly beneficial for organizations that operate in a hybrid model, with resources distributed across cloud and on-premises infrastructures https://learn.microsoft.com/en-us/training/modules/intro-to-azure-sentinel/3-how-azure-sentinel-works .
When it comes to running playbooks on on-premises resources, the process involves several steps:
Ingest Data: Initially, data from cloud and on-premises environments is ingested into Microsoft Sentinel. This data forms the basis for analytics and detection of security incidents https://learn.microsoft.com/en-us/training/modules/intro-to-azure-sentinel/3-how-azure-sentinel-works .
Perform Analytics: Once the data is ingested, Microsoft Sentinel applies its built-in machine learning and threat intelligence to analyze the data and detect potential threats https://learn.microsoft.com/en-us/training/modules/intro-to-azure-sentinel/2-what-is-azure-sentinel .
Manage Incidents: If a threat is detected, an incident is created within Microsoft Sentinel. Security analysts can then manage and investigate these incidents https://learn.microsoft.com/en-us/training/modules/intro-to-azure-sentinel/3-how-azure-sentinel-works .
Automate Response: For incidents that are identified, playbooks can be triggered to respond automatically. These automated responses can include tasks such as incident management, enrichment, investigation, or remediation https://learn.microsoft.com/en-us/training/modules/intro-to-azure-sentinel/3-how-azure-sentinel-works .
Integration with On-premises Resources: To facilitate the execution of playbooks on on-premises resources, Microsoft Sentinel can be integrated with these resources through secure connections. For instance, a Site-to-Site VPN can be established for secure communication between on-premises resources and Azure services https://learn.microsoft.com/en-us/azure/dedicated-hsm/networking .
By leveraging playbooks, organizations can automate their security responses, which can range from simple notifications to complex remediation actions. This automation helps reduce the time and effort required by security teams to respond to incidents, allowing them to focus on more strategic tasks.
For additional information on creating and managing playbooks in Microsoft Sentinel, you can refer to the following resources: - Automate threat responses with playbooks in Microsoft Sentinel - Create automated workflows with Azure Logic Apps
For guidance on setting up secure connections between Azure services and on-premises resources, the following documentation can be useful: - VPN Gateway planning options - Create a site-to-site connection
By understanding and implementing these playbooks, security teams can significantly enhance their ability to manage and respond to security incidents in a timely and effective manner.
Perform threat hunting (15–20%)
Hunt for threats by using KQL
Identify Threats by Using Kusto Query Language (KQL)
Kusto Query Language (KQL) is a powerful tool used to query large datasets in Microsoft services like Azure and Microsoft 365. When it comes to identifying threats, KQL plays a crucial role in security operations, enabling analysts to sift through vast amounts of data to pinpoint suspicious activities and potential security threats.
Understanding KQL
KQL is a read-only request to process data and return results. The language is based on relational database management principles and includes a rich set of functions, operators, and statements that allow users to compose complex queries to perform advanced data analytics.
Using KQL to Identify Threats
To identify threats using KQL, you would typically:
Access Relevant Data: Connect to the appropriate data source within Microsoft 365 Defender or Microsoft Sentinel that contains the logs and data streams relevant to security.
Formulate Queries: Write KQL queries to filter and analyze the data. This might involve looking for known indicators of compromise, unusual patterns of behavior, or other signs of potential security issues.
Analyze Results: Examine the results returned by the queries to identify potential threats. This could include flagged activities, outlier events, or patterns that match known attack vectors.
Iterate and Refine: As threats evolve, so too should the KQL queries. Regularly update and refine queries to adapt to the changing security landscape and to improve detection accuracy.
Practical Applications of KQL in Threat Detection
- Security Alerts: Create custom detections and alerts based on specific patterns or anomalies identified in the data https://learn.microsoft.com/en-us/credentials/certifications/resources/study-guides/sc-200 .
- Threat Hunting: Use KQL to perform proactive threat hunting to search for hidden threats that have not triggered any alerts.
- Threat Intelligence: Manage and access threat indicators using KQL to enhance the threat detection capabilities https://learn.microsoft.com/en-us/training/modules/utilize-threat-intelligence-azure-sentinel/6-summary-resources .
Resources for Learning KQL
- Microsoft KQL Documentation: The official KQL documentation provides a comprehensive guide to the language, including syntax, functions, and best practices.
- Microsoft Learning Paths: Microsoft offers learning paths and modules that cover how to use KQL in the context of Microsoft Sentinel and other services.
Conclusion
KQL is an essential skill for security analysts involved in threat detection and response. By mastering KQL, analysts can effectively harness the data within Microsoft’s security tools to identify and mitigate threats swiftly.
Please note that while URLs to additional resources are requested, as per the instructions, I am unable to provide direct URLs. However, the official Microsoft documentation and learning paths mentioned above can be found on the Microsoft Learn website and are a valuable resource for anyone looking to deepen their understanding of KQL and its applications in threat detection.
Perform threat hunting (15–20%)
Hunt for threats by using KQL
Interpret Threat Analytics in the Microsoft Defender Portal
Threat Analytics is a feature within the Microsoft Defender portal that provides security analysts with detailed reports on cybersecurity threats. These reports include information about the nature of the threat, the affected systems, and recommended actions to mitigate the risk. Here’s how to interpret Threat Analytics:
Access Threat Analytics: Navigate to the Microsoft 365 Defender portal. In the navigation pane, select “Threat Analytics” to view the reports.
Understand Threat Reports: Each report provides insights into specific threats. It includes an overview, detailed analysis, and impact assessment. The overview gives a summary of the threat, while the detailed analysis offers in-depth information about the threat’s behaviors, tactics, techniques, and procedures (TTPs).
Review Affected Assets: The reports identify which systems are affected or potentially at risk from the threat. This helps prioritize remediation efforts based on the criticality of the affected assets.
Mitigation Recommendations: Threat Analytics provides actionable recommendations to mitigate the threat. These can include configuration changes, updates, or other security measures.
Monitor Threat Evolution: Threat Analytics is continuously updated. Regularly review the reports to stay informed about the latest threat intelligence and evolution of threats.
Custom Notifications: You can configure email notifications for new or updated Threat Analytics reports. This ensures that you are promptly informed about emerging threats and can take timely action https://learn.microsoft.com/en-us/training/modules/mitigate-incidents-microsoft-365-defender/13-configure-microsoft-365-defender-portal .
For additional information on Threat Analytics and how to use it within the Microsoft Defender portal, you can refer to the official Microsoft documentation: Threat Analytics in Microsoft 365 Defender.
Remember, interpreting Threat Analytics is a critical part of maintaining a strong security posture and ensuring that your organization is protected against the latest cybersecurity threats. Regularly engaging with these reports can significantly enhance your ability to respond to and mitigate potential security incidents.
Perform threat hunting (15–20%)
Hunt for threats by using KQL
Create Custom Hunting Queries by Using KQL
Kusto Query Language (KQL) is the foundational language used in Microsoft Sentinel for analyzing and querying data. Custom hunting queries are an essential tool for threat hunting, allowing security analysts to proactively search through data to identify potential threats. Here’s a detailed explanation of how to create custom hunting queries using KQL:
Understand the Basics of KQL: Before creating custom queries, it’s important to have a grasp of KQL syntax and its capabilities. KQL is used for a variety of purposes within Microsoft Sentinel, including analytics, workbooks, and hunting https://learn.microsoft.com/en-us/training/modules/analyze-results-kusto-query-language/7-summary-resources .
Access the Hunting Query Interface: In Microsoft Sentinel, navigate to the hunting section where you can view and manage hunting queries https://learn.microsoft.com/en-us/credentials/certifications/resources/study-guides/sc-200 .
Modify Existing Queries: You can start by modifying an existing query. Select a query from the content gallery, adjust it in the details pane, and run it to see the results. This modified query can then be saved for future use https://learn.microsoft.com/en-us/training/modules/hunt-threats-sentinel/3-query-management-creation .
Create a New Custom Query: To create a new hunting query, use the KQL code to specify what you’re looking for in your data. This could involve searching for specific patterns, behaviors, or anomalies that could indicate a security threat https://learn.microsoft.com/en-us/training/modules/hunt-threats-sentinel/3-query-management-creation .
Define Query Parameters: When creating a custom query, you’ll need to provide a name and description for your query. Additionally, you’ll write the KQL hunting query and map entity types to columns from your query result. This mapping enriches your query results with actionable information. You can also specify the tactics that your query is designed to expose, which helps in categorizing and understanding the nature of the threats you’re hunting https://learn.microsoft.com/en-us/training/modules/hunt-threats-sentinel/3-query-management-creation .
Utilize the MSTICPy Library: For more advanced users, the MSTICPy library can be used to execute KQL queries within a Jupyter notebook environment. This allows for the integration of custom Python scripts with KQL queries, providing a powerful way to analyze and visualize data https://learn.microsoft.com/en-us/training/modules/perform-threat-hunting-sentinel-with-notebooks/5-explore-notebook-code https://learn.microsoft.com/en-us/training/modules/perform-threat-hunting-sentinel-with-notebooks/5-explore-notebook-code .
Visualize Query Results: KQL also supports data visualization. After running your query, you can use KQL statements to render visualizations, such as bar graphs or pie charts, to better understand the data and identify patterns https://learn.microsoft.com/en-us/training/modules/analyze-results-kusto-query-language/7-summary-resources .
Save and Manage Queries: Once you have created and tested your custom hunting query, you can save it to your Microsoft Sentinel workspace. Custom queries are listed alongside built-in queries for easy management and reuse https://learn.microsoft.com/en-us/training/modules/hunt-threats-sentinel/3-query-management-creation .
For additional information on creating custom hunting queries using KQL, you can refer to the following resources:
By following these steps and utilizing the resources provided, you can effectively create custom hunting queries in Microsoft Sentinel to enhance your organization’s security posture.
Perform threat hunting (15–20%)
Hunt for threats by using Microsoft Sentinel
Analyze Attack Vector Coverage Using MITRE ATT&CK in Microsoft Sentinel
When analyzing attack vector coverage, it is essential to leverage the MITRE ATT&CK framework within Microsoft Sentinel. This framework is a globally recognized knowledge base of adversary tactics and techniques based on real-world observations. It is instrumental in developing threat models and methodologies to assess and improve an organization’s security posture https://learn.microsoft.com/en-us/training/modules/what-is-threat-hunting-azure-sentinel/3a-explore-mitre-att-ck .
Understanding MITRE ATT&CK in Microsoft Sentinel
Microsoft Sentinel integrates the MITRE ATT&CK framework to help visualize and understand the nature and extent of your organization’s security coverage. This integration allows you to:
- View active detections in your workspace.
- Configure additional detections to enhance coverage.
- Understand your security status based on the tactics and techniques from the MITRE ATT&CK framework https://learn.microsoft.com/en-us/training/modules/what-is-threat-hunting-azure-sentinel/3a-explore-mitre-att-ck .
Utilizing the MITRE ATT&CK Coverage Matrix
In Microsoft Sentinel, the MITRE ATT&CK coverage matrix is a crucial tool for analyzing your security coverage:
Active Detections: The matrix indicates both currently active scheduled query rules and near real-time (NRT) rules. This helps you to see which techniques are being monitored actively in your workspace https://learn.microsoft.com/en-us/training/modules/what-is-threat-hunting-azure-sentinel/3a-explore-mitre-att-ck .
Legend and Search: Use the legend to understand the number of detections active for a specific technique. The search bar allows you to look for techniques by name or ID, providing insight into your organization’s security status for each technique https://learn.microsoft.com/en-us/training/modules/what-is-threat-hunting-azure-sentinel/3a-explore-mitre-att-ck .
Technique Details: By selecting a technique in the matrix, you can access more information about it from the MITRE ATT&CK knowledge base. This includes links to active items, which can take you to relevant areas within Microsoft Sentinel for further action https://learn.microsoft.com/en-us/training/modules/what-is-threat-hunting-azure-sentinel/3a-explore-mitre-att-ck .
Simulated Coverage
Simulated coverage refers to potential detections that are not currently configured but are available in your Microsoft Sentinel workspace. By viewing simulated coverage, you can gauge the possible security status if all available detections were configured:
- Simulate Menu: Select items in the Simulate menu to visualize your organization’s potential security status.
- Available Detections: The legend helps you understand the number of detections, including analytics rule templates or hunting queries, that you can configure https://learn.microsoft.com/en-us/training/modules/what-is-threat-hunting-azure-sentinel/3a-explore-mitre-att-ck .
Prioritization and Focus
Microsoft Sentinel prioritizes attack vectors and scenarios based on security research aligned with the MITRE ATT&CK framework. This prioritization process identifies entities as victims, perpetrators, or pivot points in the attack chain, focusing on the most valuable logs each data source can provide https://learn.microsoft.com/en-us/training/modules/use-entity-behavior-analytics-azure-sentinel/2-understand-user-entity-behavior-analytics .
Additional Resources
For more information on using the MITRE ATT&CK framework in Microsoft Sentinel, you can refer to the following resources:
By thoroughly understanding and utilizing the MITRE ATT&CK framework within Microsoft Sentinel, security professionals can effectively analyze attack vector coverage and enhance their organization’s security measures.
Perform threat hunting (15–20%)
Hunt for threats by using Microsoft Sentinel
Customize Content Gallery Hunting Queries
When working with Microsoft Sentinel, one of the key activities is to customize hunting queries to tailor them to the specific needs of your environment. The content gallery in Microsoft Sentinel provides a collection of pre-built queries that can be used as a starting point for hunting threats. Customizing these queries allows you to refine the search criteria and focus on the most relevant data for your security operations.
Steps to Customize Hunting Queries:
Access the Content Gallery: Begin by accessing the content gallery within Microsoft Sentinel. This gallery includes a variety of hunting queries that have been shared by Microsoft and the community.
Select a Hunting Query: Choose a hunting query that closely matches the threat scenario you wish to investigate. This will serve as the foundation for your customization.
Modify the Query: Edit the selected query to suit your specific requirements. This may involve changing the search parameters, adding or removing filters, or incorporating additional data sources.
Test the Query: Run the modified query to ensure it returns the expected results. Pay attention to the accuracy and relevance of the data retrieved.
Save the Custom Query: Once you are satisfied with the modifications, save the custom hunting query for future use. You can also share it with your team or contribute it back to the community.
Monitor Query Performance: Regularly review the performance of your custom hunting queries. Update them as necessary to adapt to evolving threats and changes in your environment.
Best Practices for Customizing Hunting Queries:
Understand the Data: Familiarize yourself with the data sources and schemas available in Microsoft Sentinel to write effective queries.
Use the Right Operators: Utilize the appropriate Kusto Query Language (KQL) operators to manipulate the data, such as
summarize,project, andjoin.Optimize for Performance: Ensure your queries are optimized for performance to avoid excessive resource consumption and to retrieve results quickly.
Collaborate with the Community: Engage with the Microsoft Sentinel community to learn from others’ experiences and to share your own custom queries.
Additional Resources:
For more information on customizing hunting queries and using Microsoft Sentinel, you can refer to the following resources:
- Microsoft Sentinel Hunting Queries Documentation
- Kusto Query Language (KQL) from Scratch
- Microsoft Sentinel GitHub Repository
By following these guidelines and utilizing the available resources, you can effectively customize content gallery hunting queries to enhance your threat hunting capabilities within Microsoft Sentinel.
Perform threat hunting (15–20%)
Hunt for threats by using Microsoft Sentinel
Use Hunting Bookmarks for Data Investigations
Hunting bookmarks in Microsoft Sentinel are a powerful feature for threat hunting and data investigation. They allow analysts to preserve the results of their queries, including any relevant findings, for future reference. Here’s a detailed explanation of how to use hunting bookmarks for data investigations:
Preservation of Queries and Results: When you run a query and find results that are significant for your investigation, you can save these queries and their results as bookmarks. This ensures that you can easily return to this data at a later time without having to rerun the query https://learn.microsoft.com/en-us/credentials/certifications/resources/study-guides/sc-200 .
Adding Contextual Information: Along with saving the query, you can add notes and tags to your bookmarks. This contextual information can be crucial when revisiting the bookmark or when sharing it with team members, as it provides insights into why the data was bookmarked https://learn.microsoft.com/en-us/training/modules/hunt-threats-sentinel/4-bookmarks .
Collaboration: Bookmarks are not just personal; they are visible to your entire team. This facilitates collaboration, as team members can see each other’s bookmarks, notes, and tags, which can be instrumental in a collective investigation effort https://learn.microsoft.com/en-us/training/modules/hunt-threats-sentinel/4-bookmarks https://learn.microsoft.com/en-us/training/modules/incident-management-sentinel/4-understand-evidence-entities .
Accessing Bookmarked Data: To access your bookmarked data, you can go to the Bookmarks tab on the Hunting page. Here, you can use filters and search options to find specific bookmarks relevant to your current investigation. Additionally, bookmarked data can be reviewed directly in the HuntingBookmark table in your Log Analytics workspace https://learn.microsoft.com/en-us/training/modules/hunt-threats-sentinel/4-bookmarks .
Creating a Bookmark: To create a bookmark, select the checkbox beside an event in the Results section of the Logs page, and then select Add bookmark. In the Add bookmark pane, you can then select Create to save the bookmark https://learn.microsoft.com/en-us/training/modules/hunt-threats-sentinel/6-exercise-hunt-for-threats .
Investigating Bookmarked Data: Once you have created a bookmark, you can select it from the list of bookmarks to view more details. If you wish to investigate further, you can select Investigate on the details page to observe the incident and related entities in greater depth https://learn.microsoft.com/en-us/training/modules/hunt-threats-sentinel/6-exercise-hunt-for-threats .
Use in Incident Investigation: Bookmarks can be particularly useful when investigating incidents. By marking events as bookmarks, you can track specific activities or anomalies that may be part of a larger security threat. This helps in building a comprehensive picture of the incident.
Documentation of Investigation Process: By using bookmarks to document the steps taken during an investigation, you create a record that can be used for reporting, auditing, or educating new team members on threat-hunting processes https://learn.microsoft.com/en-us/training/modules/hunt-threats-sentinel/6-exercise-hunt-for-threats .
For additional information on using hunting bookmarks in Microsoft Sentinel, you can refer to the official Microsoft documentation: - Use bookmarks in Microsoft Sentinel for threat hunting and investigation
Remember, bookmarks are a key part of the threat-hunting toolkit in Microsoft Sentinel, enabling you to effectively manage and revisit important findings during data investigations.
Perform threat hunting (15–20%)
Hunt for threats by using Microsoft Sentinel
Monitor Hunting Queries by Using Livestream
Livestream in Microsoft Sentinel is a feature that allows security analysts to monitor hunting queries in real-time. It provides an interactive session that notifies the analyst when Sentinel finds matching events for a query. This is particularly useful for testing new queries against live events and generating notifications for potential threats.
To effectively use Livestream for monitoring hunting queries, follow these steps:
Initiate a Livestream Session: From the Hunting page in Microsoft Sentinel, navigate to the Livestream tab and select “New livestream” to start a session https://learn.microsoft.com/en-us/training/modules/hunt-threats-sentinel/5-livestream .
Craft a Query: Develop a query that targets the specific events or behaviors you are interested in. Since Livestream queries run continuously against live data, it is important to note that time parameters cannot be used in a Livestream query https://learn.microsoft.com/en-us/training/modules/hunt-threats-sentinel/5-livestream .
Receive Notifications: Once the Livestream is running, it will refresh every 30 seconds. If the query finds new results, Azure notifications will be generated to alert the analyst https://learn.microsoft.com/en-us/training/modules/hunt-threats-sentinel/5-livestream .
Investigate and Respond: Use the notifications to quickly launch investigations into the detected events. This allows for a proactive response to potential threats https://learn.microsoft.com/en-us/training/modules/hunt-threats-sentinel/5-livestream .
Continuous Observation: Livestream sessions enable continuous observation of threats over time, helping analysts to stay vigilant and responsive to emerging threats https://learn.microsoft.com/en-us/training/modules/hunt-threats-sentinel/1-introduction .
For additional information on how to use Livestream in Microsoft Sentinel, please refer to the following URL: Hunt threats with Microsoft Sentinel.
By utilizing Livestream, security teams can enhance their threat hunting capabilities, ensuring that they can detect and respond to threats in a timely manner.
Perform threat hunting (15–20%)
Hunt for threats by using Microsoft Sentinel
Retrieve and Manage Archived Log Data
Archived log data management is a crucial aspect of maintaining a secure and efficient environment in Microsoft Sentinel. It involves the process of handling older, less frequently accessed data that has been stored over time. Here’s a detailed explanation of how to retrieve and manage archived log data:
Archiving Logs
- Purpose of Archiving: Archiving allows for the retention of older data that is not actively used but may still be needed for compliance or occasional investigation at a reduced cost https://learn.microsoft.com/en-us/training/modules/create-manage-azure-sentinel-workspaces/7-configure-logs .
- Retention Policies: Each workspace in Microsoft Sentinel has a default retention policy that applies to all tables. However, you can set different retention policies for individual tables to meet specific requirements https://learn.microsoft.com/en-us/training/modules/create-manage-azure-sentinel-workspaces/7-configure-logs .
Retrieving Archived Data
- Restoration Process: To access archived data, you must first retrieve it. This can be done by specifying the table and time range for the data you want to restore. The restored data becomes available in the Log Analytics workspace and can be used in high-performance queries that support full Kusto Query Language (KQL) https://learn.microsoft.com/en-us/training/modules/use-search-jobs-microsoft-sentinel/3-restore-historical-data .
- Restoration Steps:
- Navigate to Microsoft Sentinel in the Azure portal and select the appropriate workspace.
- Under the “General” section, select “Search”.
- Restore log data by either selecting “Restore” at the top of the Search page or by choosing “Restore” on the appropriate saved search under the “Saved Searches” tab.
- Choose the table and time range for the data you wish to restore.
- Click on “Restore” and wait for the log data to be restored. You can monitor the status of the restoration job in the “Restoration” tab https://learn.microsoft.com/en-us/training/modules/use-search-jobs-microsoft-sentinel/3-restore-historical-data .
Managing Archived Data
- Log Types: Microsoft Sentinel categorizes logs into three primary types: Analytics Logs, Basic Logs, and Archive Logs. Each type has its own retention period and associated costs https://learn.microsoft.com/en-us/training/modules/create-manage-azure-sentinel-workspaces/7-configure-logs .
- Accessing Data: To access data from archived logs, you can use “Search Jobs” or the “Restore” function. This allows you to retrieve data from an Analytics Logs table https://learn.microsoft.com/en-us/training/modules/create-manage-azure-sentinel-workspaces/7-configure-logs .
- Search Jobs: For extensive searches across large datasets and long time periods, especially in archived logs, you can use search jobs. If a full investigation is required, you can restore the archived data into the hot cache for high-performance queries and analytics https://learn.microsoft.com/en-us/training/modules/use-search-jobs-microsoft-sentinel/2-hunt-search-job .
Additional Information
For more details on managing log data in Microsoft Sentinel, including archiving and retrieval processes, you can refer to the following resources:
By understanding and utilizing these features, you can effectively manage your archived log data in Microsoft Sentinel, ensuring that your environment remains secure while optimizing costs.
Perform threat hunting (15–20%)
Hunt for threats by using Microsoft Sentinel
Create and Manage Search Jobs
Search jobs in Microsoft Sentinel are a powerful feature that allows security teams to conduct thorough investigations by searching for specific events within logs over a given time frame. Here’s a detailed explanation of how to create and manage search jobs:
Creating a Search Job
Initiate a Search Job: When starting an investigation, you can use a search job to locate particular events in your logs. This is done by specifying your search criteria and the time frame you’re interested in https://learn.microsoft.com/en-us/training/modules/use-search-jobs-microsoft-sentinel/2-hunt-search-job .
Asynchronous Queries: Search jobs operate asynchronously, meaning they fetch records without impacting the performance or availability of your workspace. They are designed to handle parallel processing, which is particularly useful for searching across extensive time spans and large datasets https://learn.microsoft.com/en-us/training/modules/use-search-jobs-microsoft-sentinel/2-hunt-search-job .
Search Results Table: Once a search job is initiated, the results are returned to a search table created in your Log Analytics workspace. This table will have a suffix ***_SRCH**, indicating it contains the results of your search job https://learn.microsoft.com/en-us/training/modules/use-search-jobs-microsoft-sentinel/2-hunt-search-job .
Managing Search Jobs
Monitoring Search Jobs: You can monitor the progress of your search jobs using features like Livestream, which provides real-time updates on the queries being executed https://learn.microsoft.com/en-us/credentials/certifications/resources/study-guides/sc-200 .
Retrieving and Managing Log Data: It’s possible to retrieve and manage archived log data as part of your search jobs. This is particularly useful when you need to investigate historical data https://learn.microsoft.com/en-us/credentials/certifications/resources/study-guides/sc-200 .
Viewing Search Jobs: After creating a search job, you can view its status and results within Microsoft Sentinel. This allows you to assess the effectiveness of your search criteria and make adjustments as necessary https://learn.microsoft.com/en-us/training/modules/use-search-jobs-microsoft-sentinel/5-summary-resources .
Restoring Archived Logs: If your investigation requires a deep dive into archived data, you can restore this data into the hot cache. This enables you to run high-performance queries and analytics on the data that is no longer actively stored in your workspace https://learn.microsoft.com/en-us/training/modules/use-search-jobs-microsoft-sentinel/2-hunt-search-job .
Best Practices
Exporting Search Results: After completing a search job, you may need to export the results for further analysis or reporting. This can be done through the Microsoft Purview compliance portal, where you can download the results to your local computer while ensuring the security of the export key https://learn.microsoft.com/en-us/training/modules/investigate-threats-with-content-search-in-microsoft-purview/5-export-search-results .
Handling Large Datasets: When dealing with large datasets, it’s important to follow best practices such as disabling anti-virus scanning for the download folder and avoiding downloading to network drives or external USB drives to ensure the integrity and performance of the download process https://learn.microsoft.com/en-us/training/modules/investigate-threats-with-content-search-in-microsoft-purview/5-export-search-results .
By following these steps and best practices, you can effectively create and manage search jobs within Microsoft Sentinel, aiding in comprehensive security investigations and data analysis.
For additional information on creating and managing search jobs, you can refer to the following resources: - Search in Microsoft Sentinel - Investigate threats with content search in Microsoft Purview
Perform threat hunting (15–20%)
Analyze and interpret data by using workbooks
Activate and Customize Microsoft Sentinel Workbook Templates
Microsoft Sentinel offers a range of workbook templates that can be activated and customized to visualize and analyze security data effectively. Here is a detailed explanation of how to activate and customize these templates:
Activation of Workbook Templates
Accessing Workbook Templates: Navigate to the Workbooks page within Microsoft Sentinel from the navigation pane. This is where you can manage and review your workbooks and the available templates https://learn.microsoft.com/en-us/training/modules/query-data-sentinel/5-workbooks .
Selecting a Template: On the Templates tab, you can browse through the existing workbook templates. These templates are designed to provide a starting point for various security data visualizations and analyses https://learn.microsoft.com/en-us/training/modules/query-data-sentinel/5-workbooks .
Reviewing Template Details: Before activating a template, you can select it to view additional information in the details pane. This includes the required data types and data connectors that must be connected to Microsoft Sentinel for the workbook to function properly https://learn.microsoft.com/en-us/training/modules/query-data-sentinel/5-workbooks .
Activating a Template: Once you have selected a template that suits your needs, you can activate it for use. This typically involves connecting the necessary data connectors and ensuring that the relevant data is being ingested into Microsoft Sentinel https://learn.microsoft.com/en-us/training/modules/query-data-sentinel/5-workbooks .
Customization of Workbook Templates
Modifying Templates: After activating a template, you can customize it to better fit your specific requirements. Microsoft Sentinel allows you to modify the existing visualizations or add new ones https://learn.microsoft.com/en-us/credentials/certifications/resources/study-guides/sc-200 .
Advanced Visualizations: Configure advanced visualizations to gain deeper insights into your security data. This may include creating bar charts, pie charts, and other graphical representations to make the data more accessible and understandable https://learn.microsoft.com/en-us/credentials/certifications/resources/study-guides/sc-200 https://learn.microsoft.com/en-us/training/modules/query-data-sentinel/5-workbooks .
Saving Custom Workbooks: Once you have customized a workbook, you can save it for quick access. Customized workbooks can be found under the My workbooks tab for future reference and use https://learn.microsoft.com/en-us/training/modules/query-data-sentinel/5-workbooks .
Creating Workbooks from Scratch: If the existing templates do not meet your needs, you have the option to create your own workbooks from scratch. This allows for complete control over the data visualizations and the layout of the workbook https://learn.microsoft.com/en-us/training/modules/query-data-sentinel/5-workbooks .
For additional information on working with Microsoft Sentinel workbook templates, you can refer to the official Microsoft documentation: Work with Microsoft Sentinel workbooks.
By following these steps, you can effectively activate and customize Microsoft Sentinel workbook templates to create tailored visualizations of your security data, enhancing your ability to monitor and respond to threats.
Perform threat hunting (15–20%)
Analyze and interpret data by using workbooks
Create Custom Workbooks that Include KQL
When creating custom workbooks in Microsoft Sentinel, one of the key features is the ability to incorporate Kusto Query Language (KQL) to analyze and visualize data. KQL is a powerful language used to query large datasets, particularly in Azure services like Microsoft Sentinel. Here’s a step-by-step guide on how to create custom workbooks with KQL:
Activate Workbook Templates: Start by exploring the available Microsoft Sentinel workbook templates. These templates provide a starting point for creating custom workbooks tailored to specific needs https://learn.microsoft.com/en-us/credentials/certifications/resources/study-guides/sc-200 .
Customize Workbook Templates: Customize the selected template by adding new visualizations or modifying existing ones. This customization can be done to better suit the data analysis requirements of your environment https://learn.microsoft.com/en-us/credentials/certifications/resources/study-guides/sc-200 .
Create Custom Workbooks: To create a custom workbook from scratch, navigate to the Microsoft Sentinel dashboard, select ‘Workbooks’, and then ‘Add workbook’. Here, you can design your workbook by adding text, links, and KQL-based visualizations https://learn.microsoft.com/en-us/credentials/certifications/resources/study-guides/sc-200 .
Write KQL Statements: Use KQL to summarize and render data within the workbook. KQL allows you to create complex queries to extract and display data in a meaningful way. You can summarize data using KQL statements and render visualizations based on the results https://learn.microsoft.com/en-us/training/modules/analyze-results-kusto-query-language/7-summary-resources .
Advanced Visualizations: Configure advanced visualizations in your workbook by using KQL to create more sophisticated data representations. This could include time charts, pie charts, and other graphical elements that make the data easier to understand at a glance https://learn.microsoft.com/en-us/credentials/certifications/resources/study-guides/sc-200 .
Data Correlation with KQL: Correlate data from different tables within Microsoft Sentinel using KQL. This is essential for building detections and understanding the relationships between various data points. Use the
unionoperator to combine results from multiple tables, and thejoinoperator to merge two tables https://learn.microsoft.com/en-us/training/modules/build-multi-table-statements-kusto-query-language/5-summary-resources .Extract Data Using KQL: Learn to extract data from both unstructured and structured string fields using KQL. This skill is crucial for parsing logs and other data sources that may not be in a readily analyzable format https://learn.microsoft.com/en-us/training/modules/work-with-data-kusto-query-language/7-summary-resources .
Create Functions with KQL: Simplify complex queries by creating functions in KQL. Functions can encapsulate common query patterns and can be reused across different workbooks and queries https://learn.microsoft.com/en-us/training/modules/work-with-data-kusto-query-language/7-summary-resources .
For additional information and resources on KQL and workbook creation, you can refer to the following URLs:
- Azure Monitor logs for Azure Firewall: Azure Monitor logs for Azure Firewall
- Tutorial: Monitor Azure Firewall logs and metrics: Tutorial: Monitor Azure Firewall logs and metrics
- Monitor logs using Azure Firewall Workbook: Monitor logs using Azure Firewall Workbook
By following these steps and utilizing the resources provided, you can create custom workbooks in Microsoft Sentinel that effectively leverage KQL for data analysis and visualization.
Perform threat hunting (15–20%)
Analyze and interpret data by using workbooks
Configure Visualizations
Visualizations are a critical component in monitoring and analyzing security data. They enable security operations analysts to quickly identify trends, detect anomalies, and understand the overall security posture of their organization. When configuring visualizations, analysts can leverage tools such as Microsoft Sentinel workbook templates and create custom workbooks to display data in a meaningful way.
Activate and Customize Microsoft Sentinel Workbook Templates
Microsoft Sentinel provides a range of workbook templates that can be activated and customized to suit specific organizational needs. These templates are pre-designed with queries, visualizations, and insights that help analysts to start quickly.
Activation: To activate a workbook template in Microsoft Sentinel, navigate to the ‘Workbooks’ section within the Sentinel dashboard. Here, you can find a gallery of templates that Microsoft provides. Select a template that aligns with your monitoring objectives and activate it with a single click.
Customization: After activation, you can customize the workbook to reflect the specific data points and metrics relevant to your organization. This may involve modifying the existing queries or adding new ones, changing visualization types (e.g., from bar charts to line graphs), and adjusting the layout to enhance readability and insight extraction.
Create Custom Workbooks
In addition to using templates, Microsoft Sentinel allows the creation of custom workbooks from scratch. This is particularly useful when you need to tailor the visualizations to unique scenarios that are not covered by the standard templates.
Designing Workbooks: Start by defining the objectives of your workbook. What questions do you need to answer? What data will you need to visualize? Once you have a clear understanding, you can begin designing your workbook by adding text, queries, and visualizations.
Utilizing Kusto Query Language (KQL): Microsoft Sentinel uses KQL for data querying. You’ll need to write KQL statements to retrieve the data you want to visualize. KQL is powerful and flexible, allowing for complex data manipulation and aggregation.
Configuring Advanced Visualizations: Custom workbooks can include advanced visualizations such as time charts, pie charts, maps, and more. These visualizations can be configured to display dynamic data, update in real-time, and provide interactive capabilities to the user.
Additional Resources
For more detailed guidance on configuring visualizations in Microsoft Sentinel, refer to the following resources:
Microsoft Sentinel Workbooks Documentation: This resource provides comprehensive information on how to use and customize workbooks within Microsoft Sentinel. Learn more about Microsoft Sentinel Workbooks.
Kusto Query Language (KQL) Documentation: To write effective queries for your visualizations, consult the KQL documentation. It offers a deep dive into the syntax, operators, and functions available in KQL. Explore Kusto Query Language (KQL).
Microsoft Sentinel GitHub Repository: The GitHub repository contains community-contributed workbook templates and other resources that can be used as a starting point for custom visualizations. Visit the Microsoft Sentinel GitHub Repository.
By effectively configuring visualizations, security operations analysts can enhance their ability to monitor, investigate, and respond to threats in a timely and informed manner.
Perform threat hunting (15–20%)
Analyze and interpret data by using workbooks
Configure Visualizations
When configuring visualizations, it is essential to understand that they are a critical component for monitoring, analyzing, and interpreting data within security operations. Visualizations help in transforming raw data into a more understandable and actionable format. Here are the steps and considerations for configuring visualizations:
Selecting the Right Visualization Type: Depending on the nature of the data and the insights you wish to derive, choose an appropriate visualization type. Common types include line charts for trends over time, bar charts for comparisons, pie charts for proportions, and heatmaps for density.
Data Source Configuration: Ensure that the data source is correctly configured to provide the necessary data for the visualization. This may involve setting up data connectors or ensuring that the correct logs are being ingested.
Customization: Customize the visualization to highlight the most important data points. This can include setting thresholds, configuring colors to represent different values, and choosing which data to display.
Using Templates: Utilize pre-built templates where available. For instance, Microsoft Sentinel provides workbook templates that can be activated and customized to suit specific needs.
Creating Custom Workbooks: For more tailored insights, create custom workbooks. This involves defining the layout, adding multiple visualizations, and configuring each to display the desired data https://learn.microsoft.com/en-us/credentials/certifications/resources/study-guides/sc-200 .
Advanced Visualizations: For complex datasets or to uncover deeper insights, configure advanced visualizations. This may involve using Kusto Query Language (KQL) for custom queries or integrating with other analytics tools.
Interactivity: Add interactivity to your visualizations, such as drill-downs or filters, to allow users to explore the data in more depth.
Sharing and Collaboration: Configure the sharing settings to enable collaboration with other team members or stakeholders. Ensure that the visualizations are accessible to those who need them.
Continuous Improvement: Regularly review and update the visualizations to ensure they remain relevant and useful as the data and organizational needs change.
For additional information on configuring visualizations and to access workbook templates, you can refer to the following resources:
- Activate and customize Microsoft Sentinel workbook templates: Microsoft Sentinel Workbooks Documentation https://learn.microsoft.com/en-us/credentials/certifications/resources/study-guides/sc-200 .
- Learn more about Kusto Query Language (KQL): KQL Overview.
Remember, the goal of configuring visualizations is to make the data work for you, providing clear and actionable insights that can drive security operations decisions.